Becky, a fellow member of the Naturecoast Dulcimer Players, has commissioned a new dulcimer — one with a gator head carving in the tuning scroll. I am particularly excited about this build: this year marks the 45th year since I learned the craft, it will be the 50th dulcimer I have constructed, and Becky has connections to Knoxville and to Maryville College! The gator head is appropriate in this case because she is a graduate of the University of Florida. She has decided to match it up with gecko designs for the main sound holes and sunrays for the upper holes.
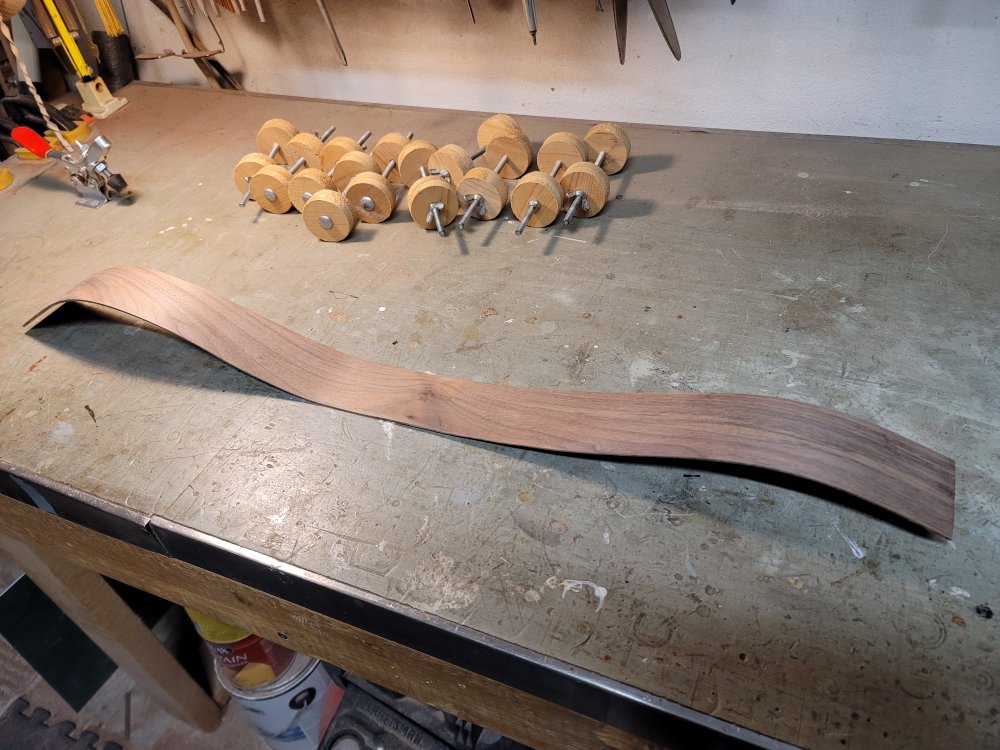
I needed to order the tuning pegs, so while I waited for their delivery (along with a couple of other lutherie tools), I designed and built a couple of jigs to make the construction process easier and safer. I documented the construction of these jigs in a new section of this site called Woodworking. I thought it might inspire any fellow woodworkers who just happened by.
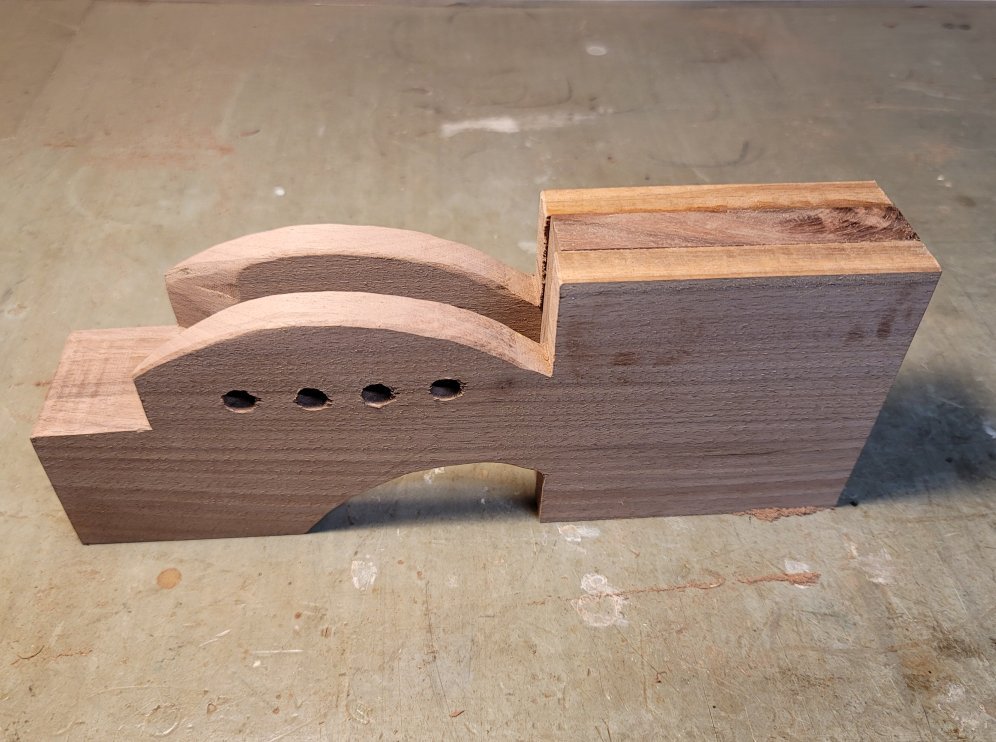
I like to start with the peghead first. The width of the peghead will determine the width of the fretboard. Since this will be a carved peghead, I need to add extra wood to make sure I have enough to work with. However, the tuning peg box is still the same basic shape that I fell in love with years ago.
This process has evolved since I first built these instruments. Back then, I would shape a solid block and then chisel out the peg box. I had almost no power tools to work with and my resources were the old-timers from the hollers of Appalachia. My fancy-schmancy power tools certainly speed things up, but ultimately, I still must work each component by hand until it feels right. Dulcimer #1 is shown here.
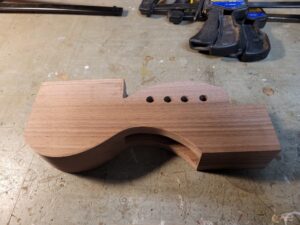
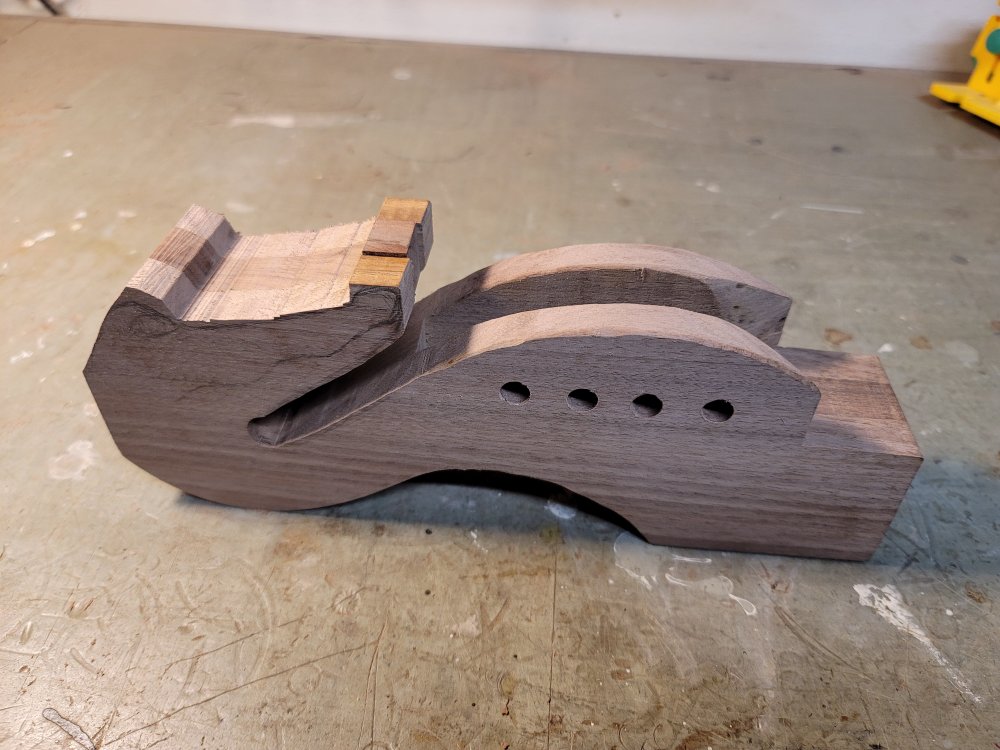
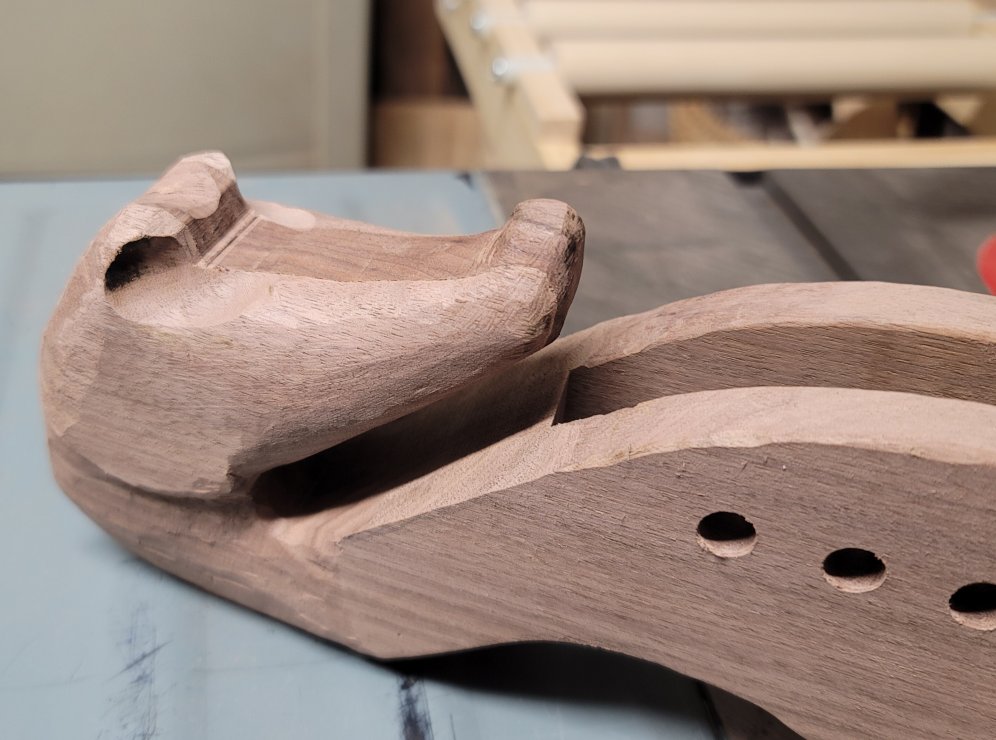
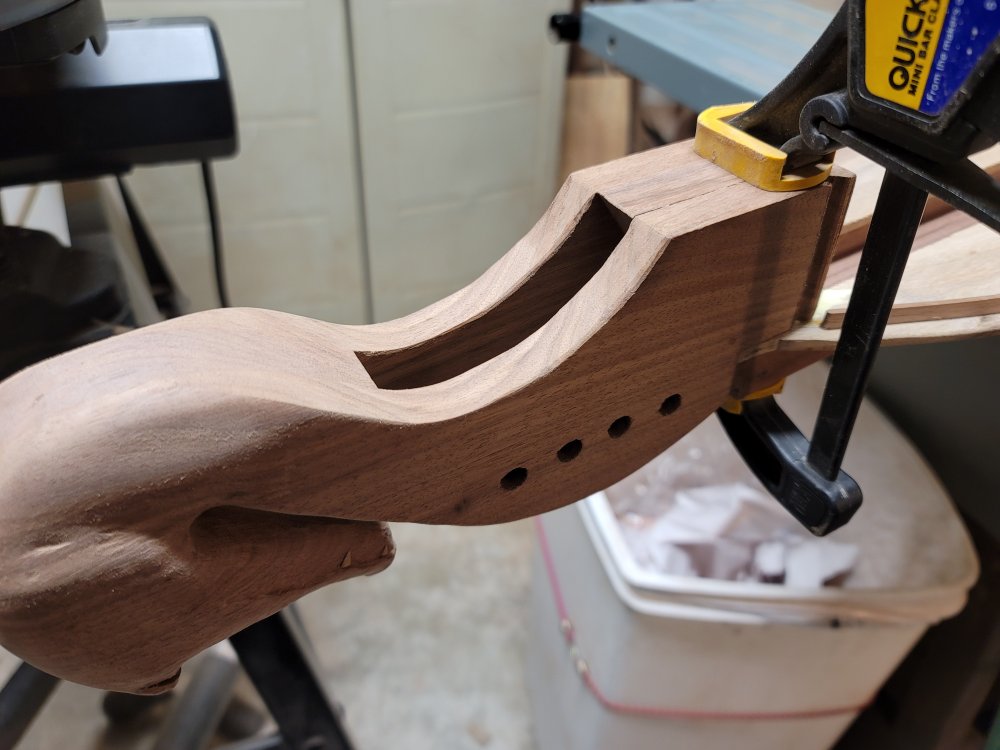
With the functional part of the peghead completed, it’s time to find the gator hiding in this block of wood. This part of the process is truly magic to me and I do not rush it. Besides, walnut is not the medium for whittlin’ out a head — I have to use power tools. One little slip, and it’s back to the drawing board. At no other time is the woodworking adage “measure twice, cut once” more appropriate. The first thing I do is continue the graceful lines in the back of the scroll, using my belt sander to make it nice and smooth.

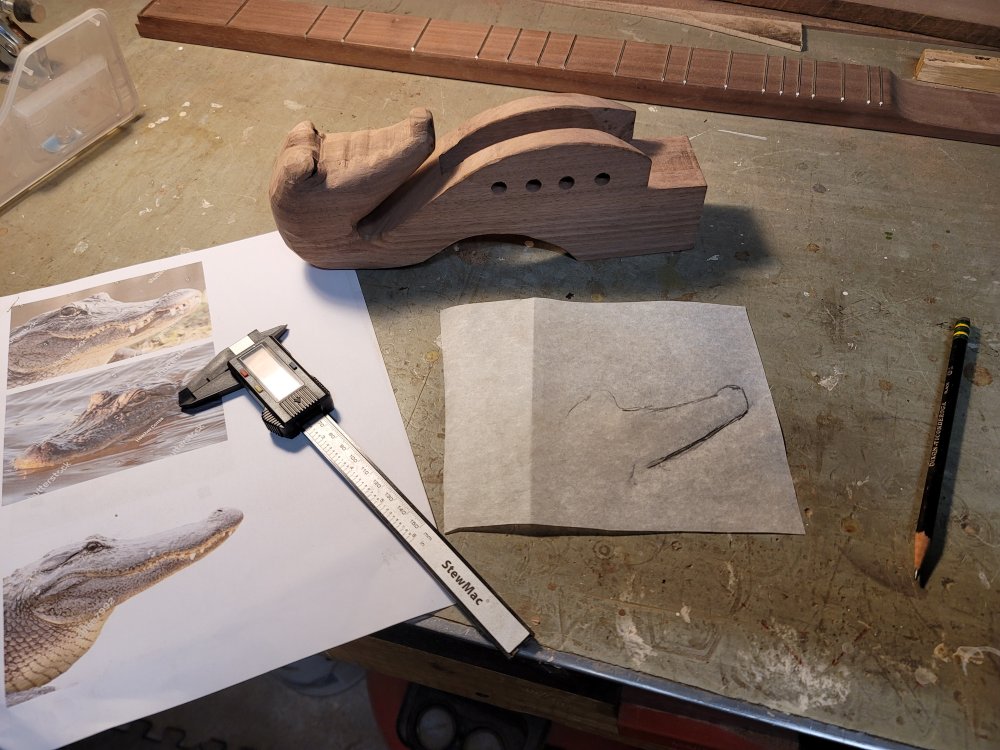
I spend some time researching gator heads. It’s amazing the number of images that are generated in a search for “gator head” or “alligator head” or similar search terms. Some are cartoonish and some are photos. Most of the cartoonish ones depict an angry gator with an open mouth and lots of teeth. I admit that having a closed mouth is easier to carve. Practically speaking, however, an open mouth may weaken the wood, making it more susceptible to damage. Furthermore, an angry gator would be inappropriate for this instrument. The word “dulcimer” is from the latin words dulce and melos, which translates to “sweet song”. All this to say, we want a docile, contented reptile who will perhaps hum along with the tunes.

Of the three photos printed above, I like the profile on the bottom of the page, but I like the eyes on the middle one. I will shoot for a somewhat realistic head, but inevitably, it will take the shape it wants to. I just have to know when to stop carving. I create a rough sketch of the profile.
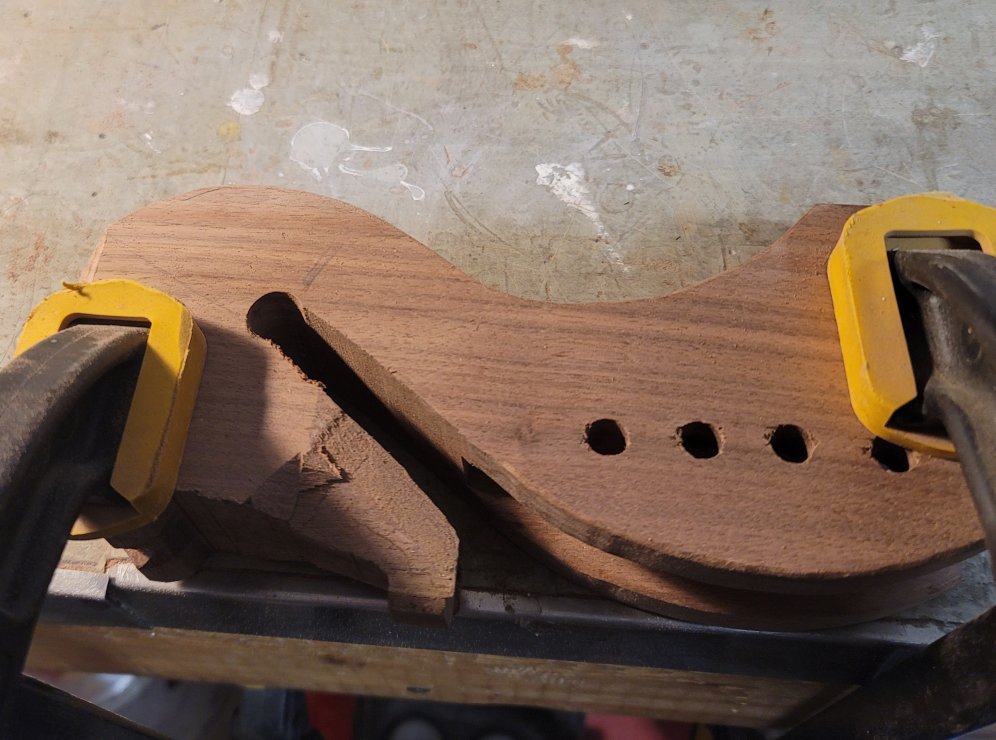
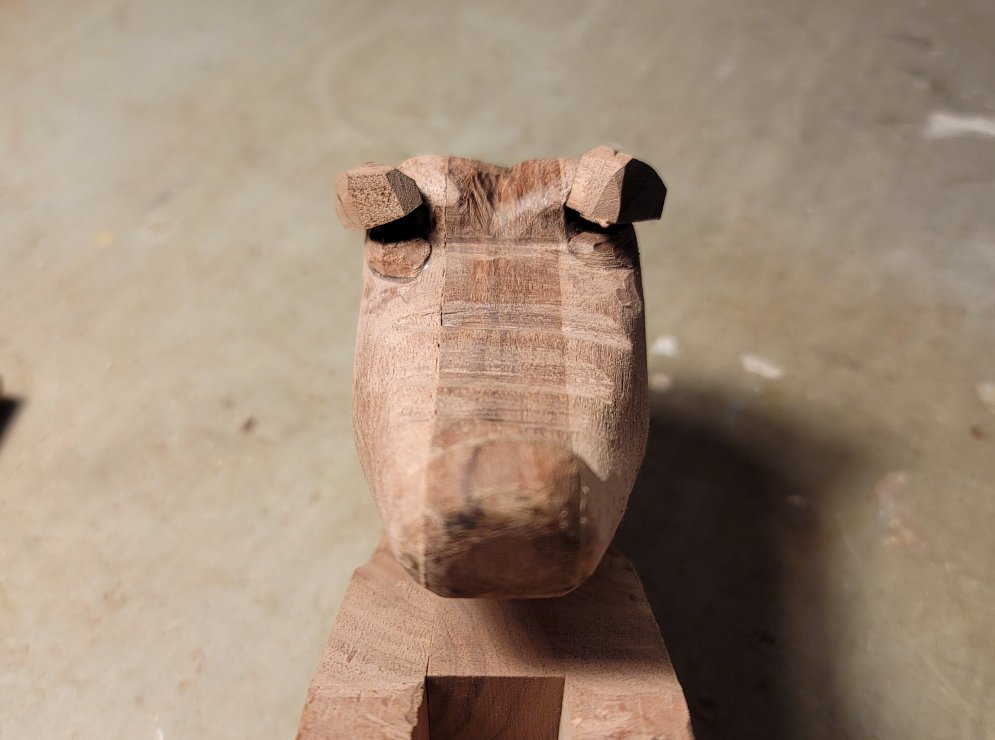
We have out-of-town family visiting for a few days, but I still found a little time to slip into the shop to cut out the profile. I’m beginning to see this dude (or dudette)!
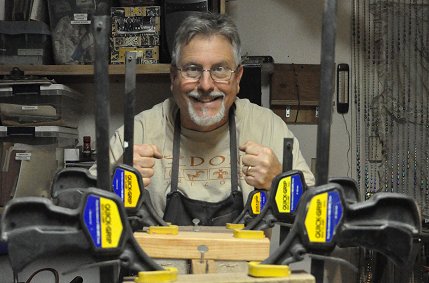
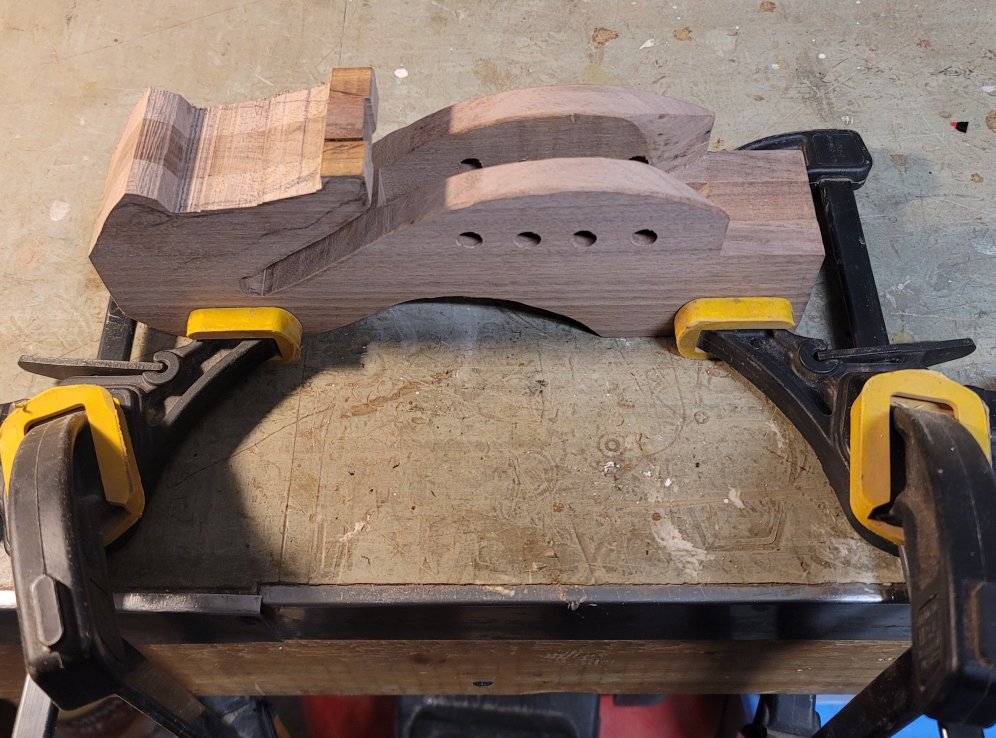
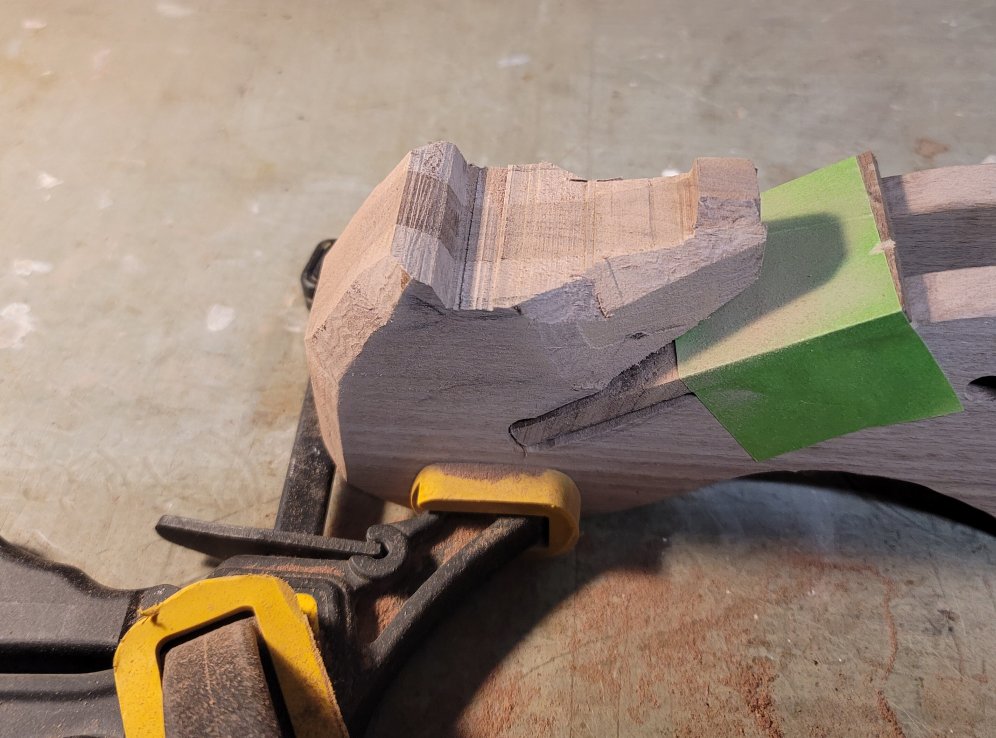
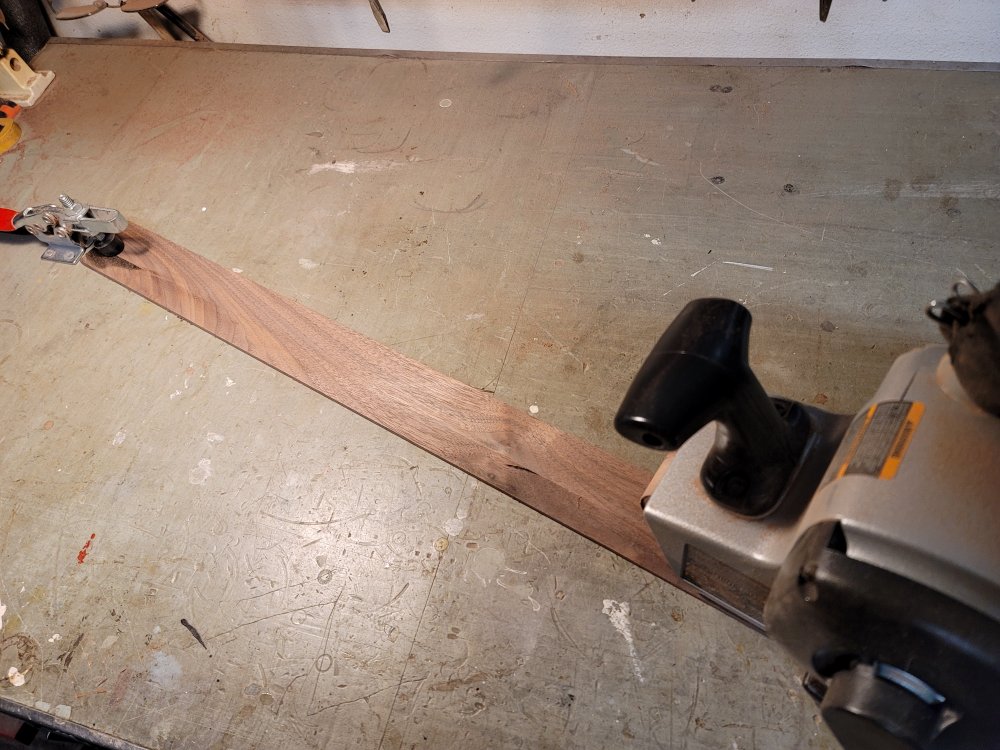
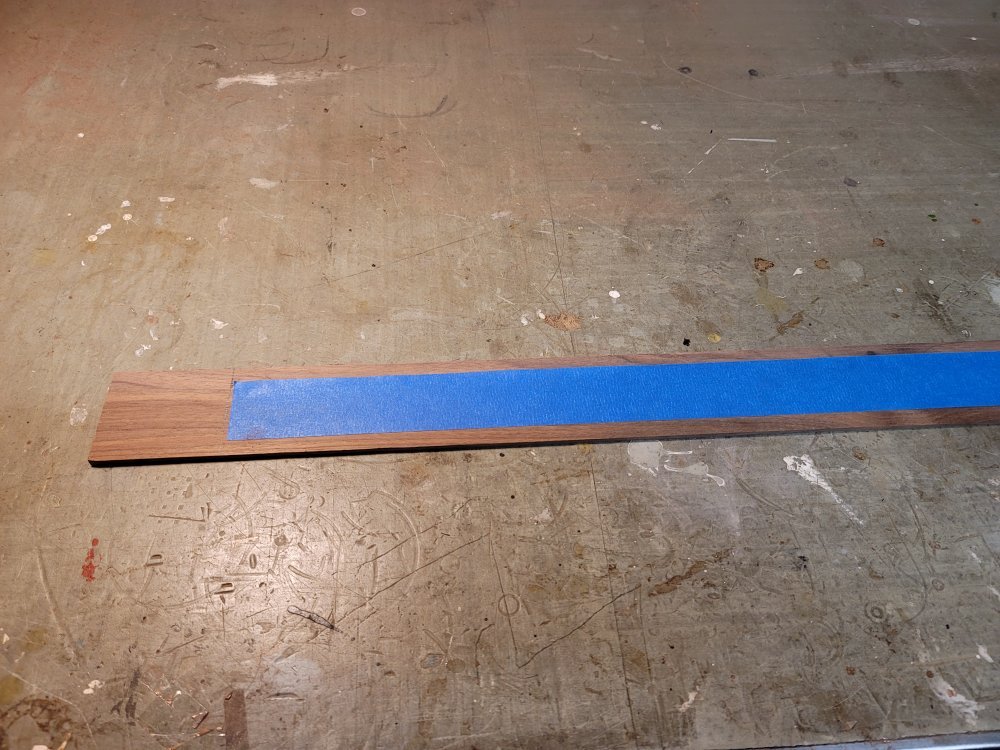
Still entertaining company, but found some shop time to start the shaping process. It’s important to clamp that puppy down when making the large rough cuts. Sometimes I tape down a piece of scrap if there’s a chance I might damage a semi-finished part.
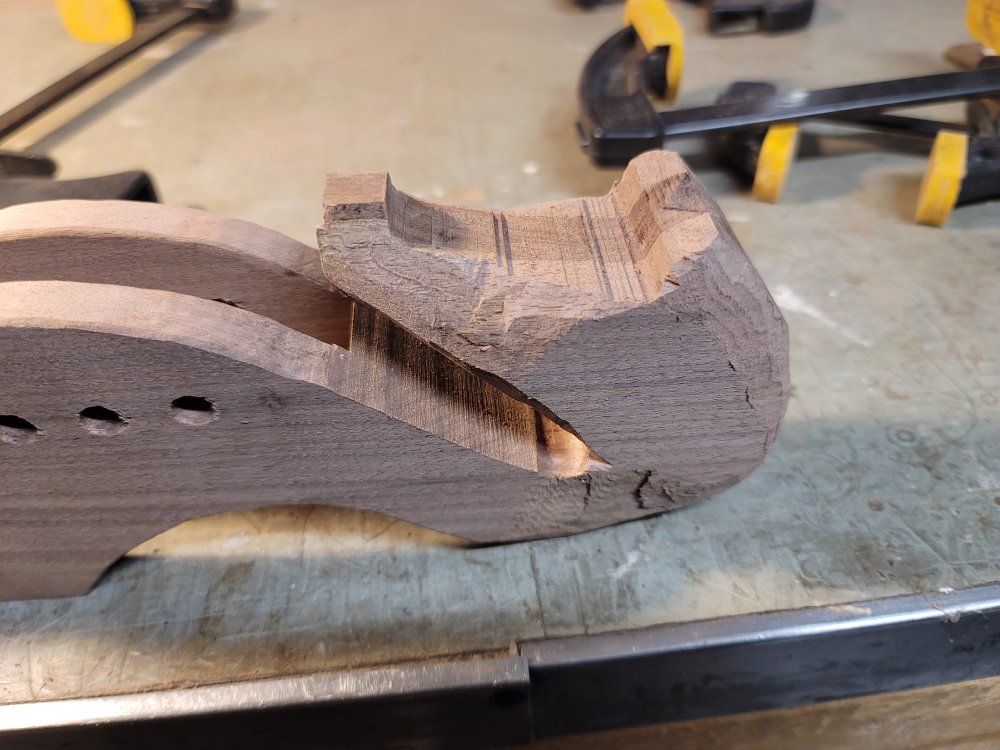
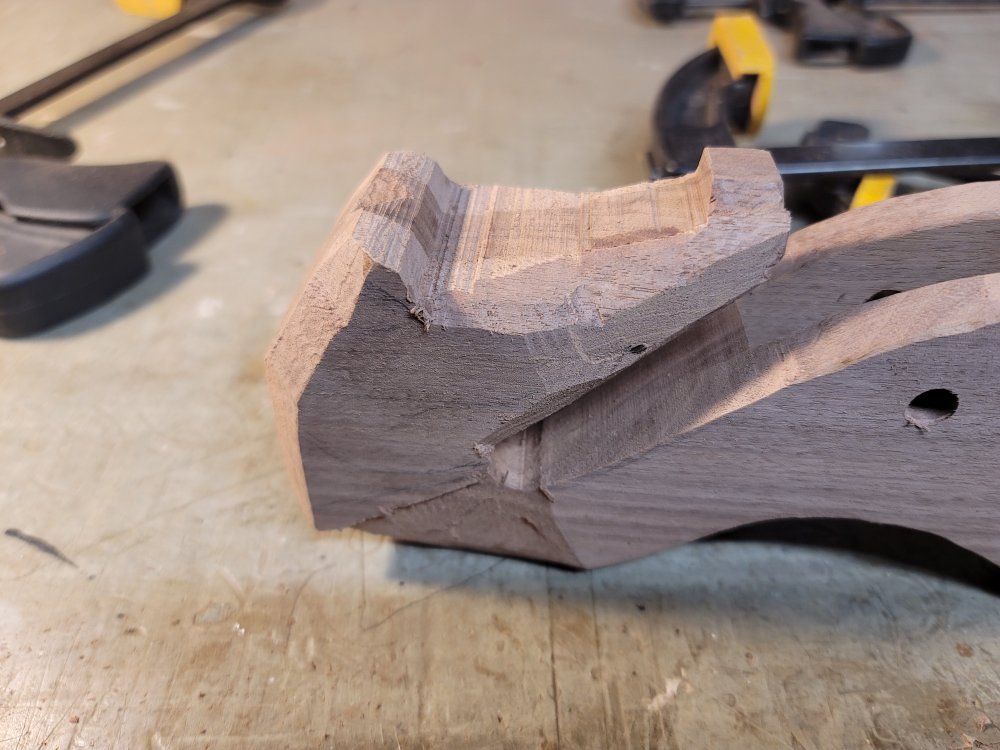
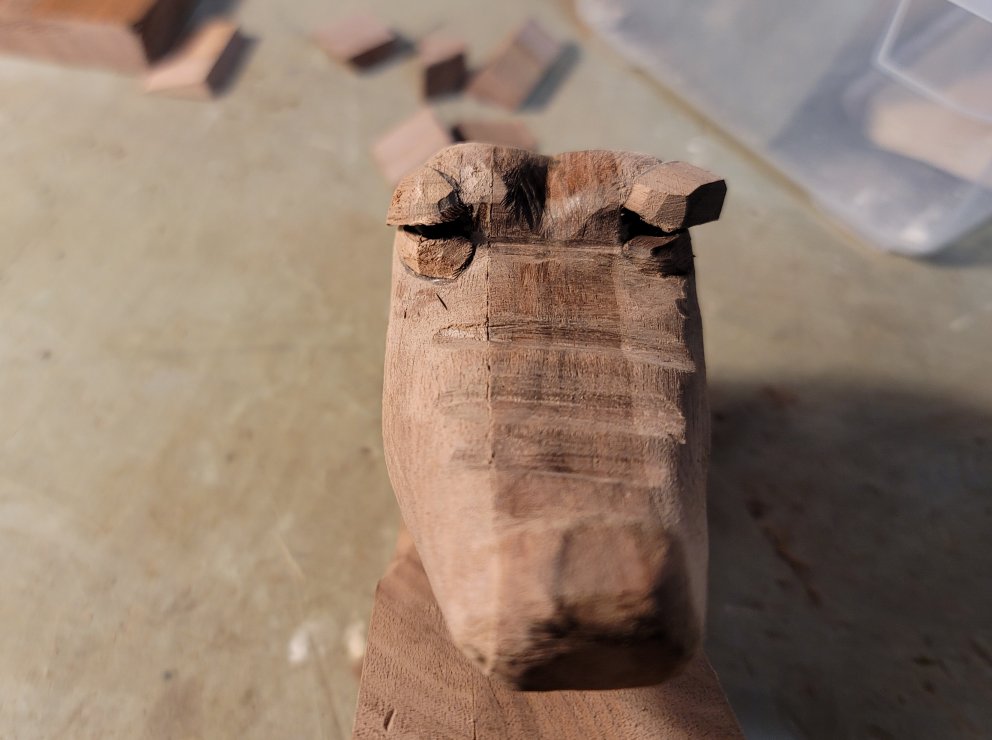
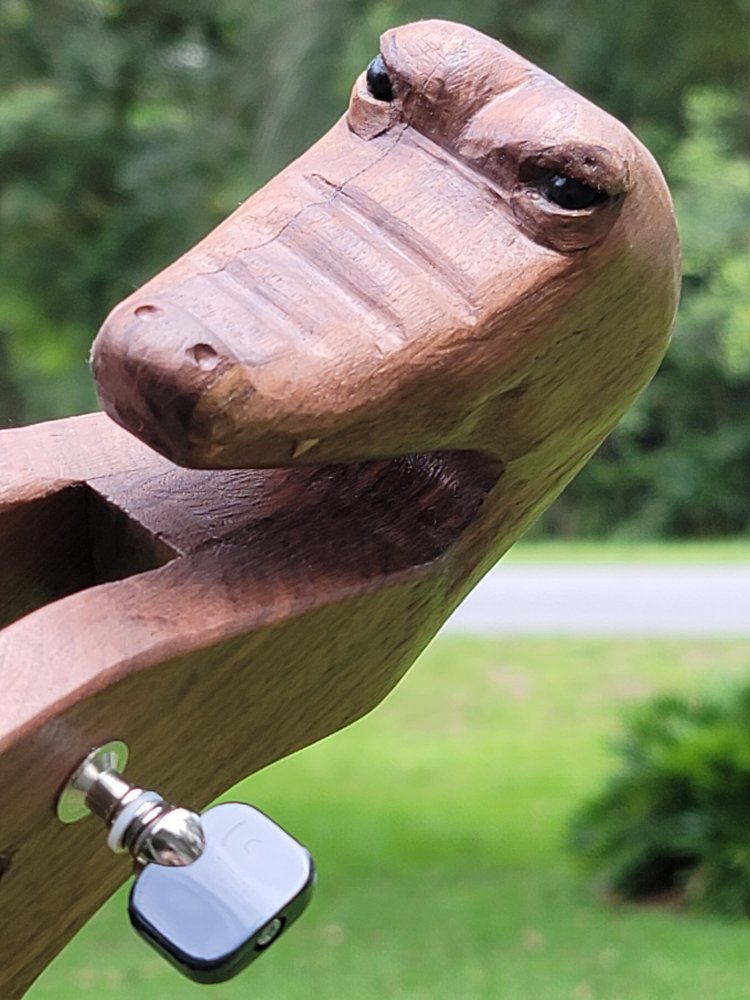
I am able to hold the work while doing some of the finer cuts, but must be careful of slips. On my two previous gator heads, the eyes have been a little more straight-on. This gave the gator a somewhat cartoonish or cinematic appearance while still maintaining the essence of the beast. Though this one will not be a realistic carving either, I am moving the eyes more to the side. I like the look so far.
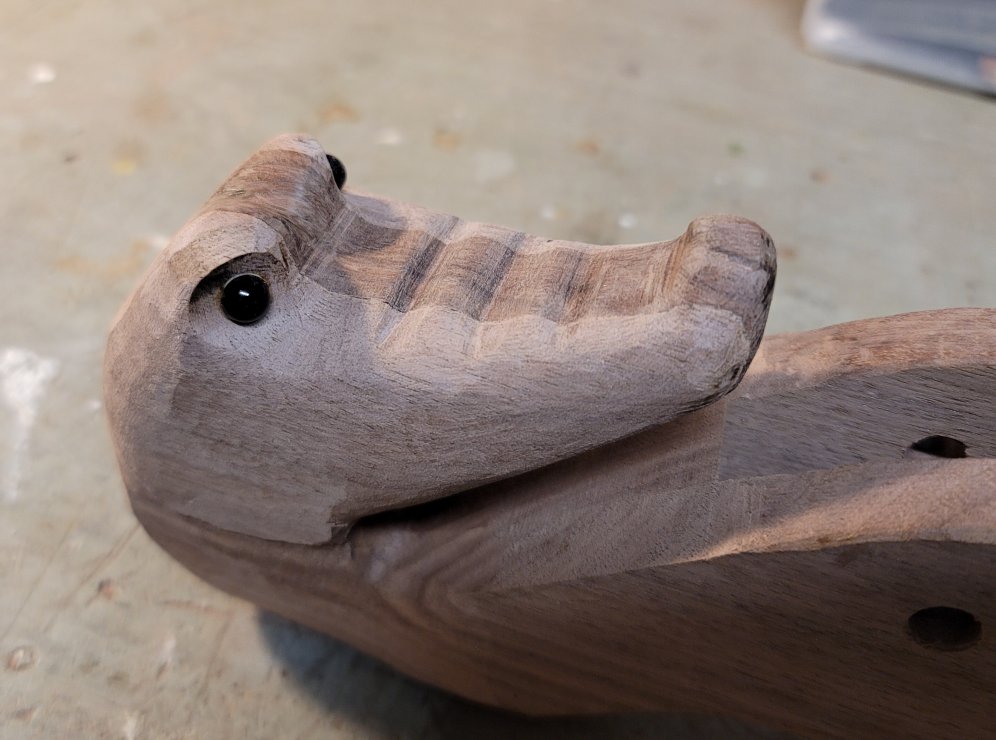
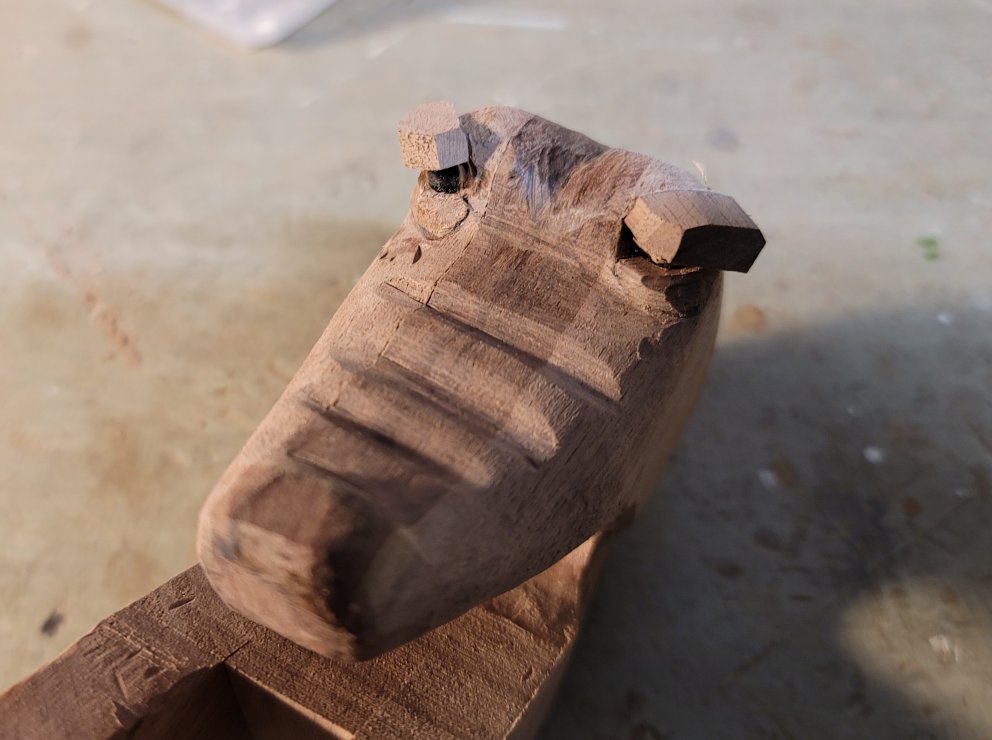
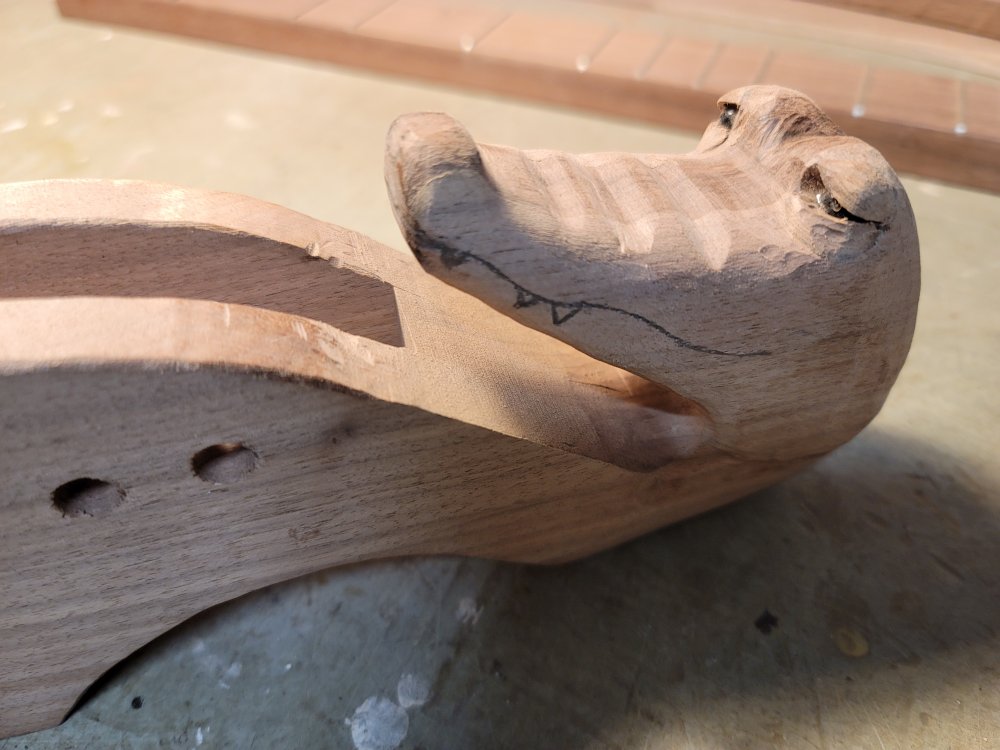
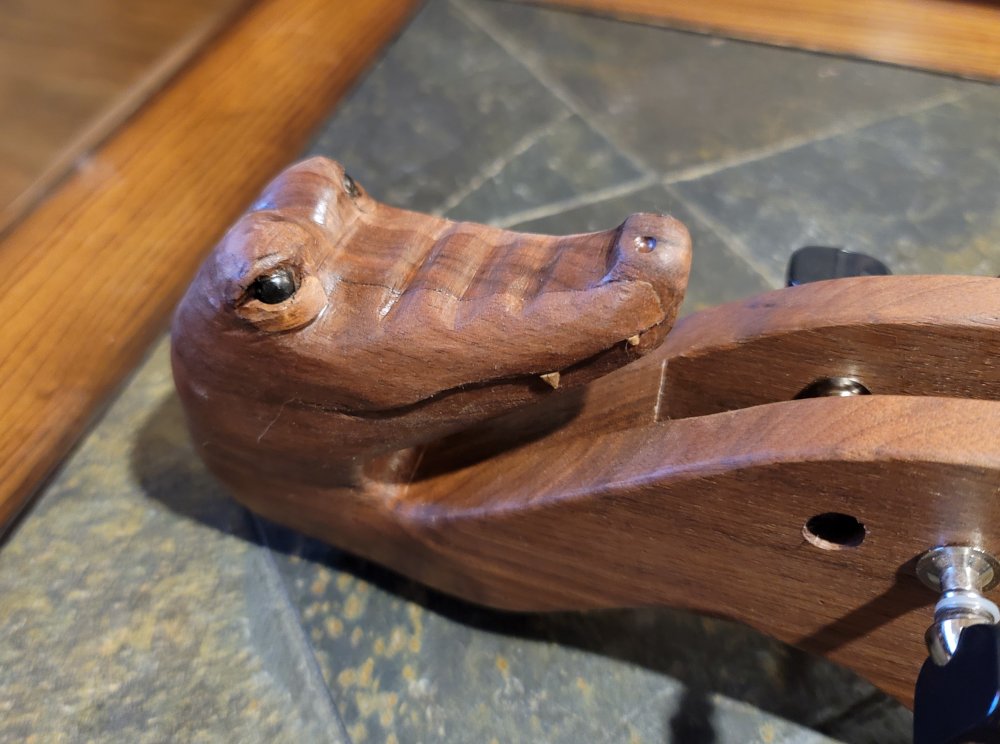
I decided to add some texture to the upper snout area — something I have never tried. I like it. I also added some eyes. Letting them dry overnight. I am particular about the eyes on these carvings. Through trial and error, I have settled on the half-beads with built-up eyelids.
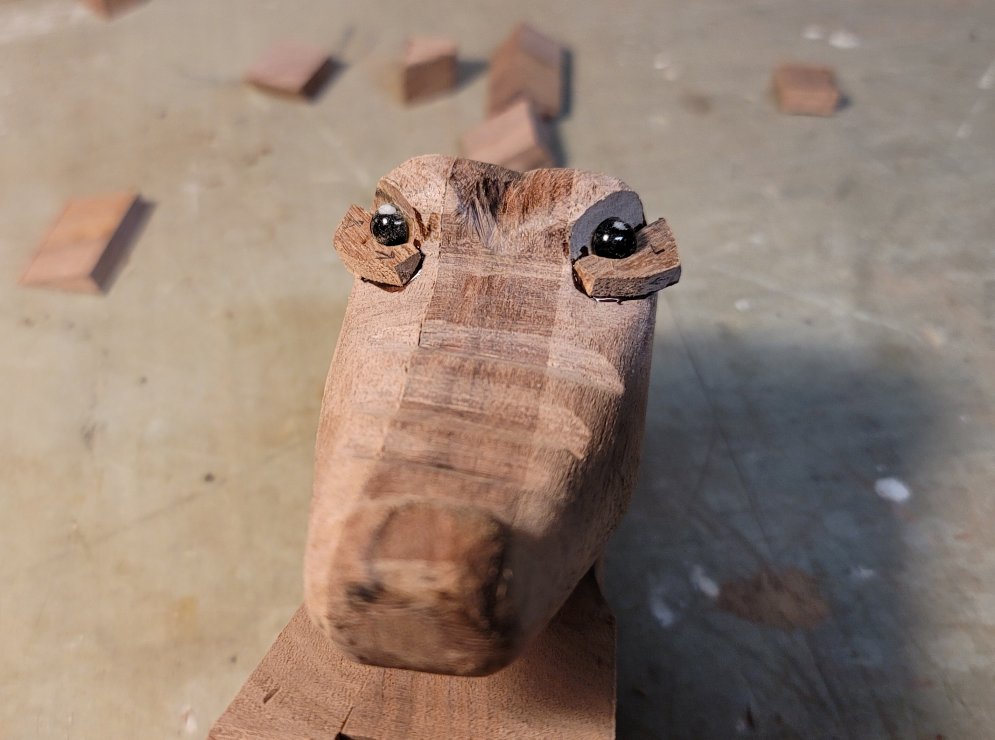
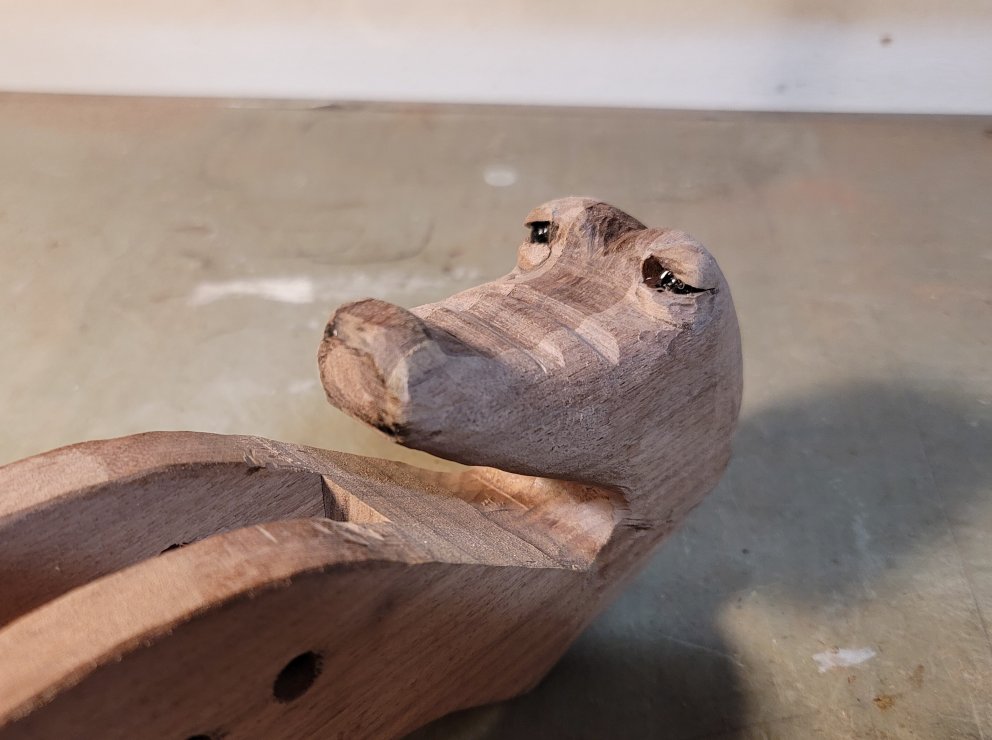
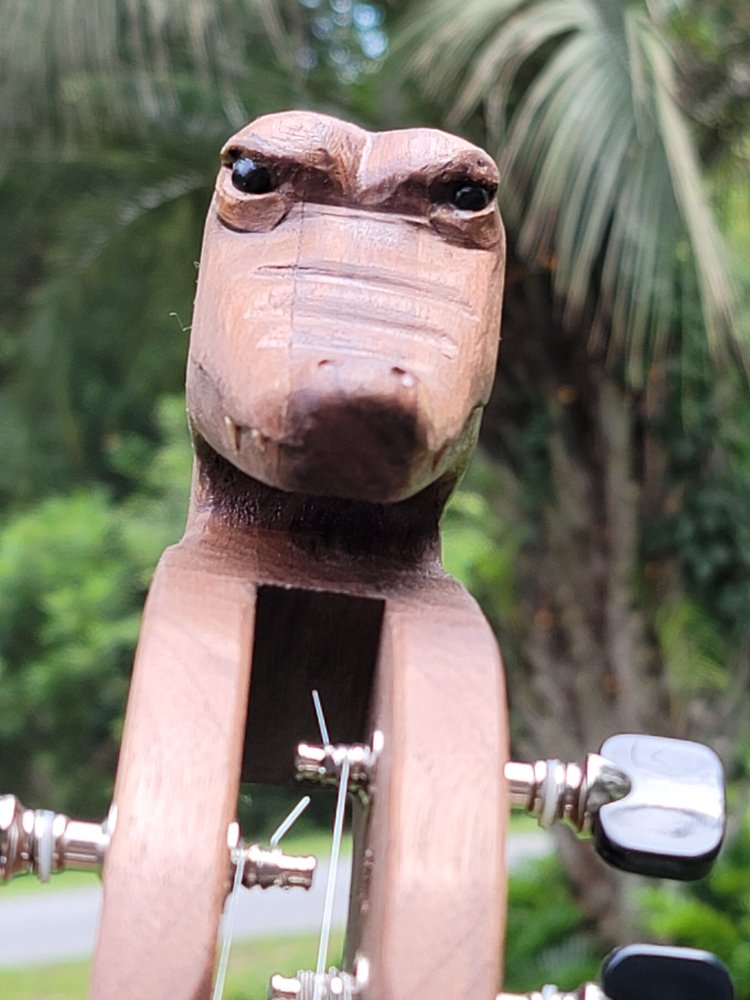
This is the trickiest and most time-consuming part of the whole dulcimer. It would be a snap if I were working with clay, but must use tiny pieces of walnut instead. I make the eyelids clunky and oversized, knowing I can carve them all down to shape. To make sure the additions can withstand the Dremel tool, I use 5-minute epoxy and let it cure thoroughly before shaping. I did want the eyes to be more to the side, but sometimes these constructions will have “minds of their own” — these are more to the front. Nevertheless, it still works and I’m pleased with it so far. All I have left to do is the mouth and some touch-ups to finish the gator.
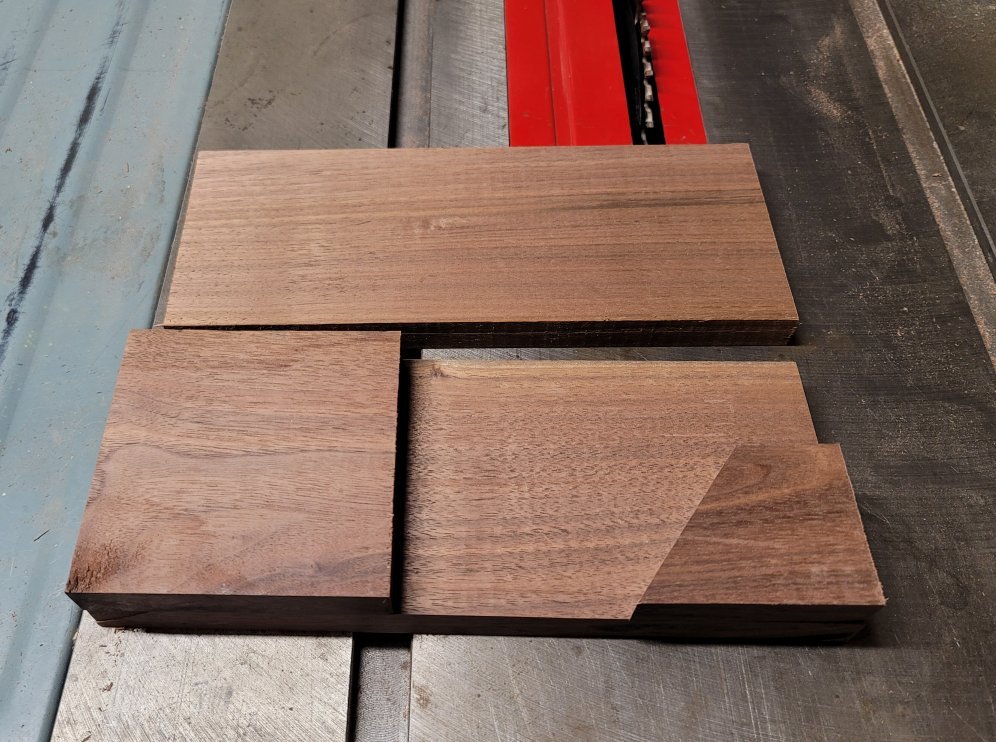
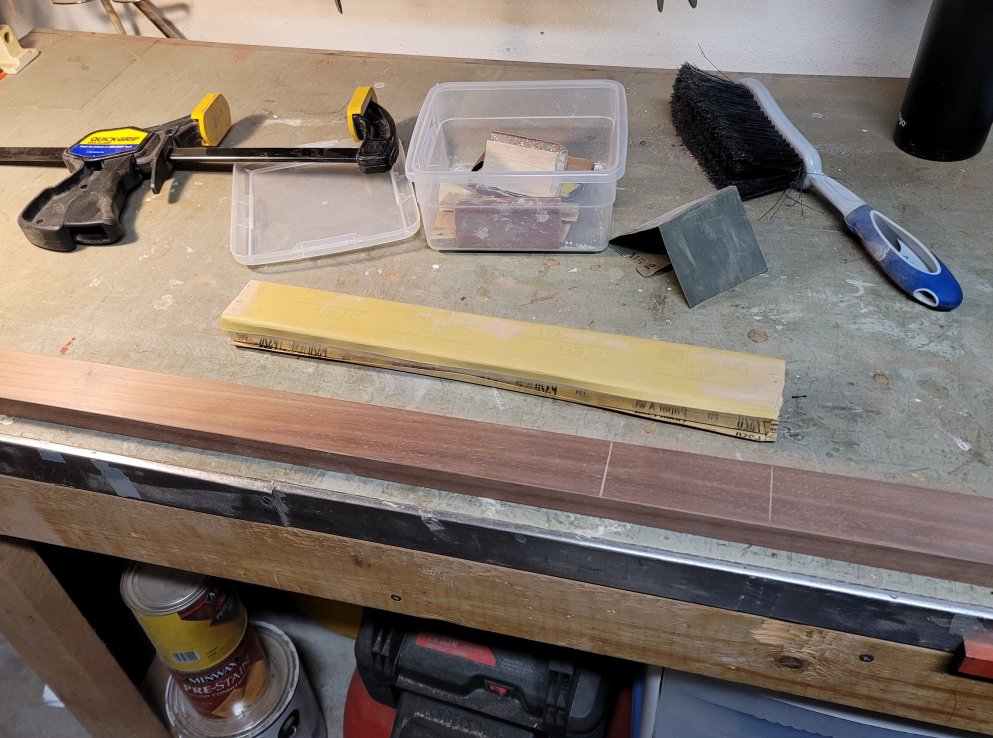
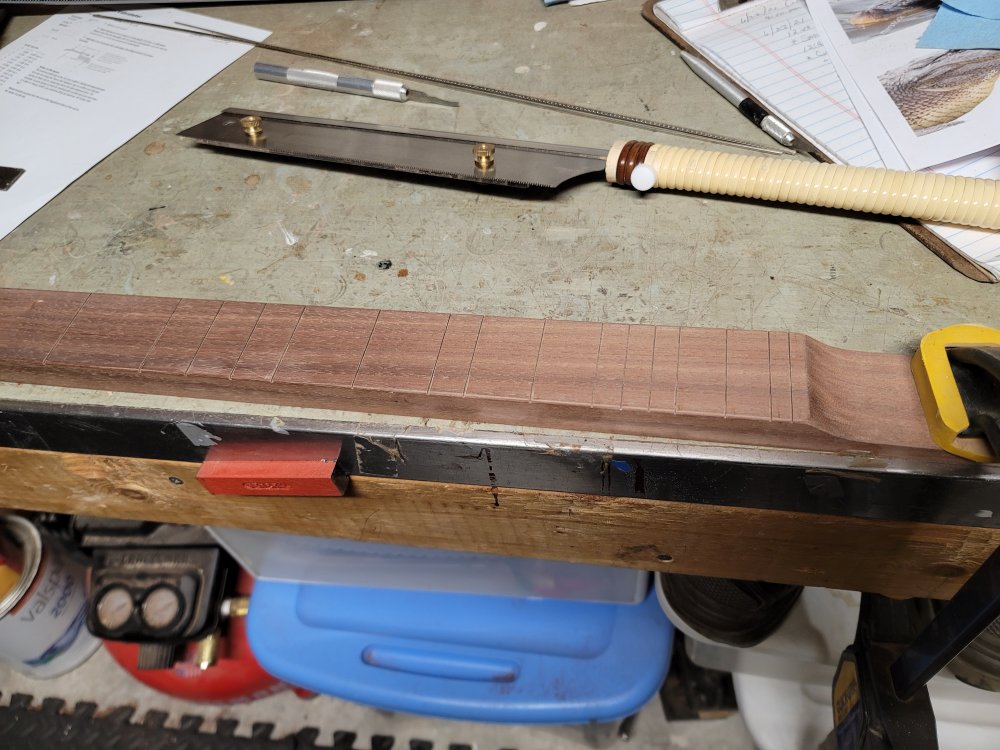
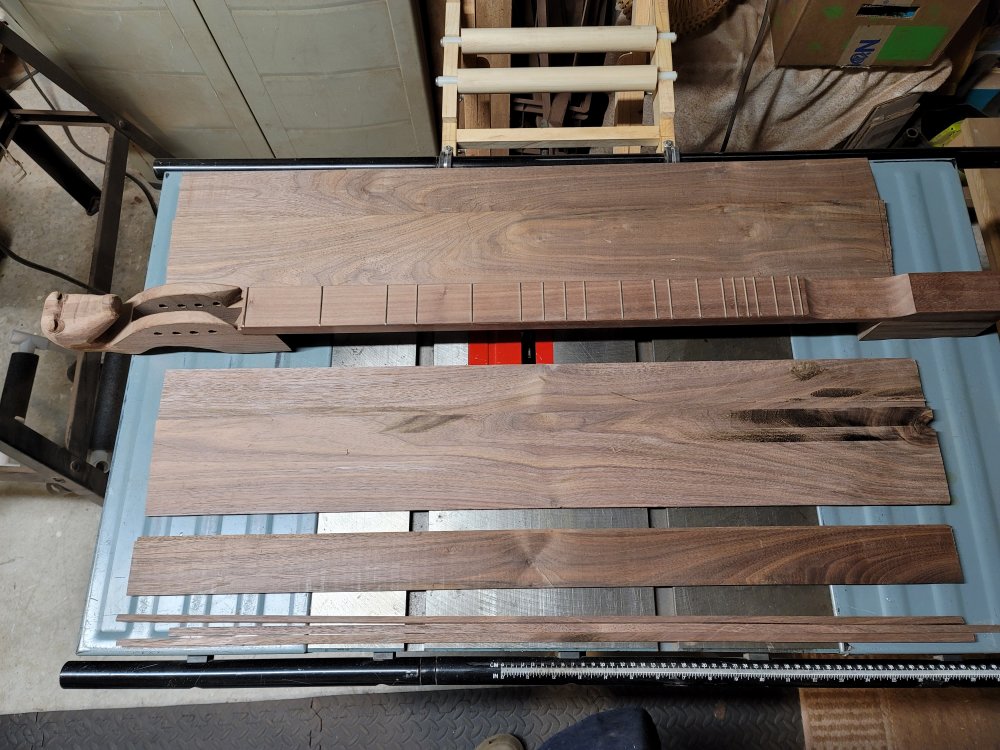
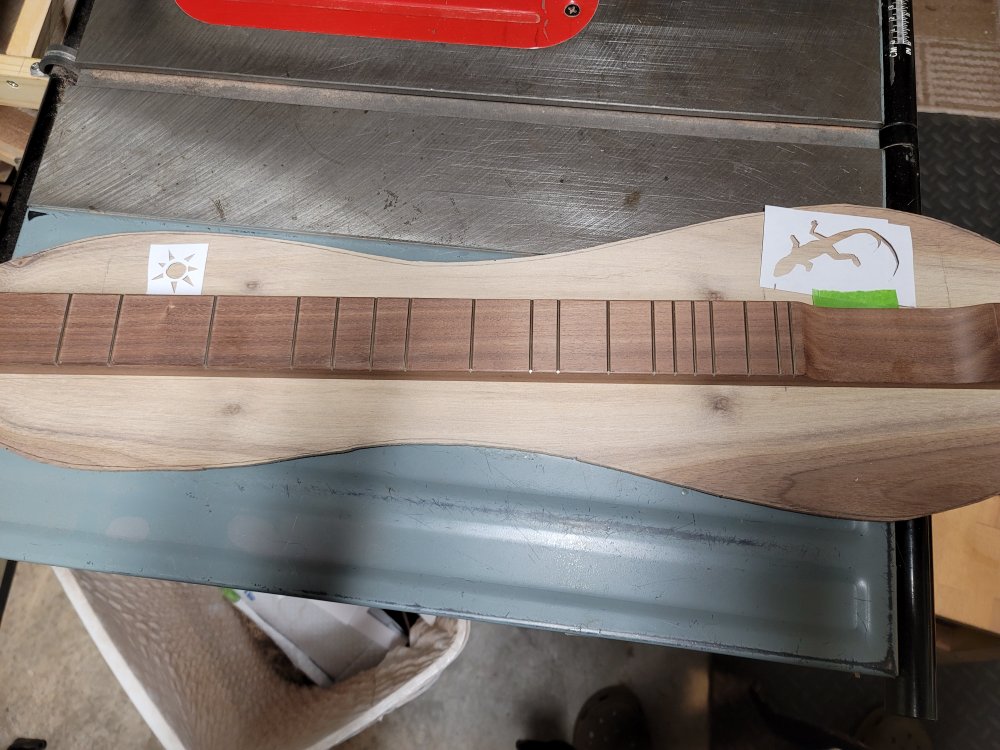
I’ve decided to set the head aside for now and work on the most important part of the instrument — the fretboard. I am a stickler for fret accuracy because if the instrument doesn’t sound right, it’s “wall art” and that is unacceptable. Not only does it have to be completely flat, but it also needs to have the final sanding finished before adding the frets. I was actually able to cut out three fretboards from a 1″ thick board and planed one of them down for this project.
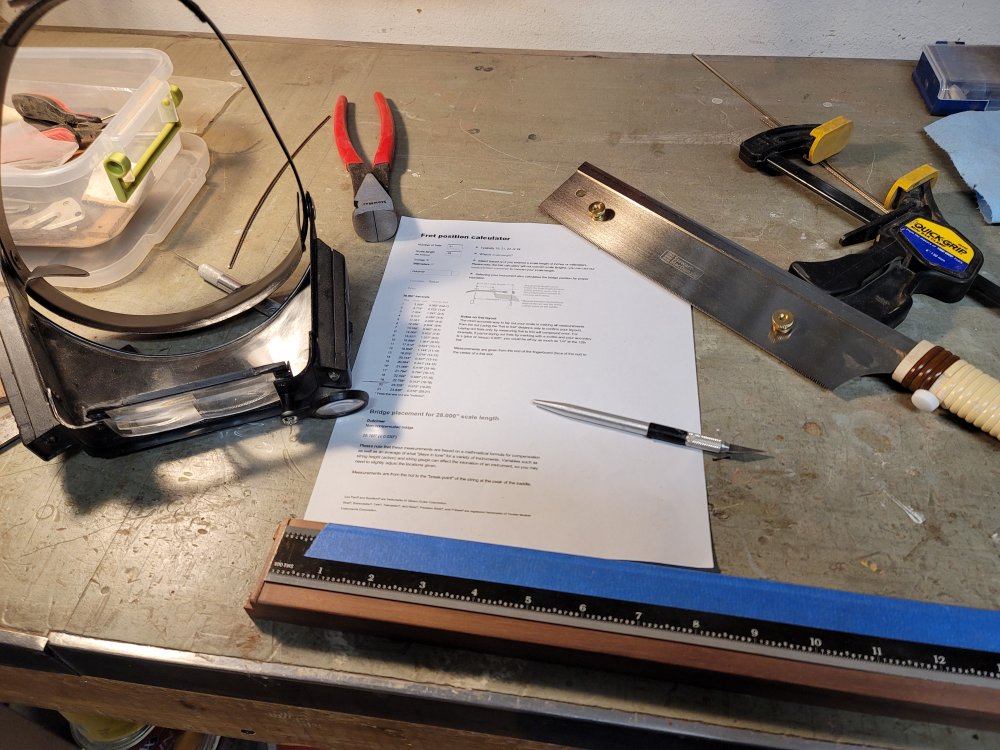
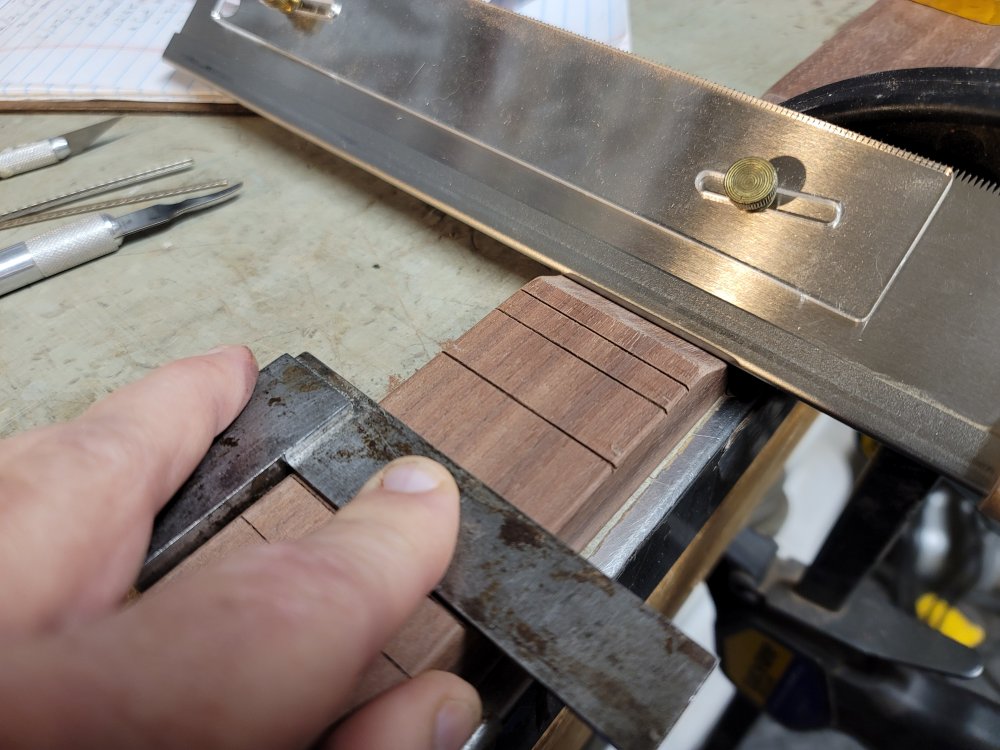
I like to use a 28″ scale length, which establishes an octave at 14″ and another octave at 21″ from the nut. (or, more accurately, from the zero fret). For fret placement, I use a fret calculator from the Stewart-MacDonald website which prints out the intervals to 1/1000 of an inch. I use a ruler that is marked to 1/100th of an inch (which is about the limit for a physical ruler) and employ several magnifying lenses to ensure that the frets are right on the money.
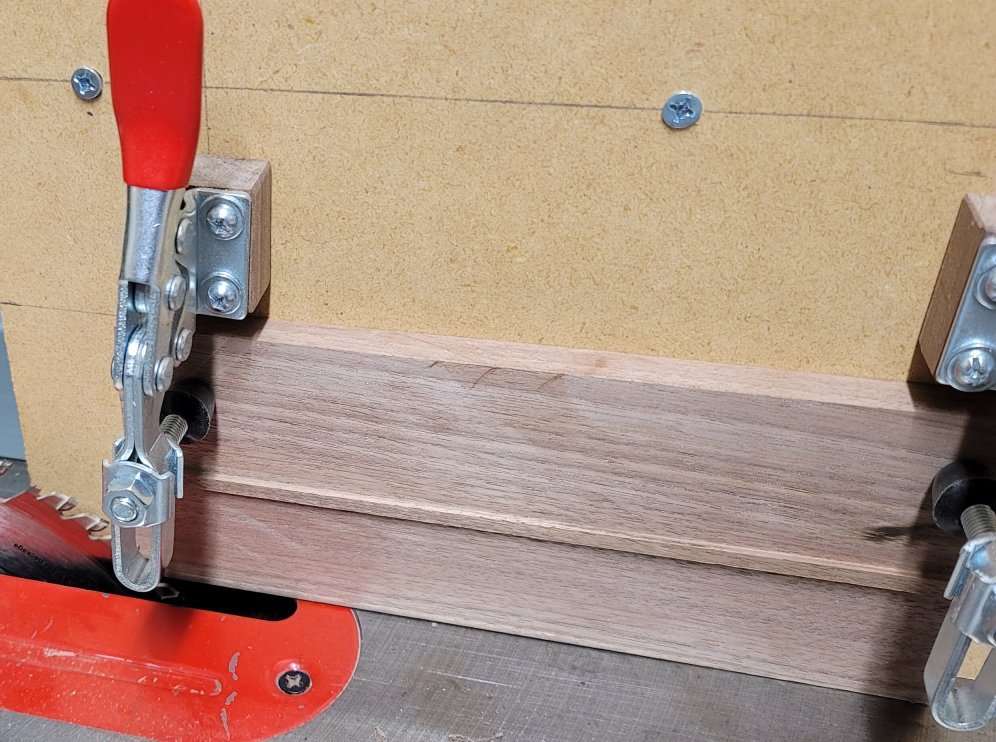
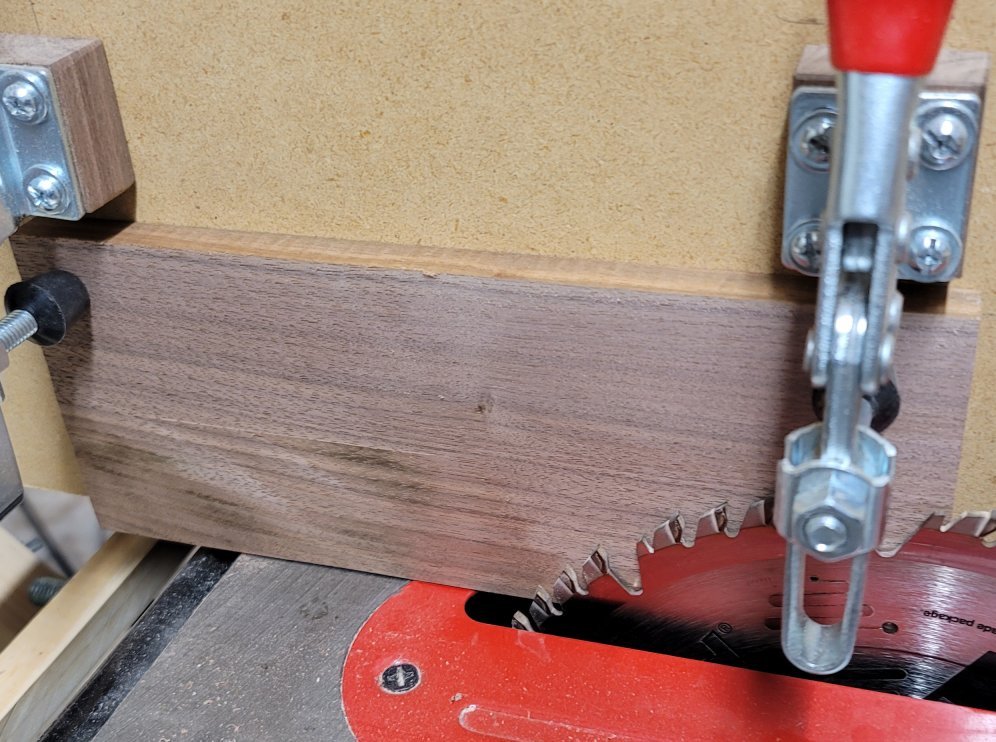
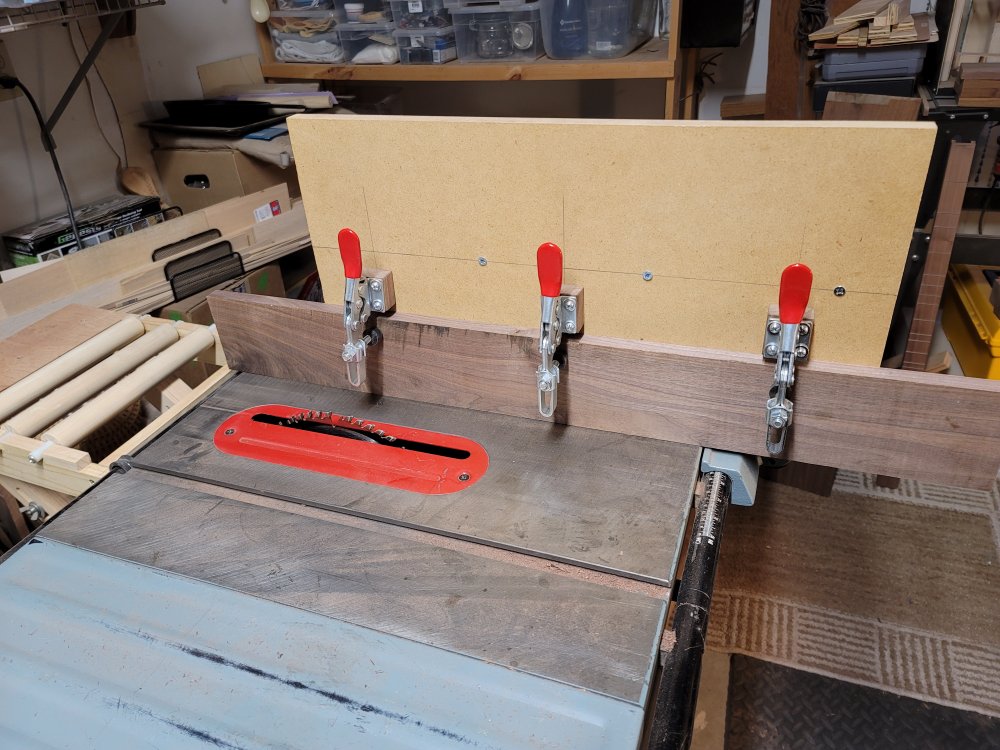
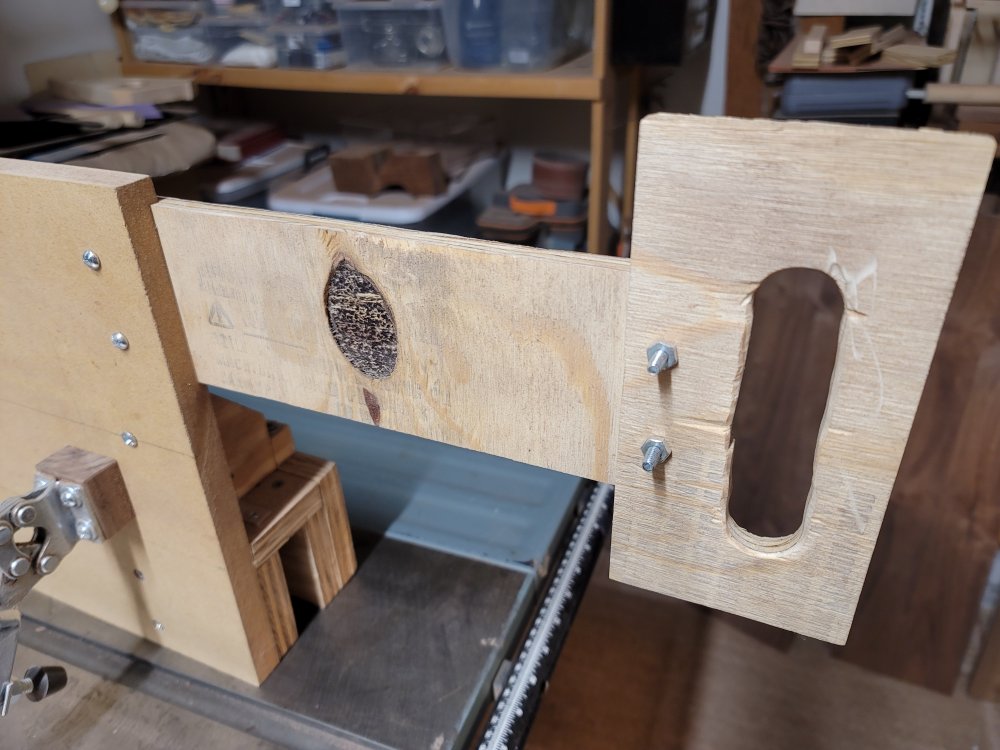
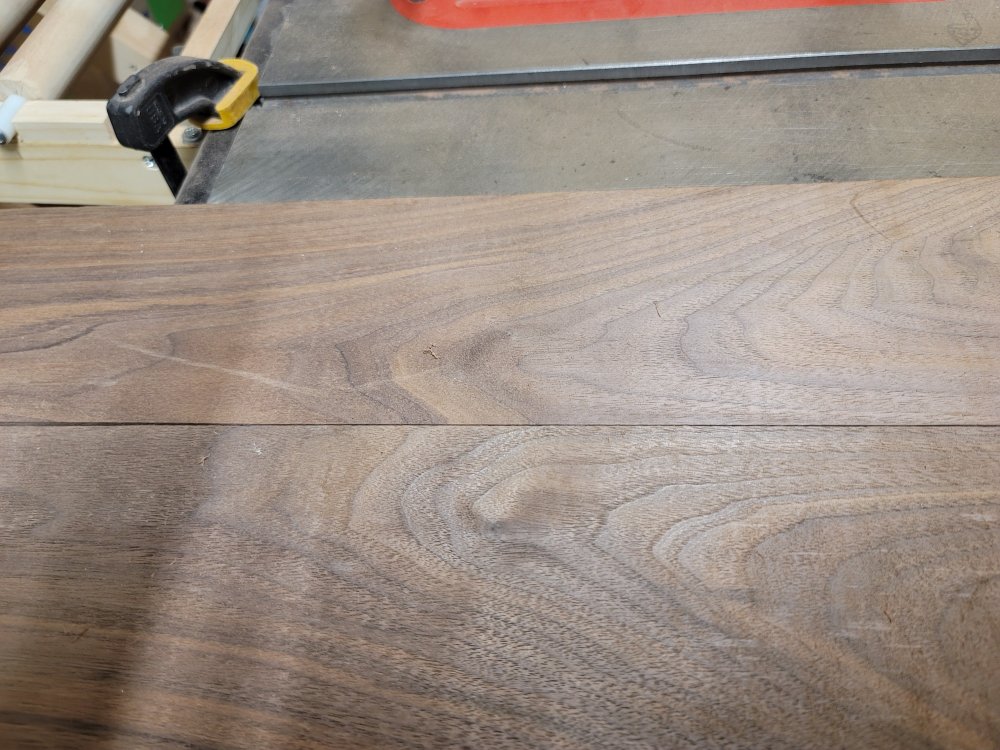
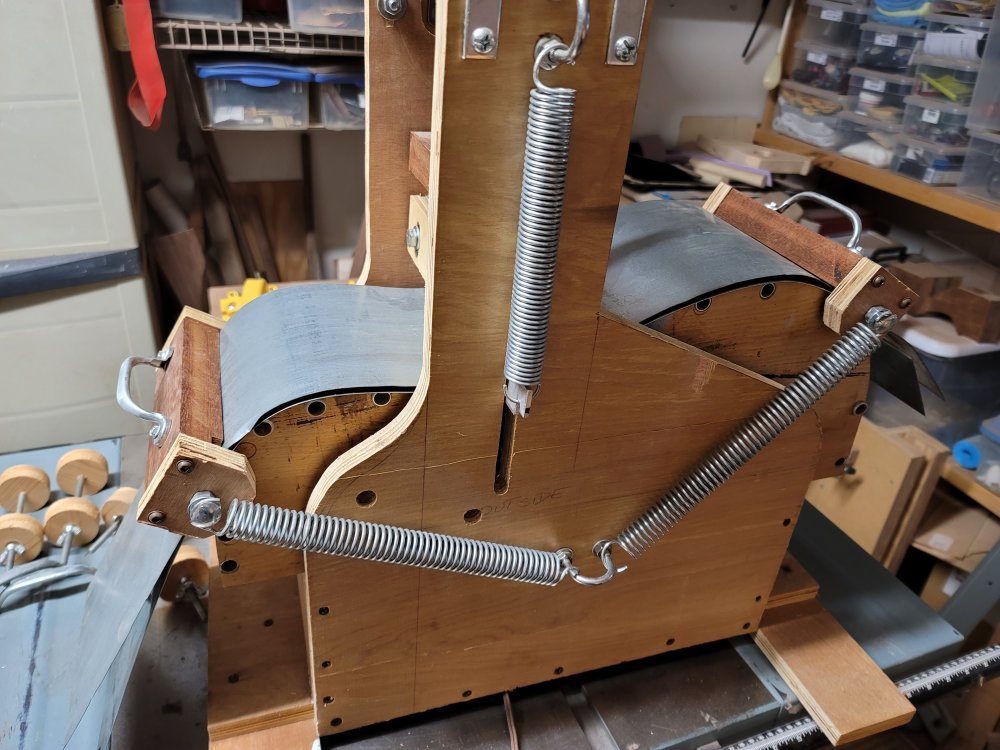
The top (soundboard) of the dulcimer and the back should be no more than 1/8″ thick. Making thin slices of thicker boards is known as resawing, and can be a problematic process. Although I used my new resawing jig to thin the blocks used for the peghead and tailstock, this would be the first time using it for the job for which it was designed. It became readily evident that the process needed some tweaking. For one thing, I had not accounted for the actual 33″ length of the boards that I use. To actually have the board clear the sawblade, I had to stand to the left side of the saw and continue the cut. That felt awkward and somewhat dangerous. Any inconsistency to the cut could result in unevenness which must be sanded out. So I used some scrap plywood to build a bolt-on handle, enabling me to keep constant pressure through each pass of the cut.
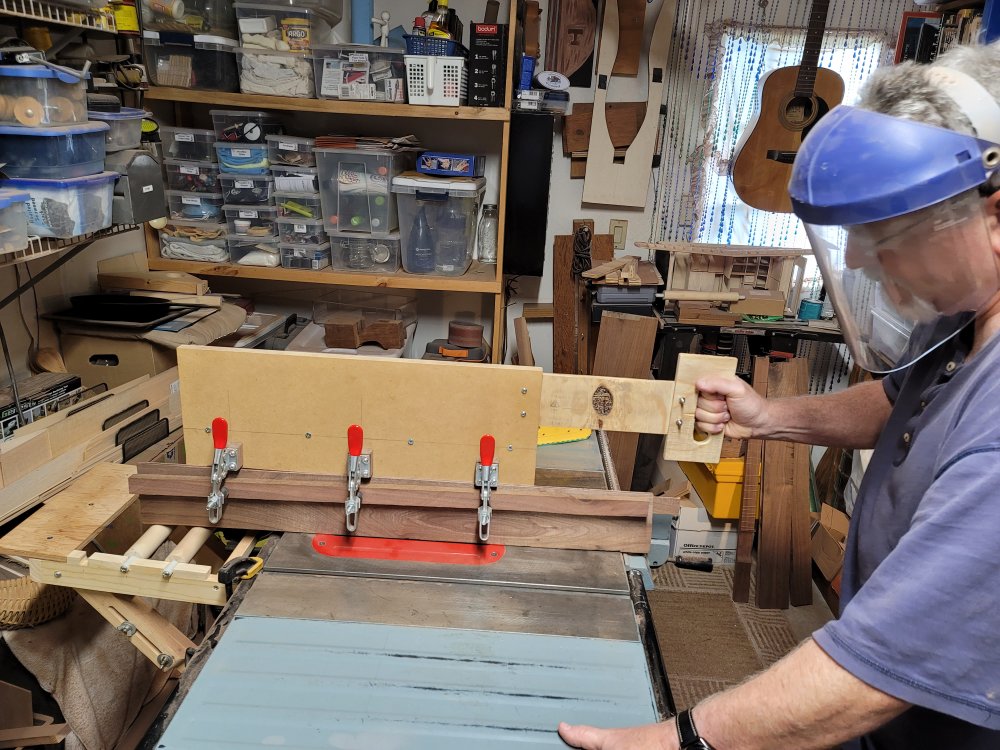
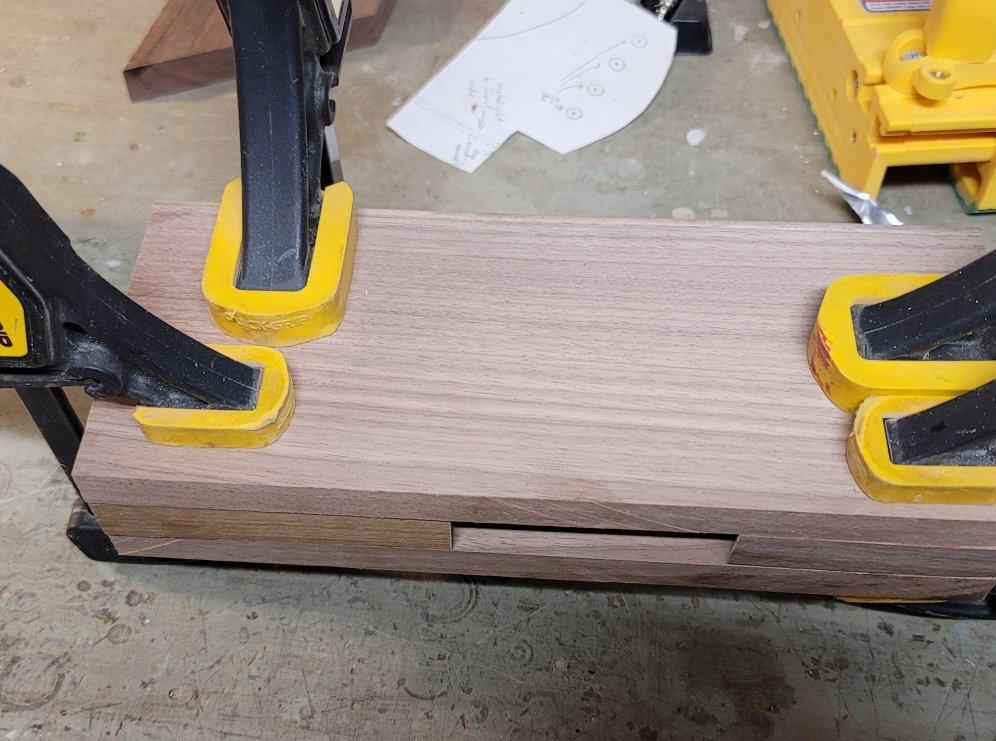
It still took extra time to set up each piece, but I was rewarded with consistently thin, beautifully bookmatched boards. With the work securely clamped and by making several passes with increasing depth of cut, I felt comfortable raising the saw enough to do the entire job on the tablesaw, eliminating the need for the bandsaw completely. This also simplified the finish work, requiring only sanding.
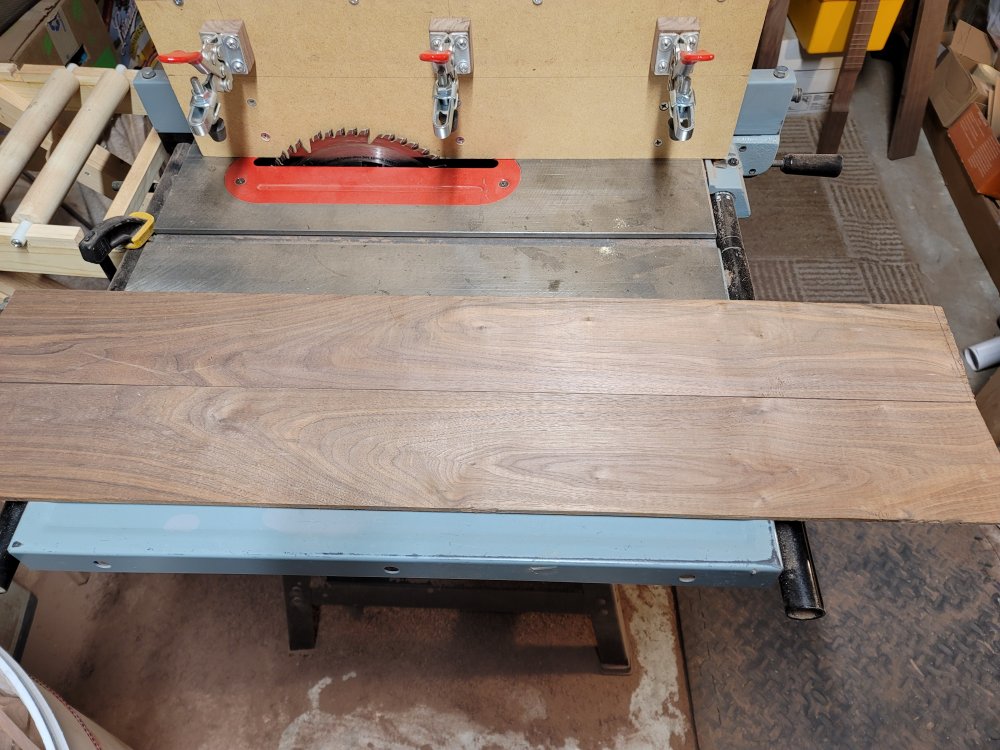
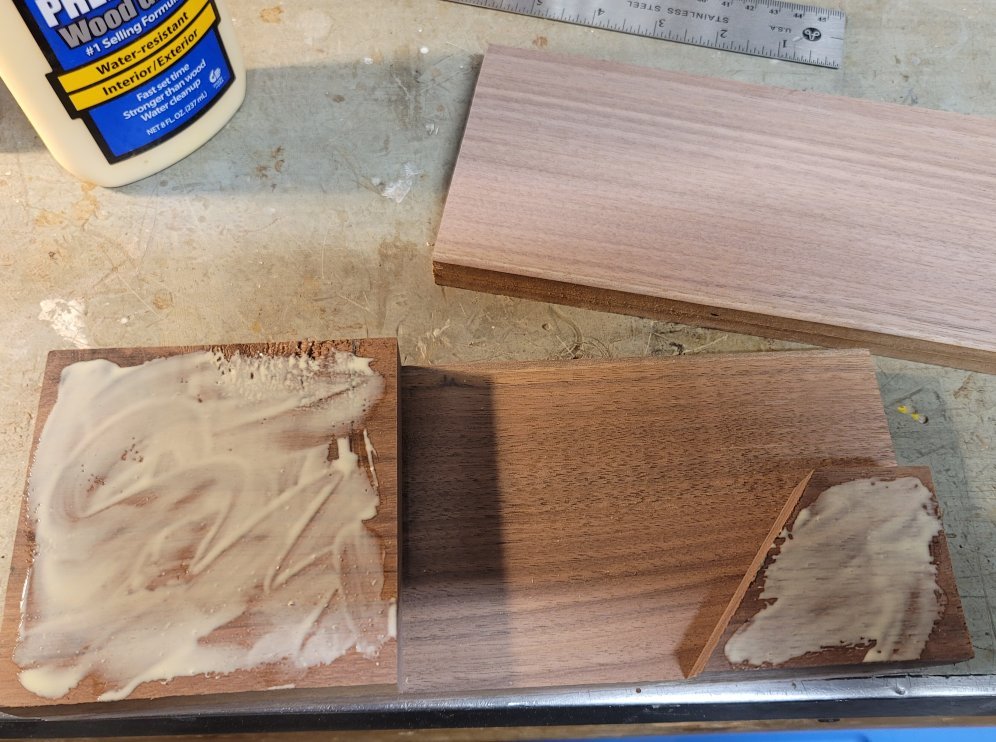
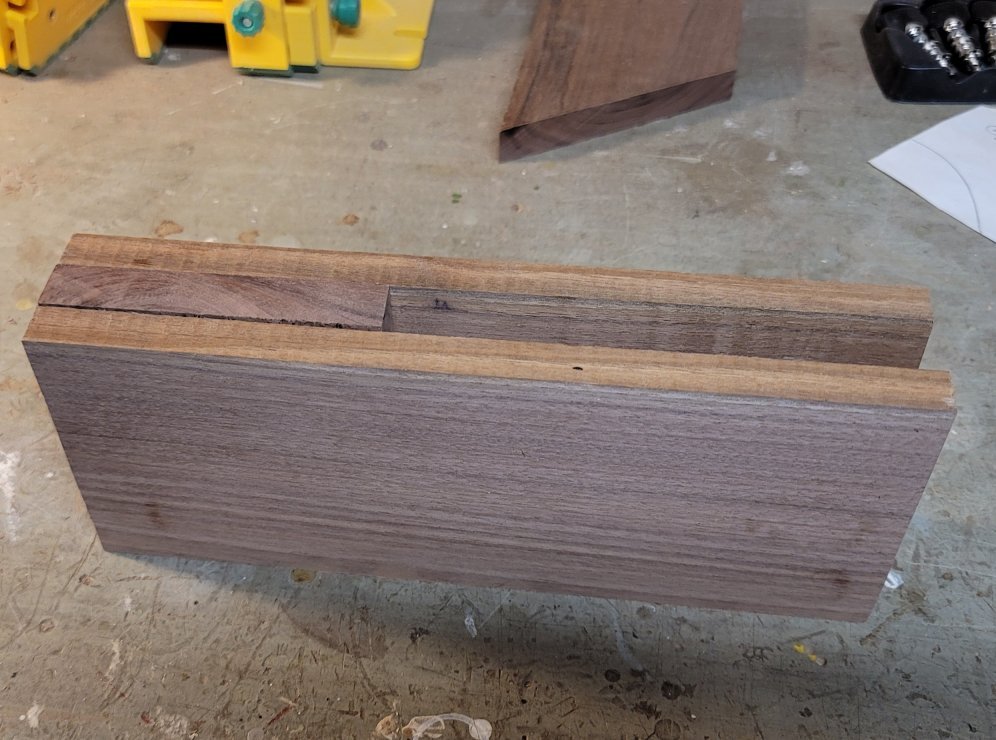
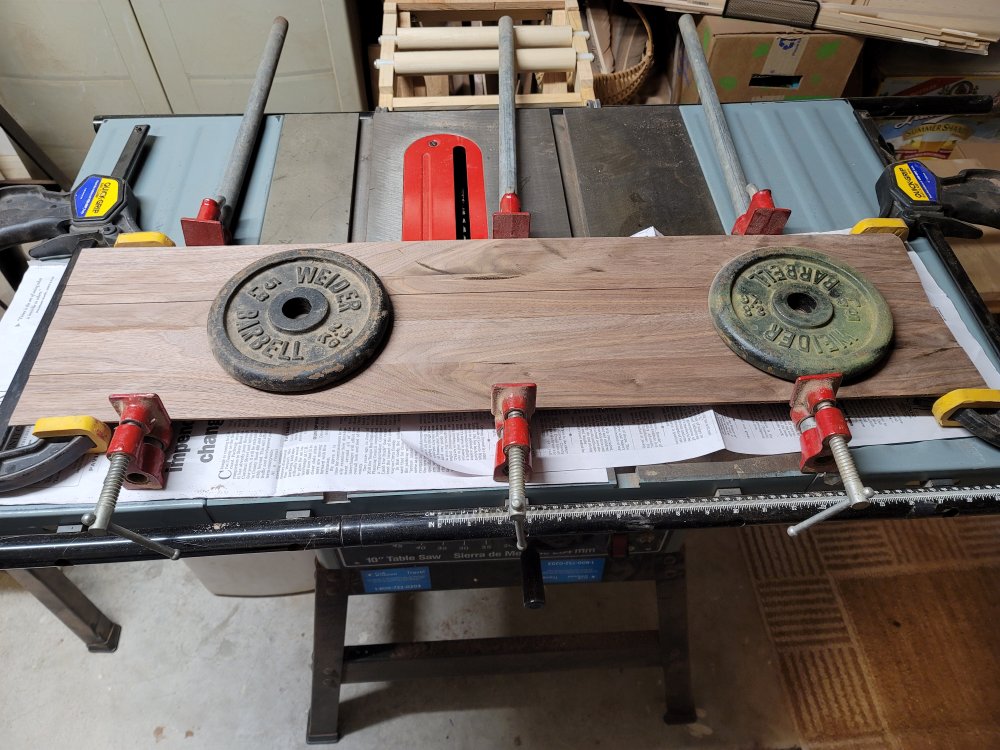
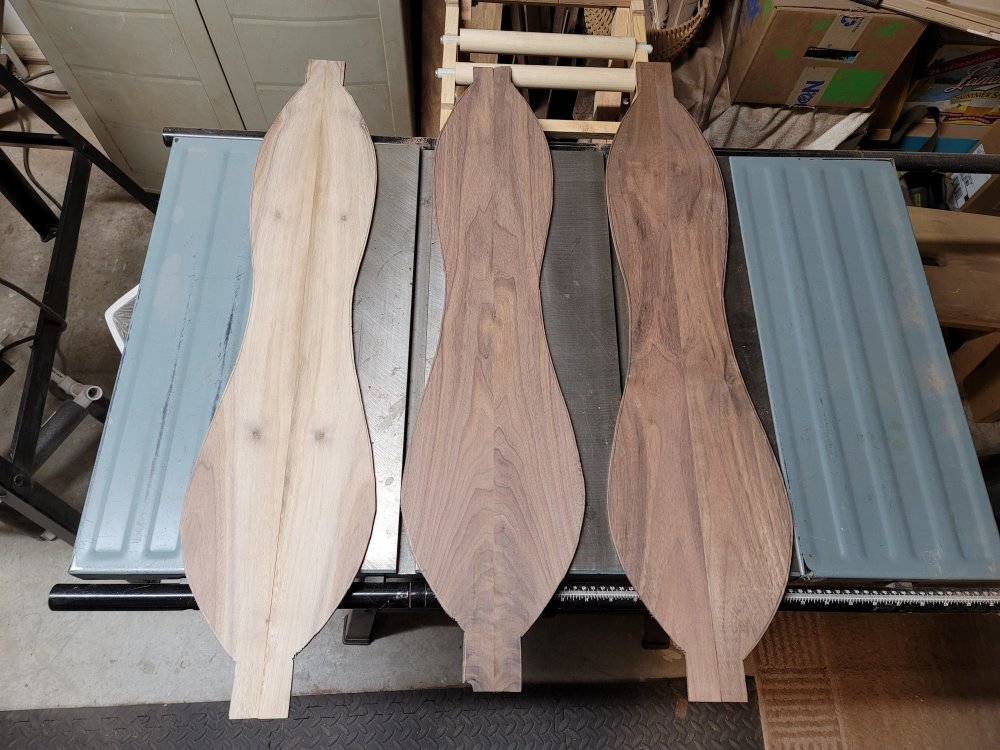
Since the edges were perfectly straight, it was a simple matter of gluing the 4″ boards together to create the 8″ width that I needed. I was so pleased with the jig that I started slicing up other boards for future projects. Sometimes it’s a mystery what the grain will look like when it’s bookmatched. One of the boards I found was mostly walnut heartwood — much lighter in color. I made it into a soundboard as well. I gave Becky a choice of the darker or the lighter soundboard and she chose the more exotic heartwood. I think the contrast will look nice.
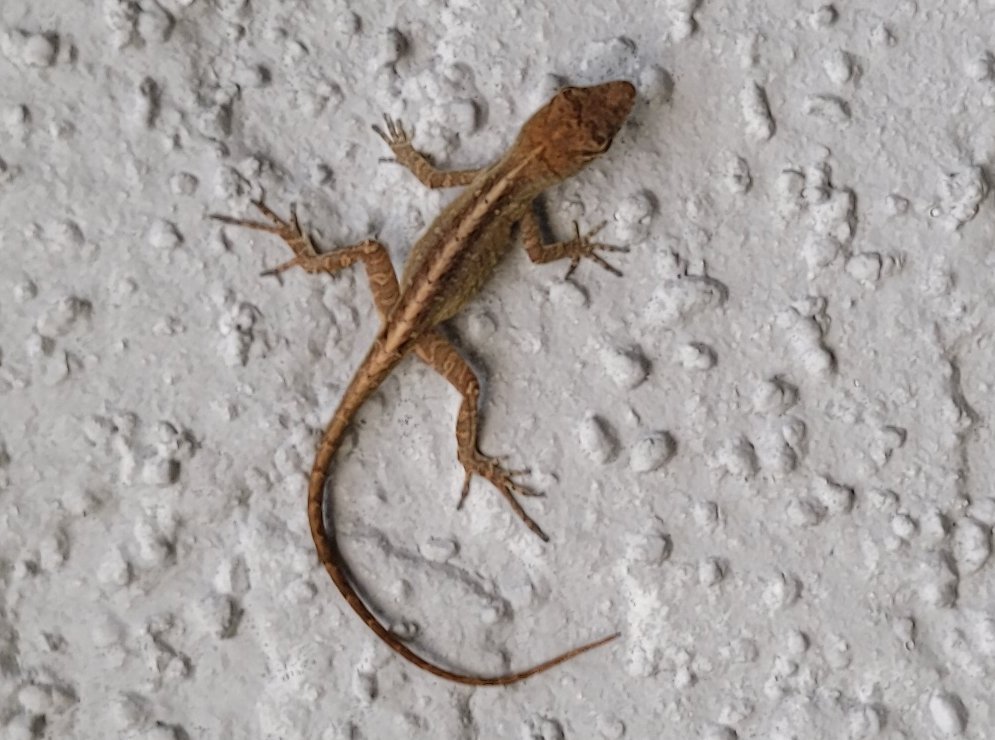
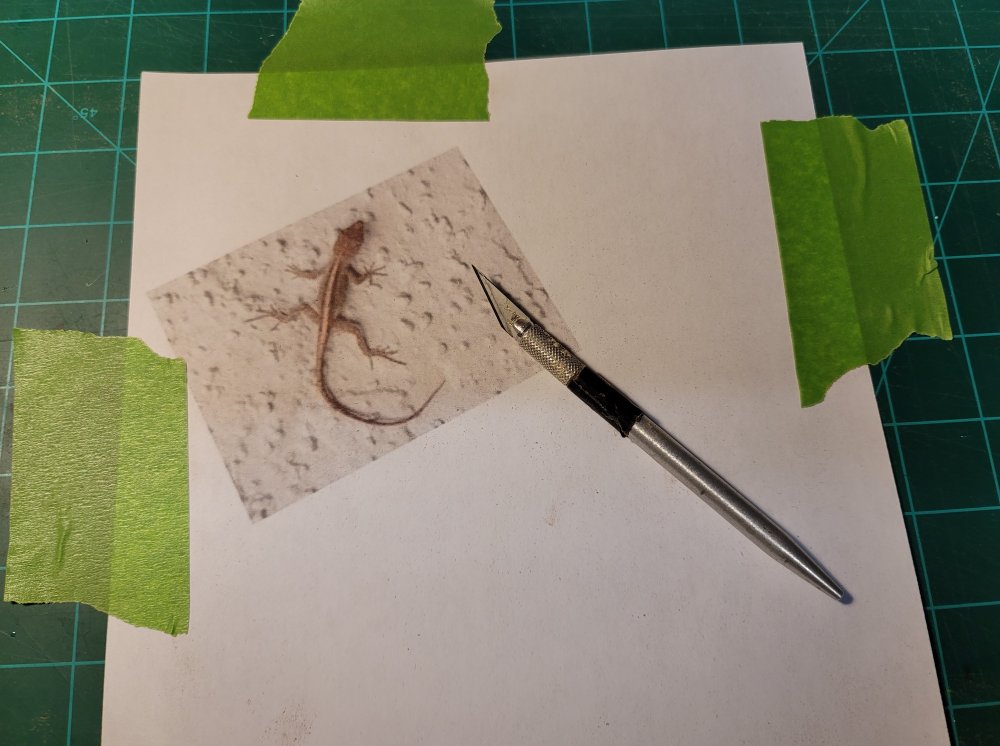
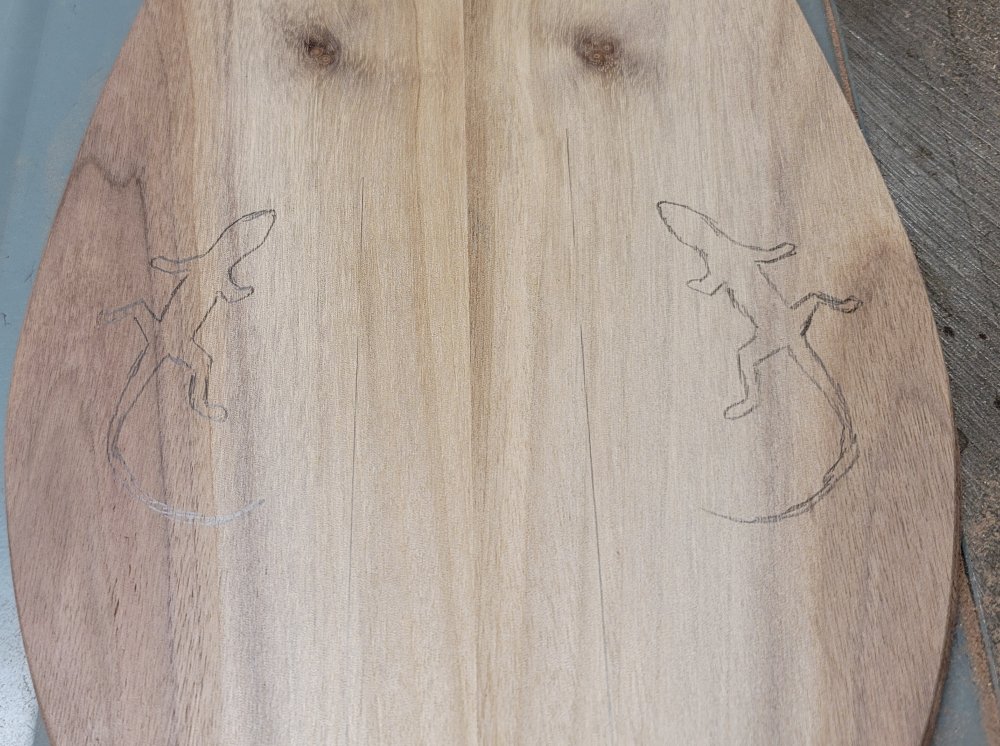
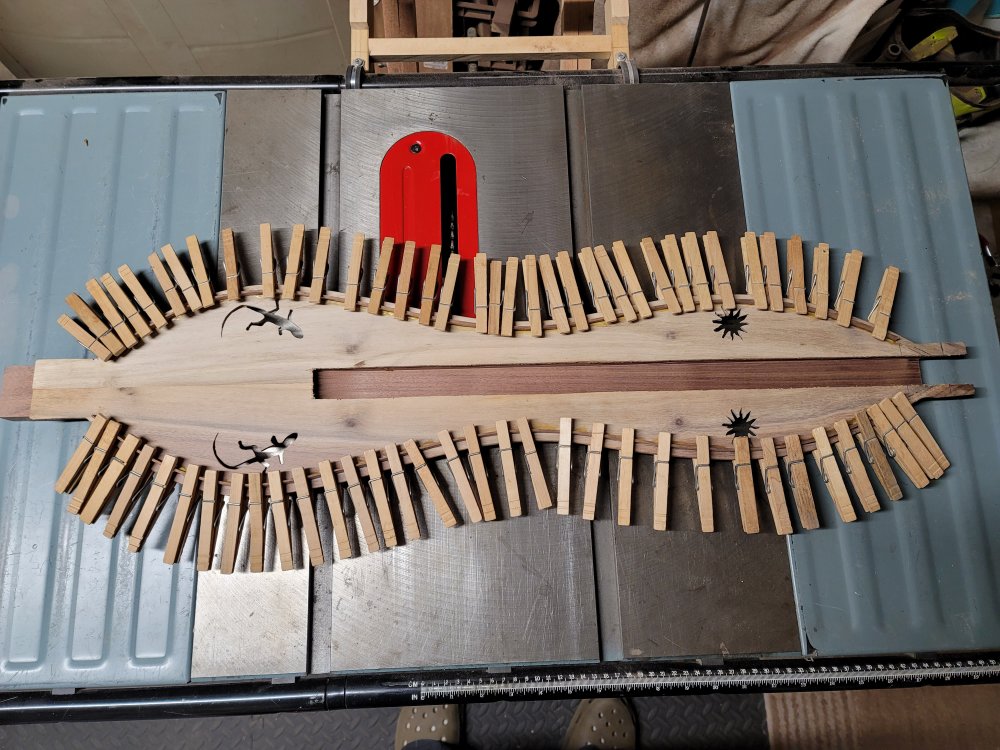
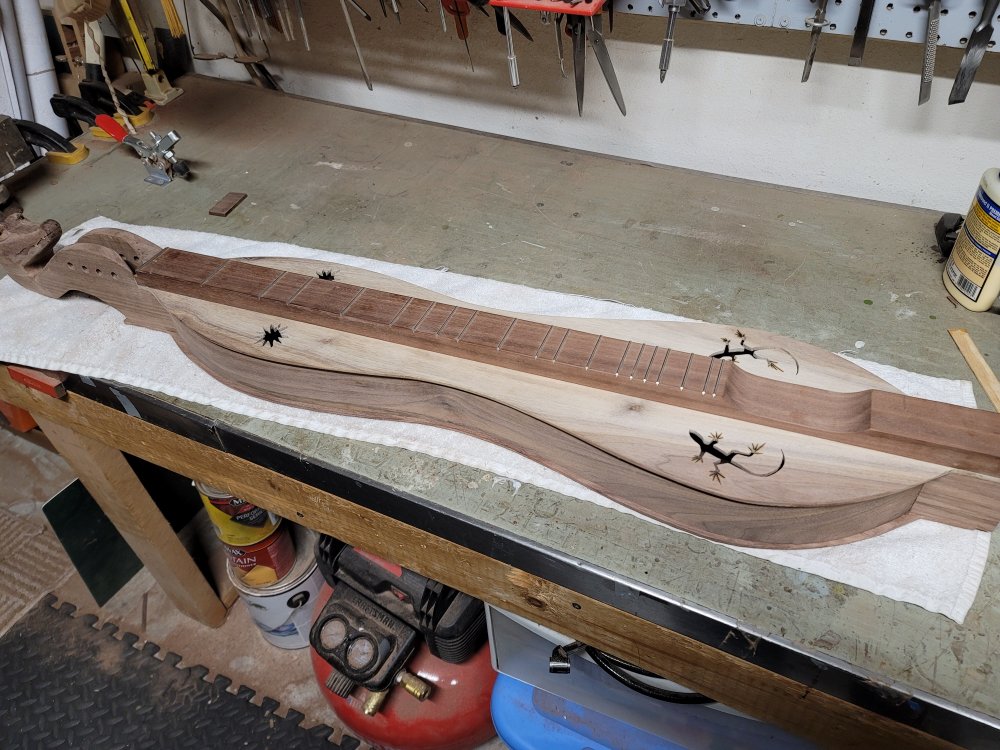
The next step will be cutting out the sound holes. She wants a Florida/swamp theme with some type of lizard and a stylized sun. As if on cue, there was a small lizard on my outside wall as I was mowing two days ago and I happened to have my phone with me. His pose was perfect, and I’m taking it as a sign. I’ll just modify it as needed to fit the space constraints. It’s all coming together!
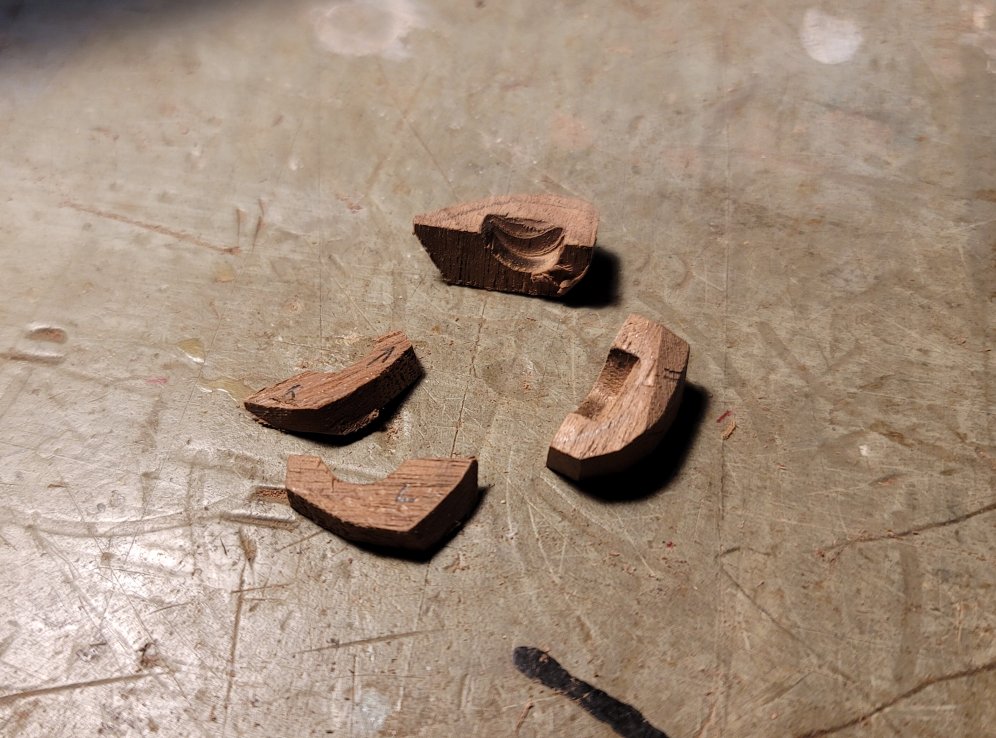
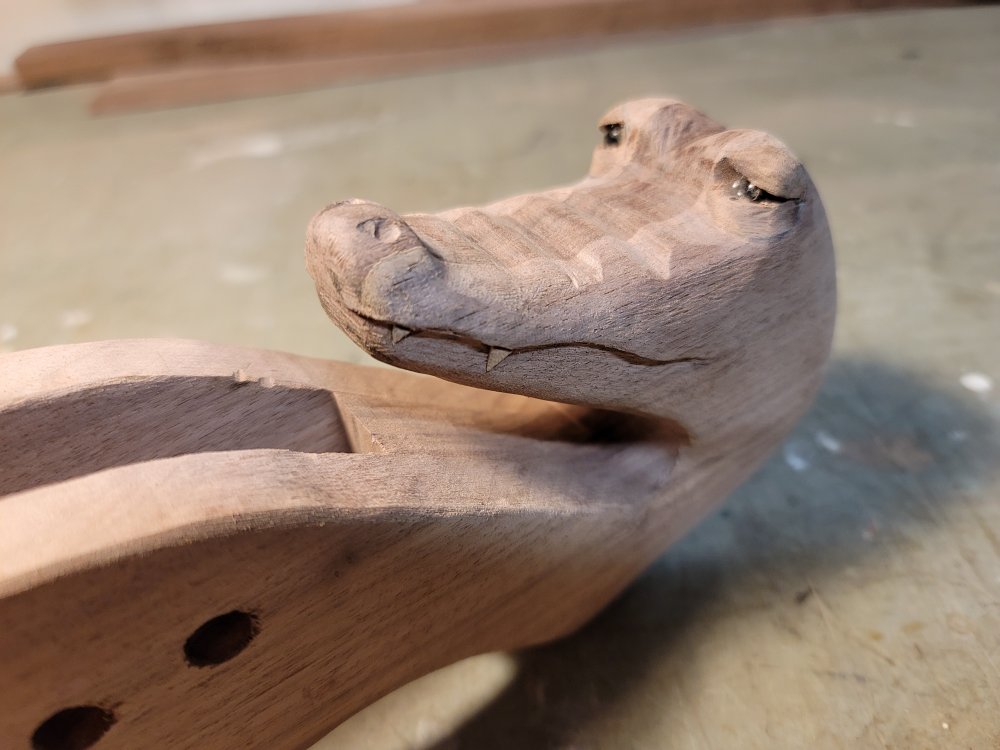
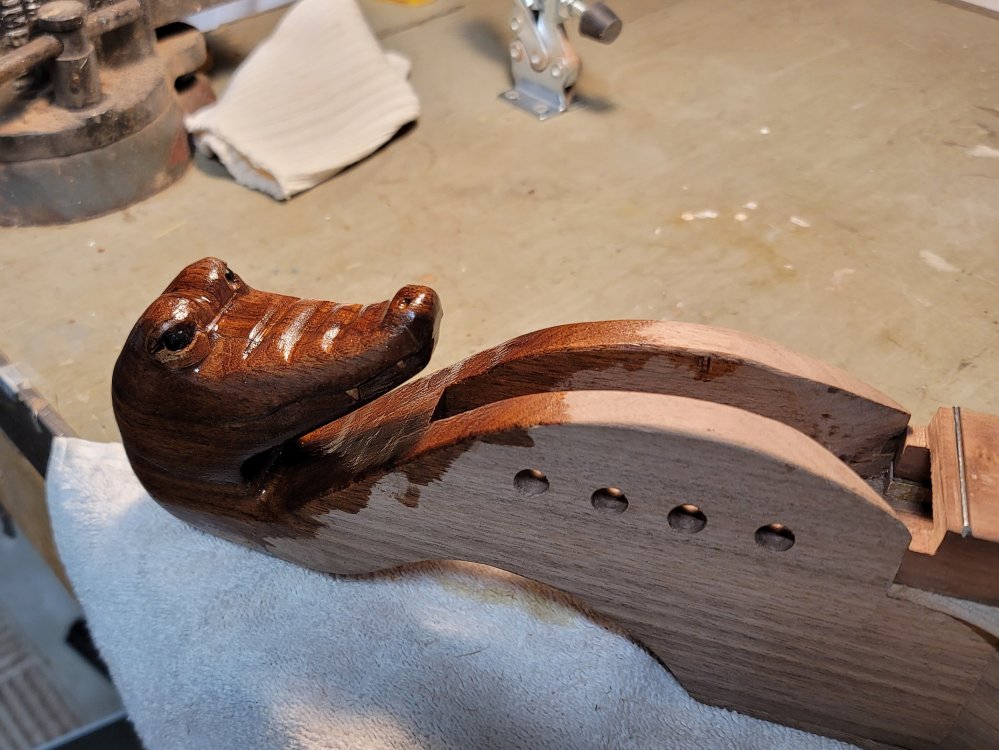
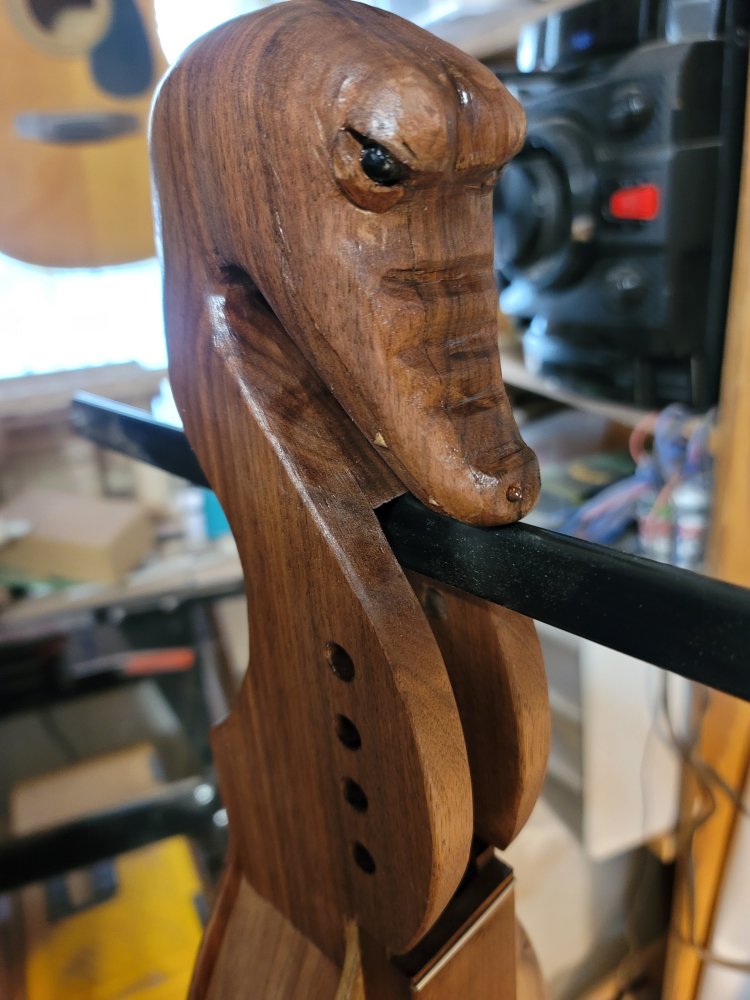
It was time to go back and finish the peghead. The mouth pattern lined up perfectly with one of the pictures I had. The trick was to duplicate both sides exactly. After sketching out the mouth on paper, I attached it to each side of the snout and poked holes along the pattern, including the couple of teeth I wanted to include on each side. The teeth were made from scrap walnut heartwood and were mounted after carving out the lower jaw. I then lowered the nose just a tad and added nostrils.
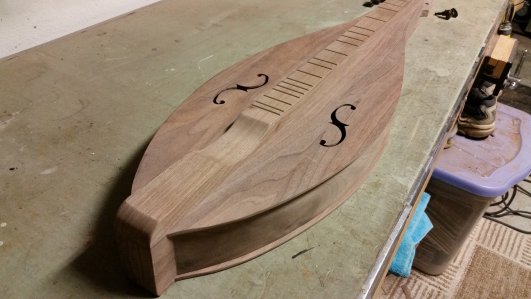
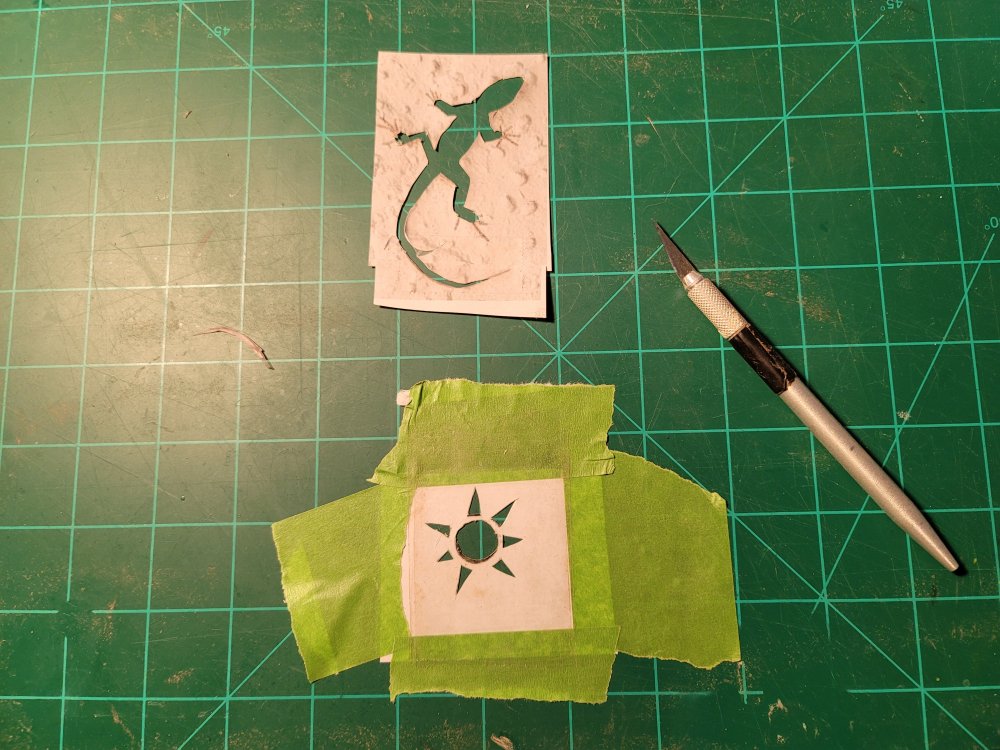
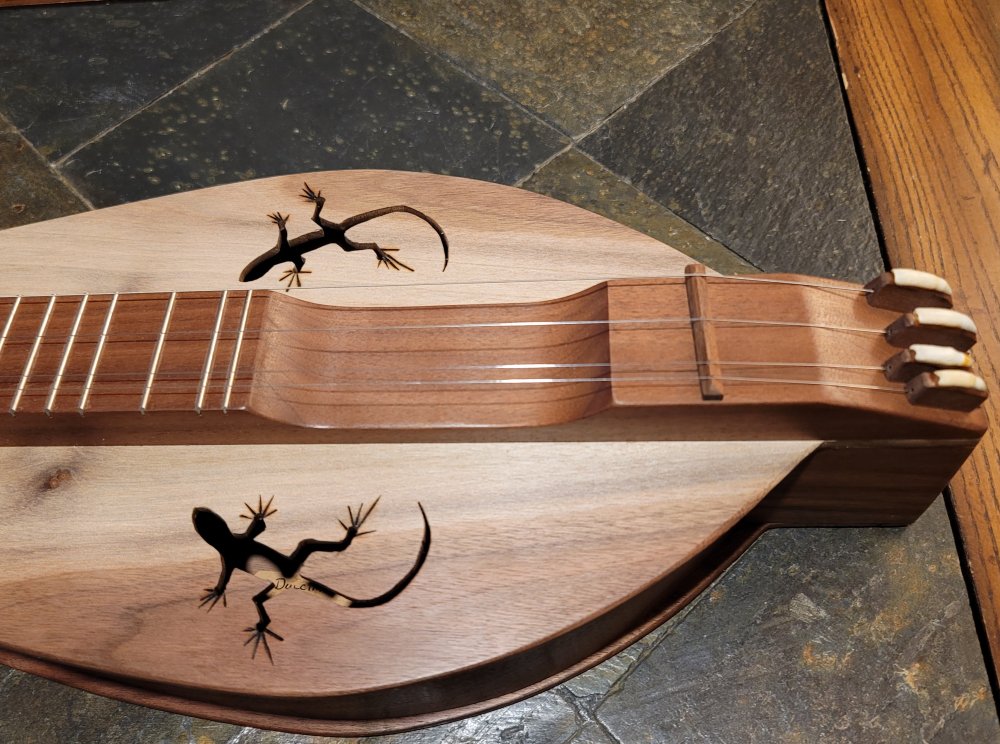
The lizard soundholes were taken directly from the photograph. Oddly enough, it is almost the exact size of the small lizard on the wall. The stylized sun is a smaller version of one I used on a bass dulcimer.
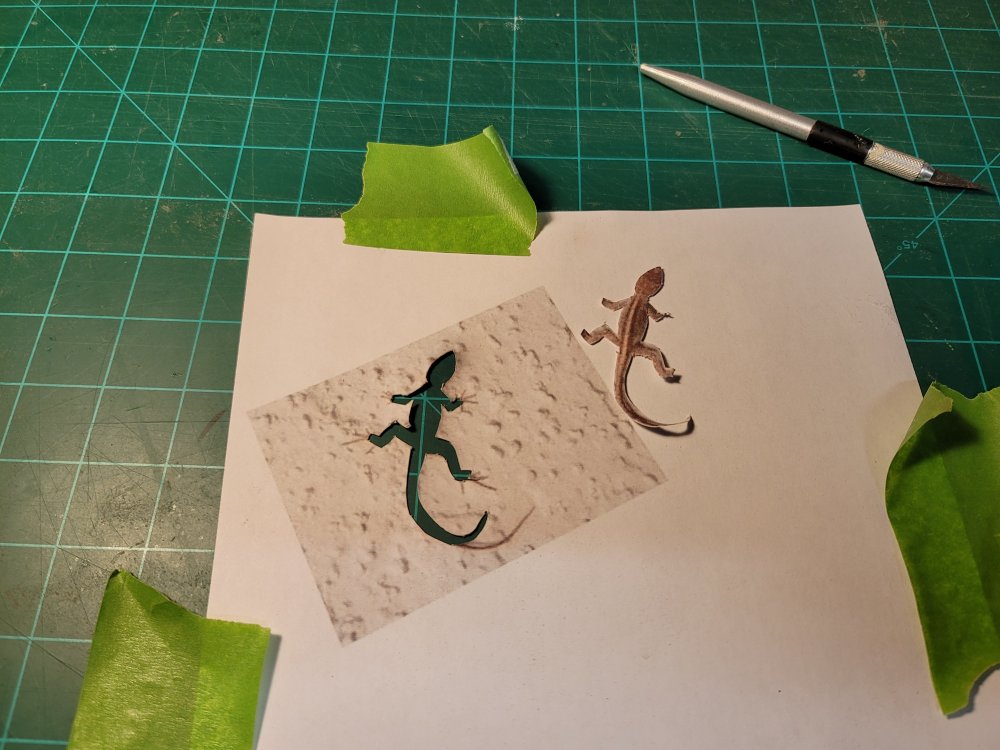
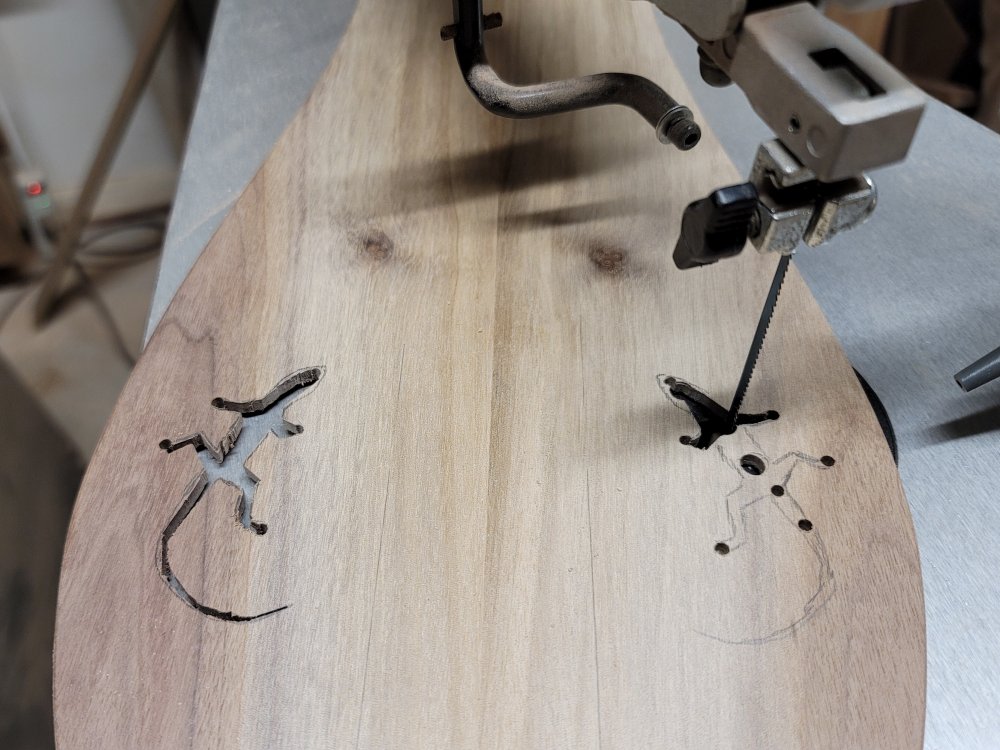
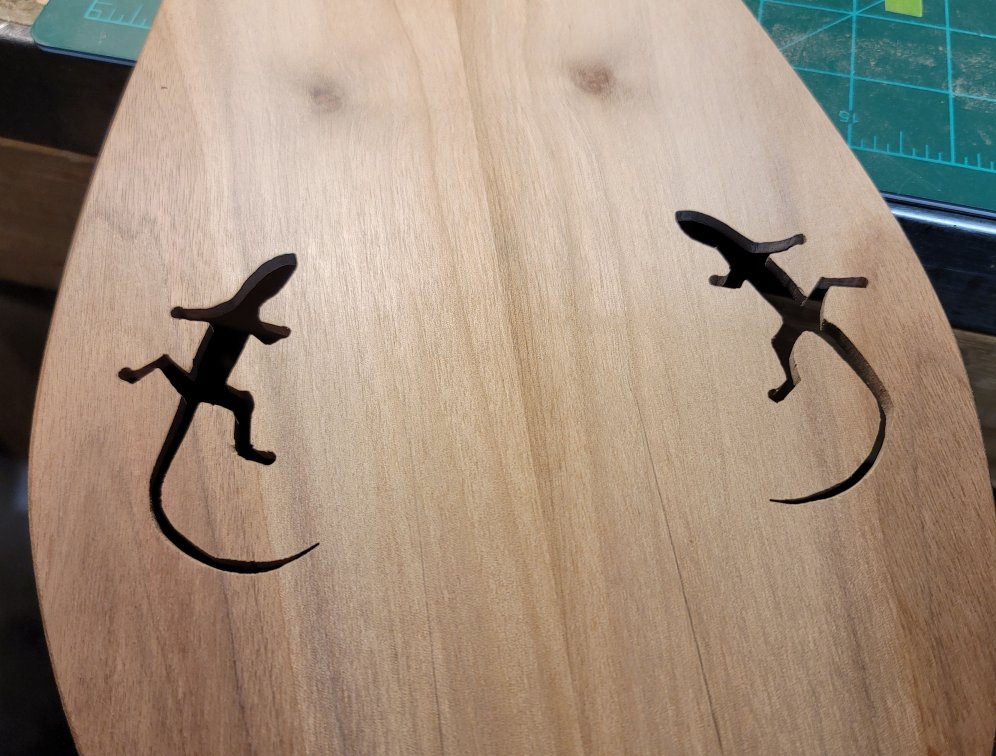
To cut the sound holes, I transferred the designs onto the top, ensuring that the holes were mirror images of each side. I then used a scroll saw to rough out the holes.
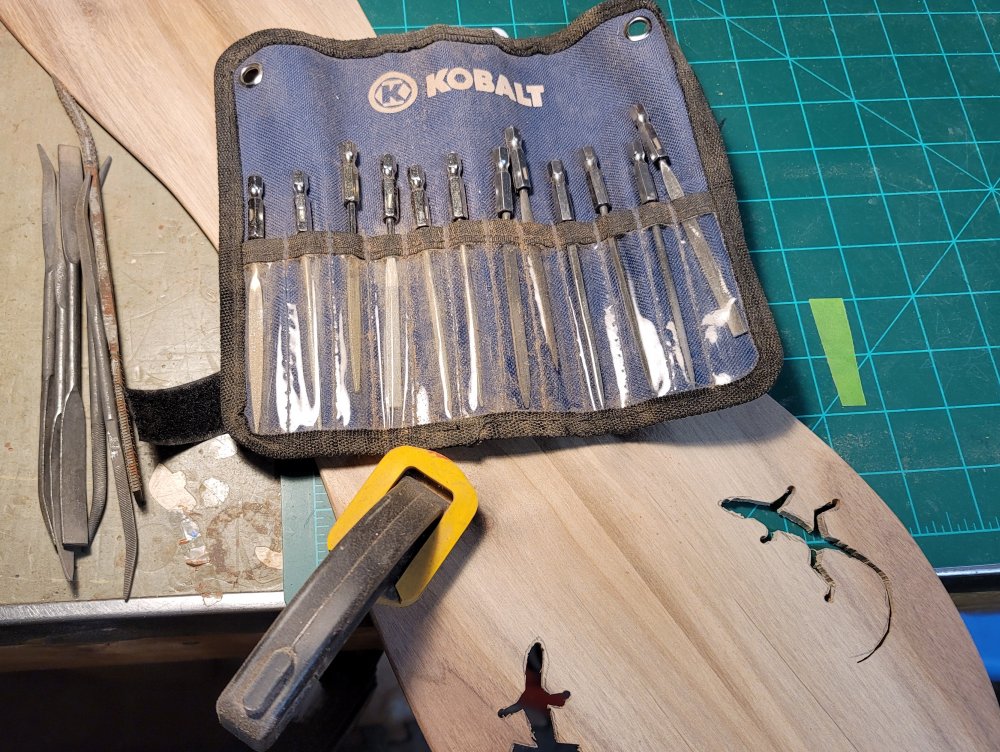
I then used small razor files and sandpaper to finish the lizard holes.
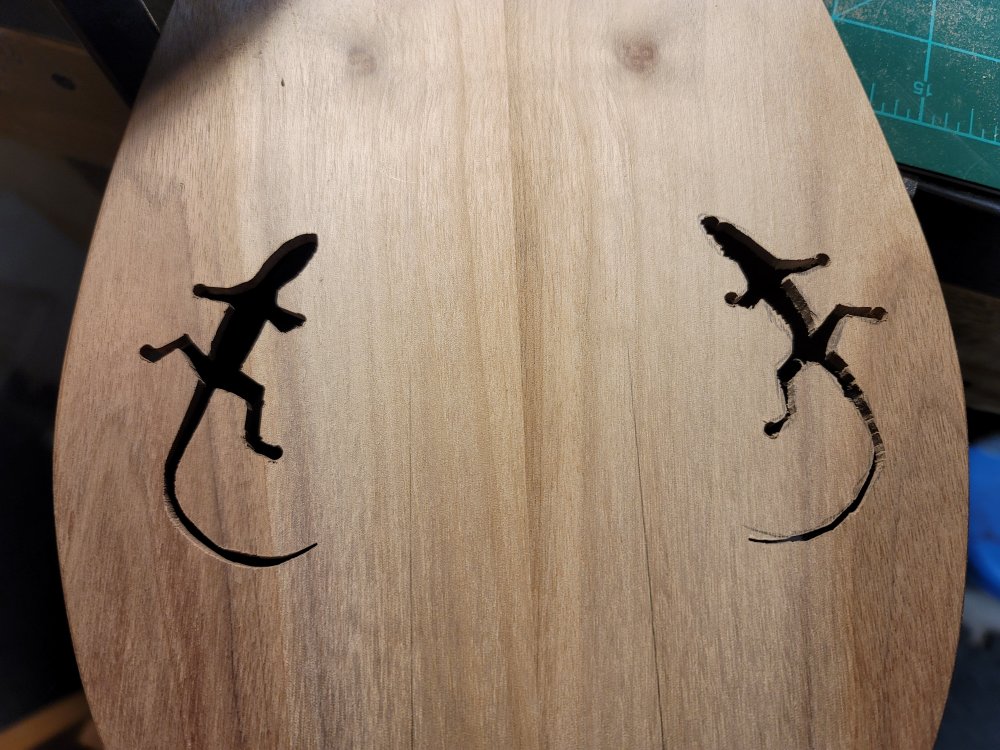
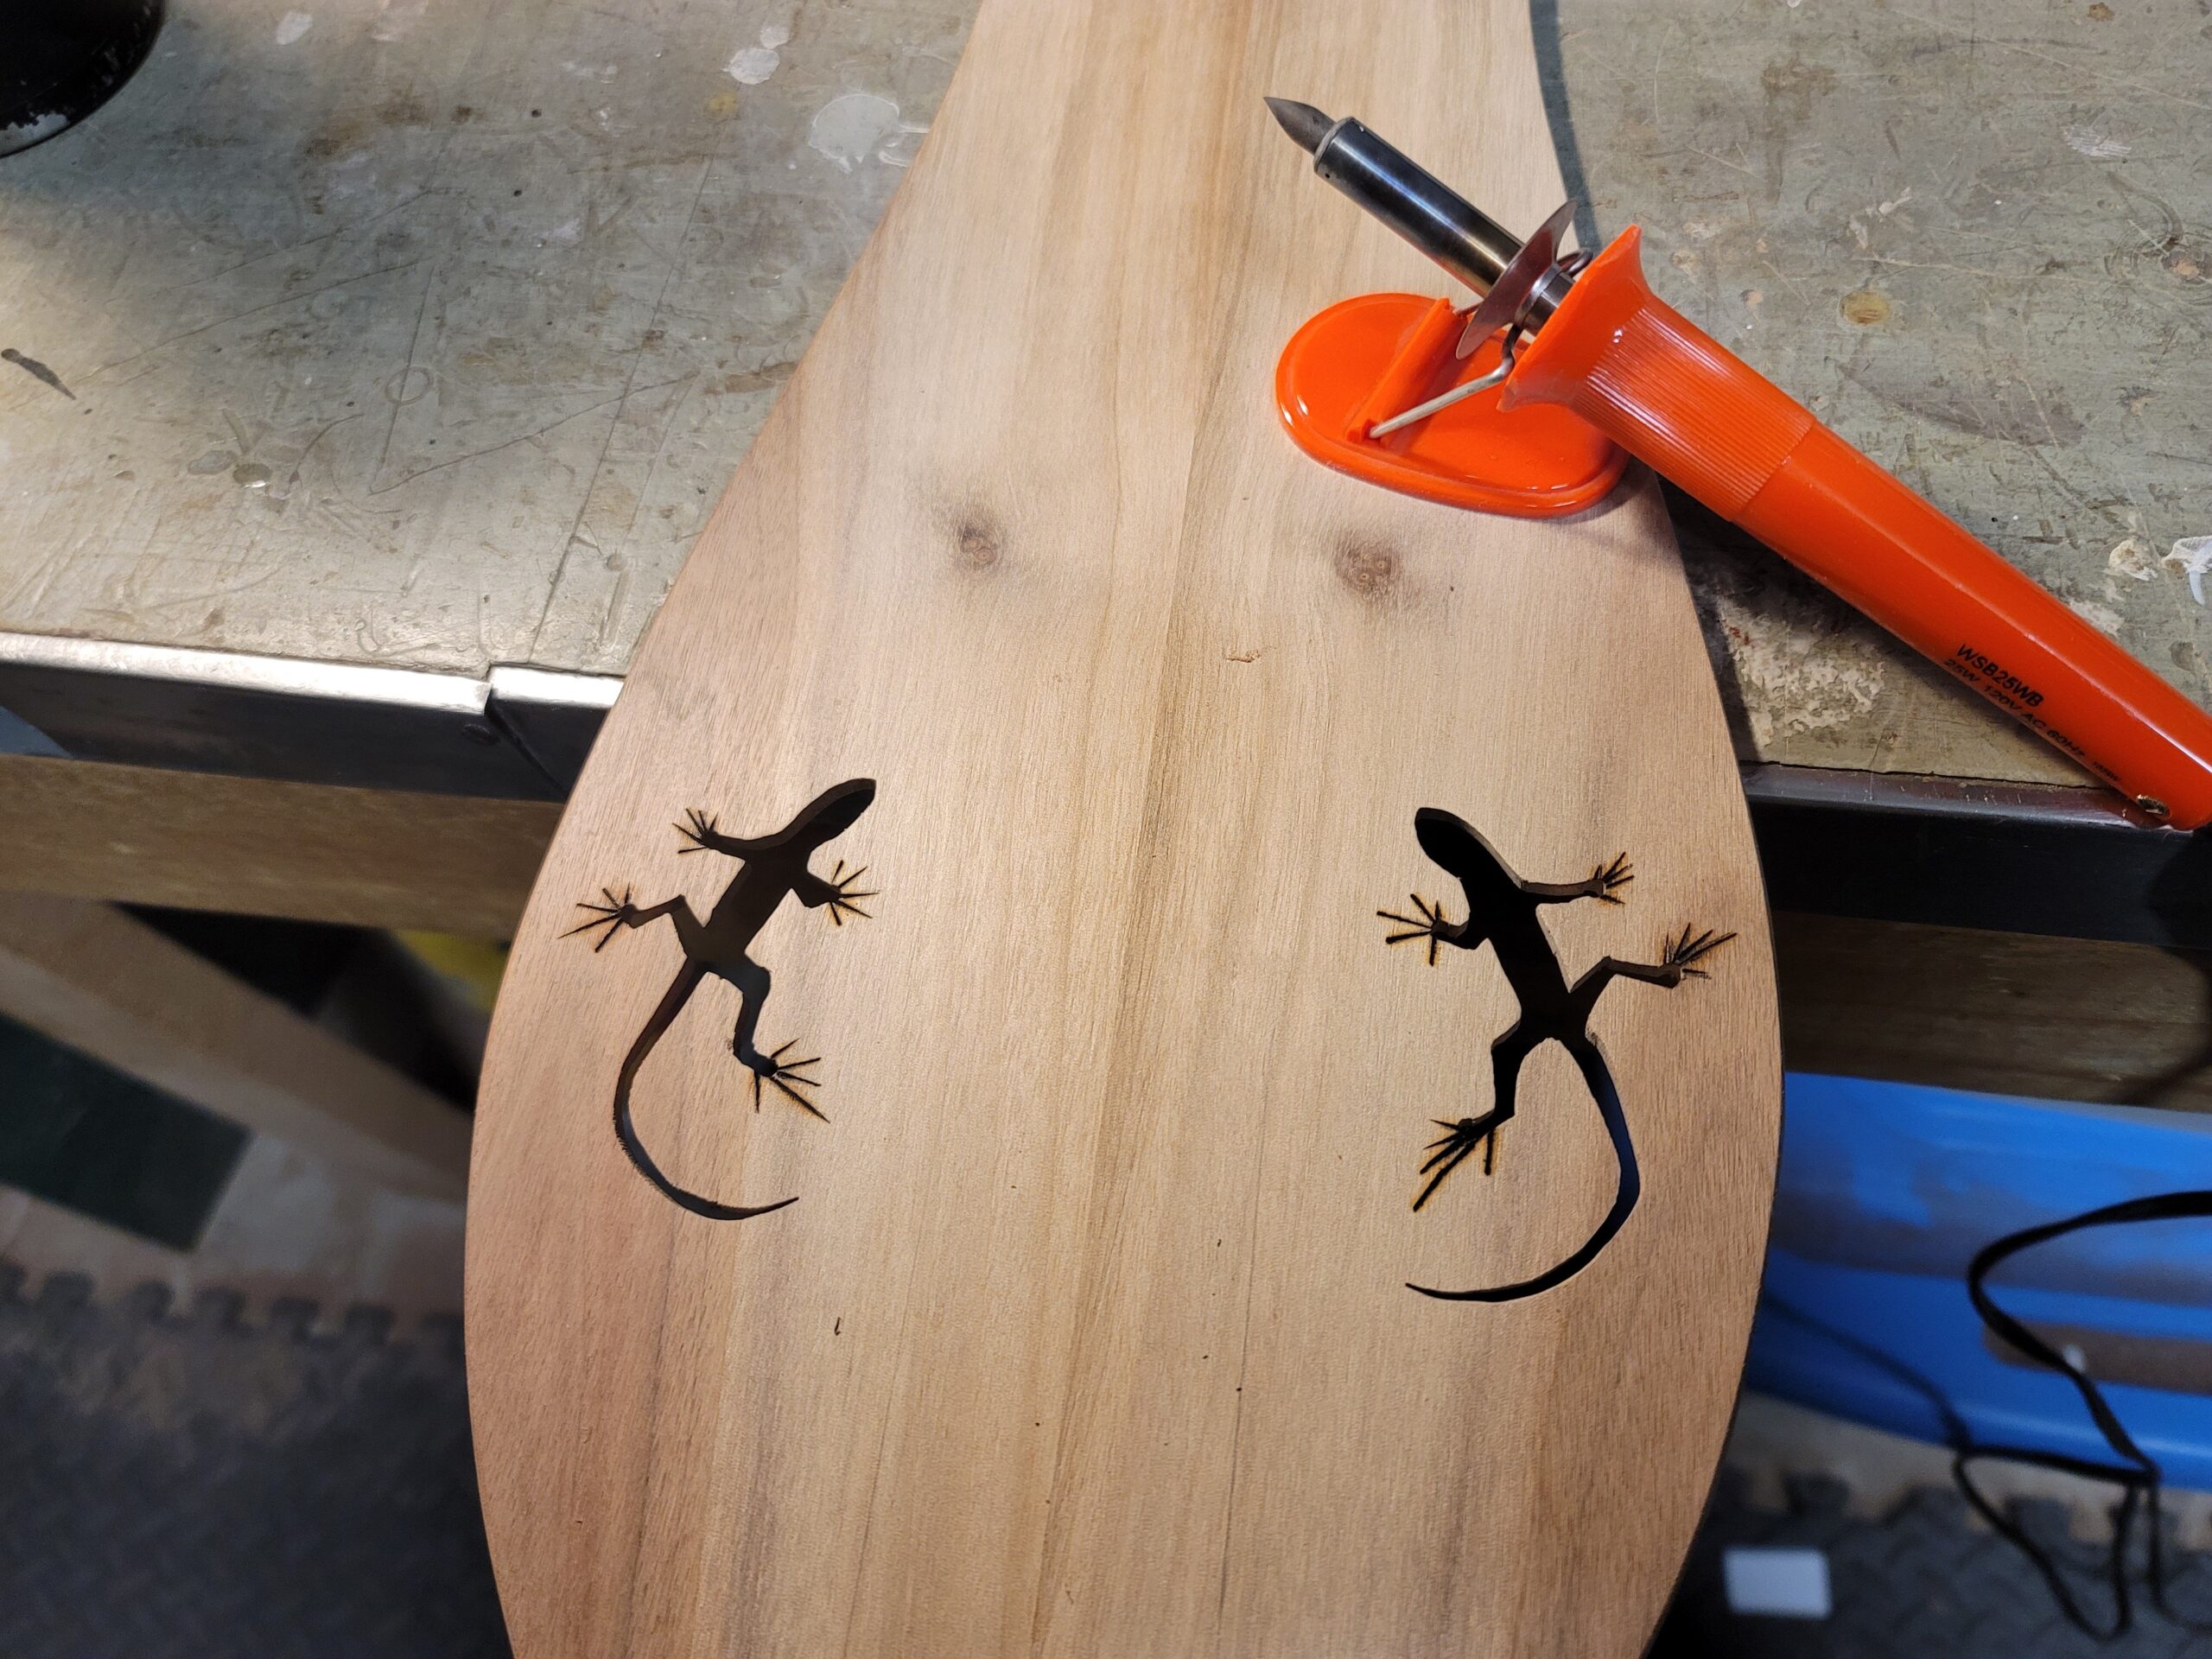
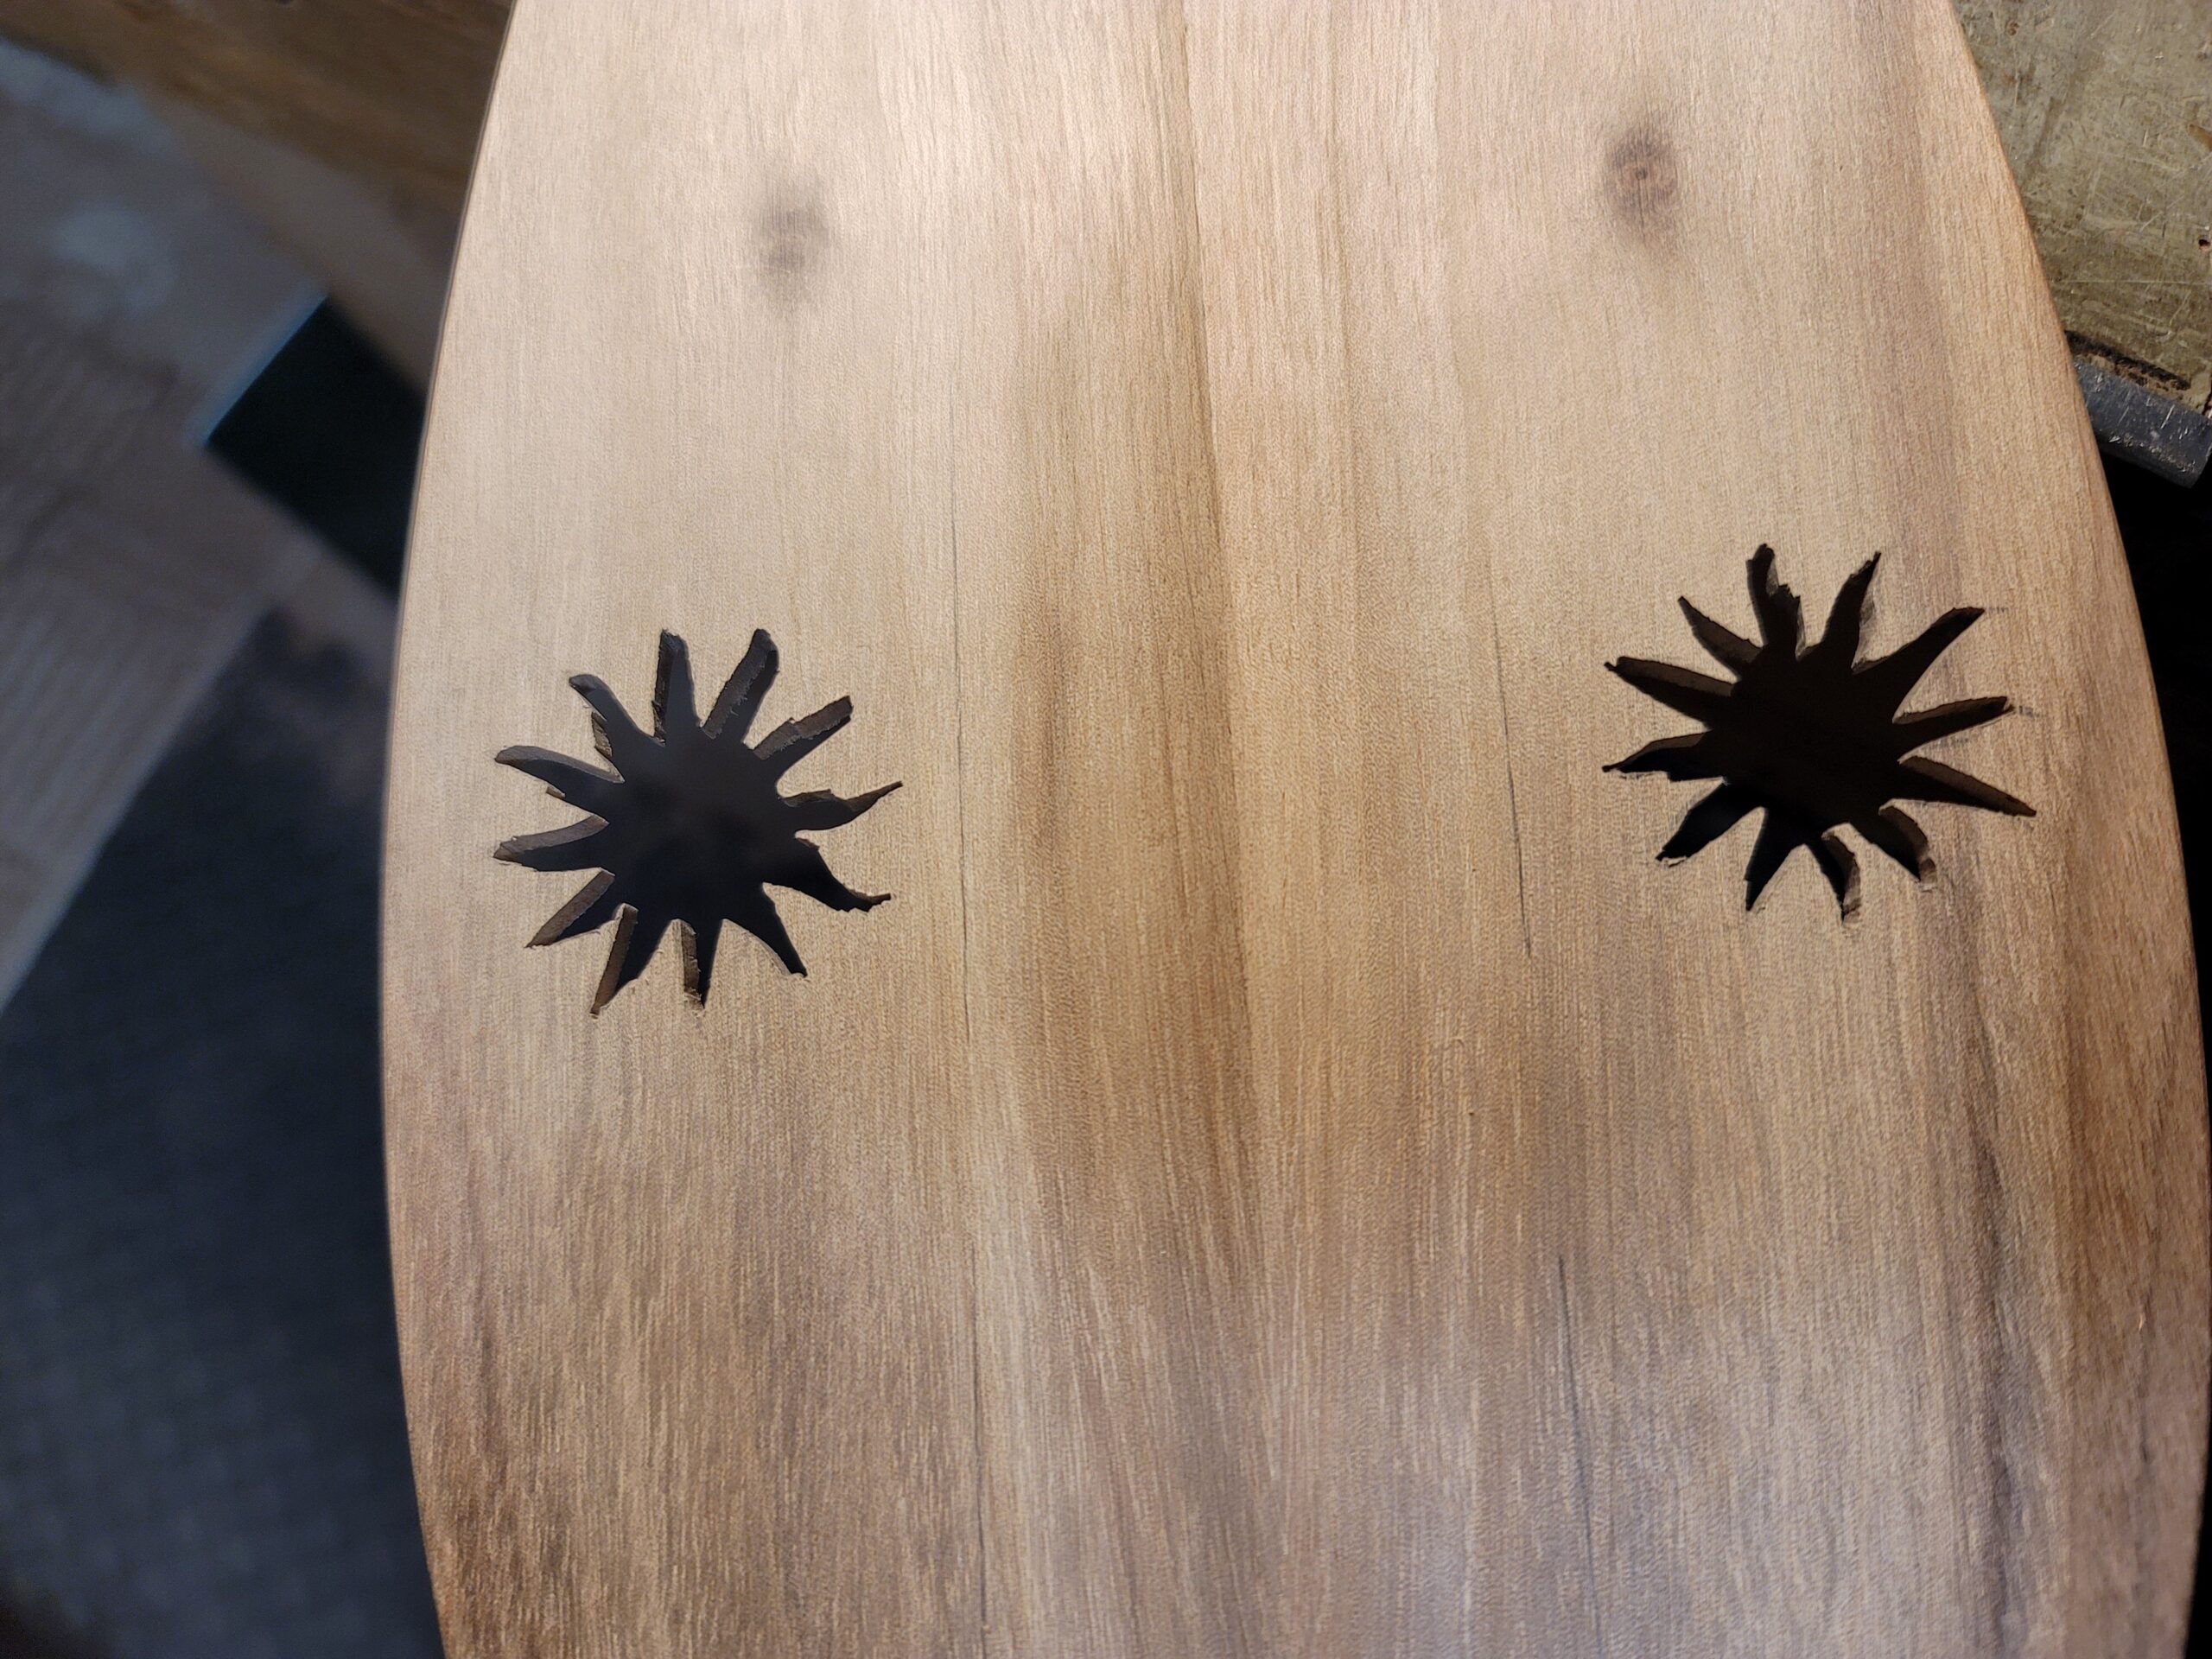
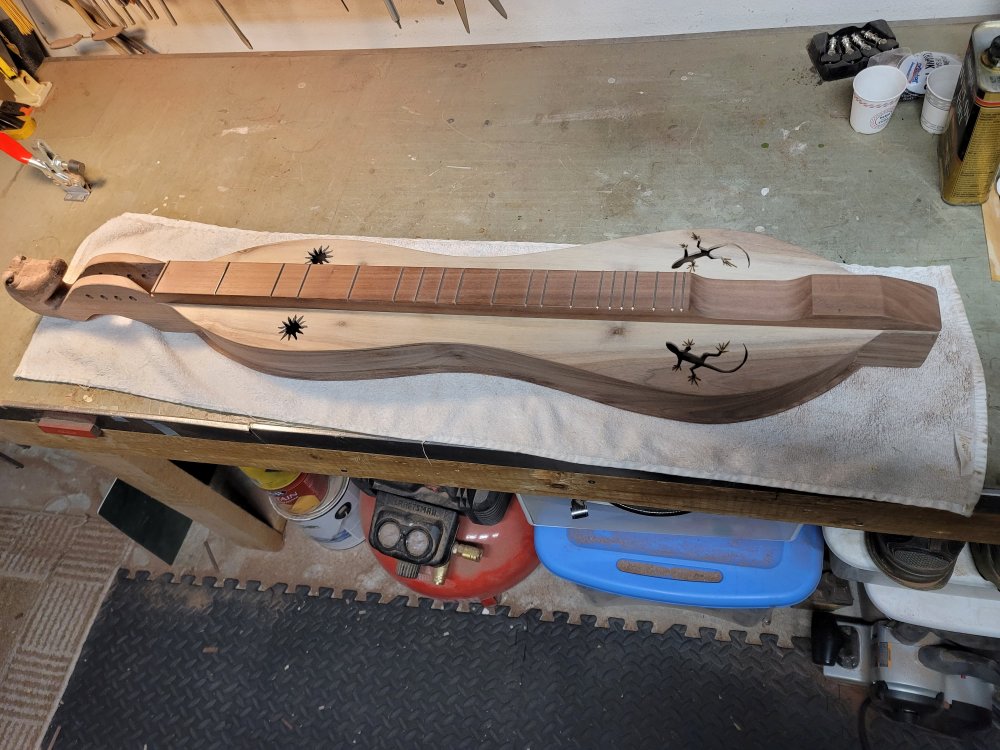
I decided to finish the lizards by woodburning the feet. This will ensure that the design wouldn’t be weakened by too many cuts. I also had to redesign the sun sound holes because I could not get the scrollsaw to fit into the tiny holes of the previous design. After shaping the suns with the razor files and cutting out the fretboard channel, the top was complete.
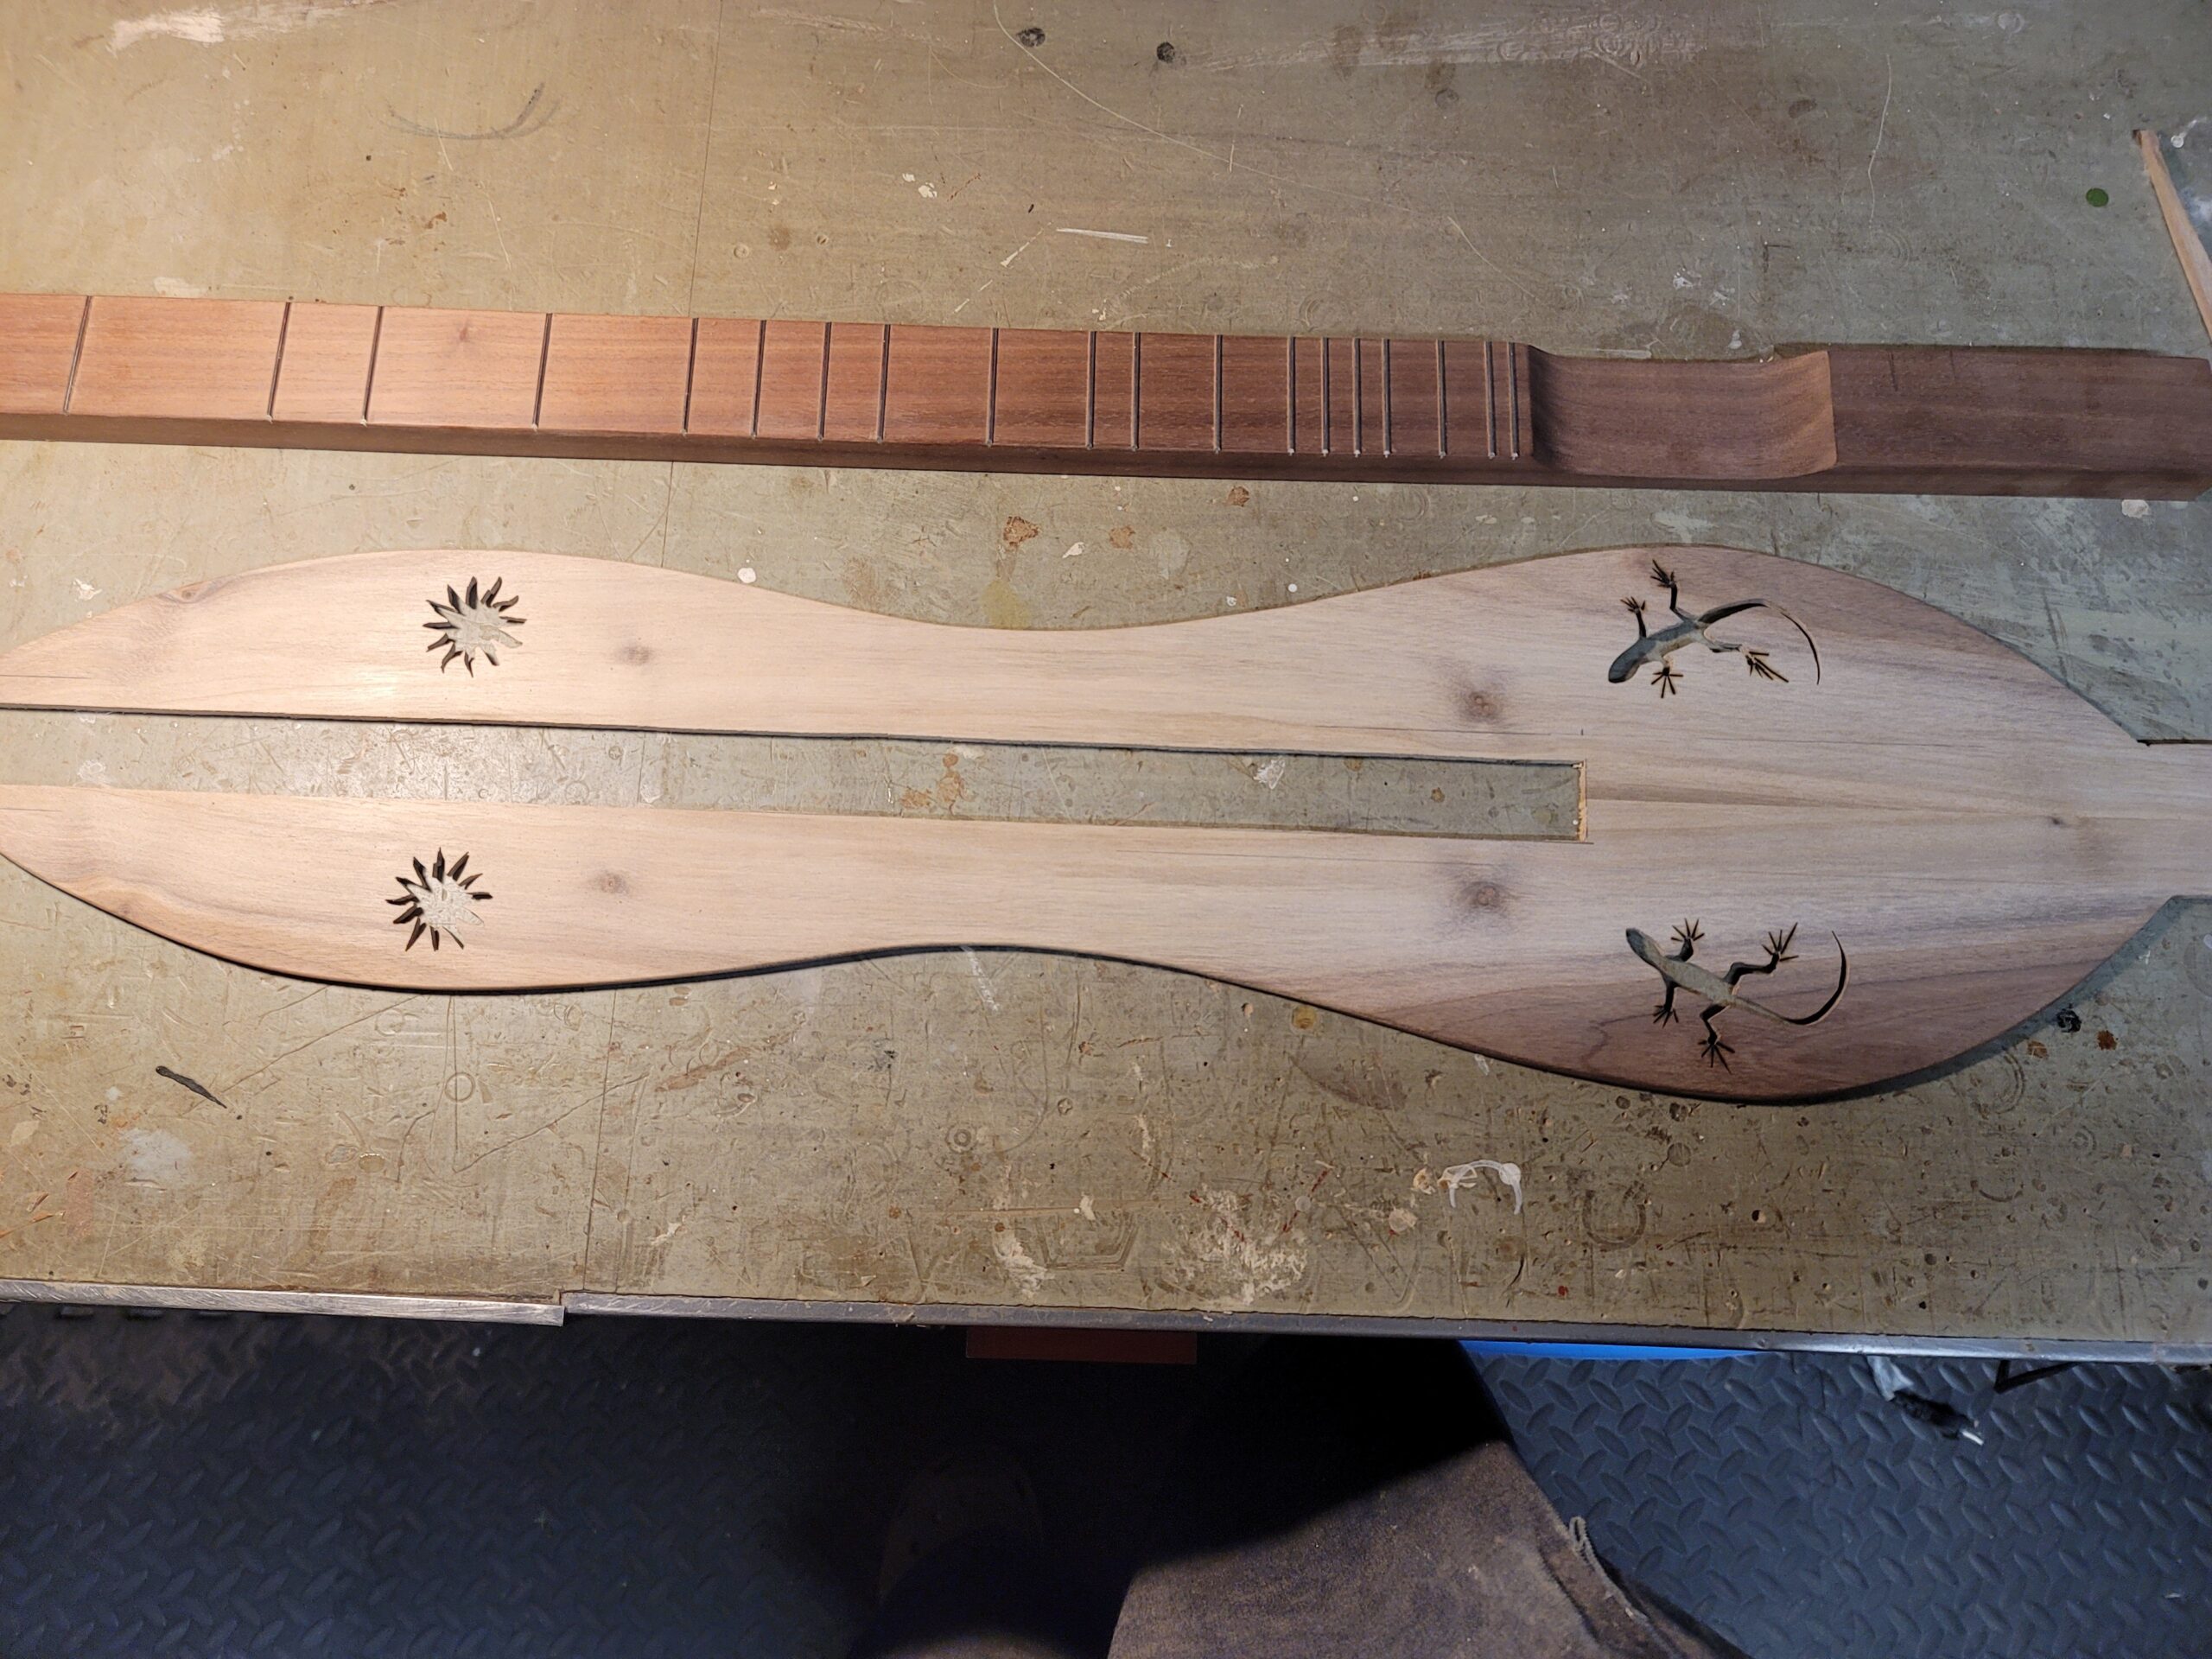
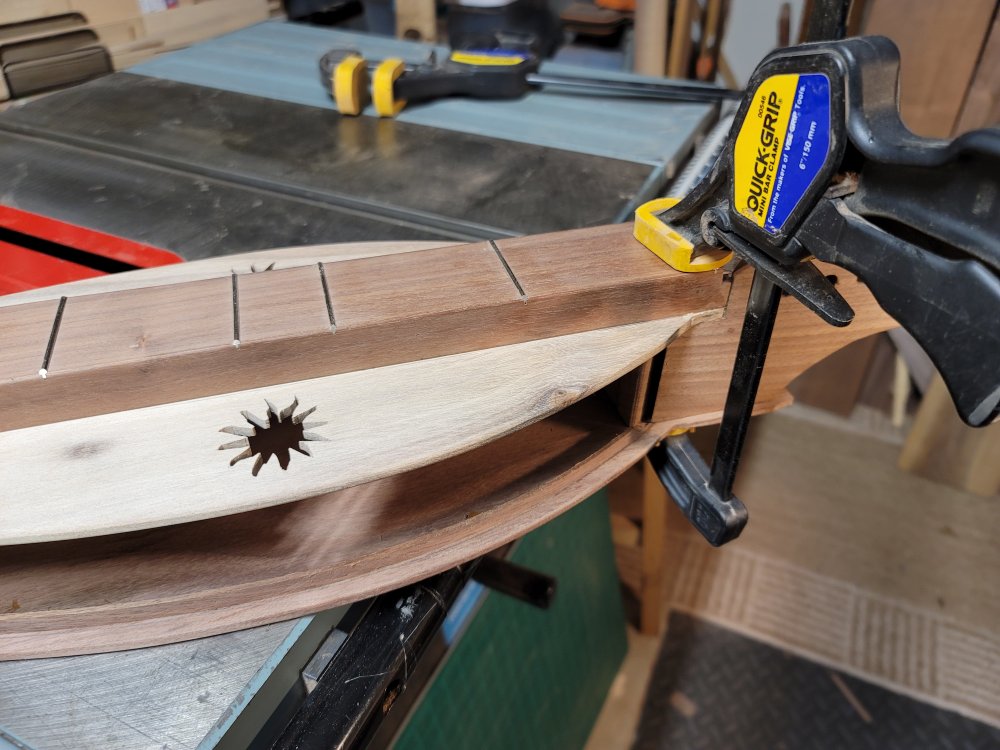
I then glued down the fretboard on the top using a jig I made many years ago. The next step was to glue down thin strips of walnut as a gluing flange for the side pieces. I have always liked the top and back to extend over the sides about 5 mm.
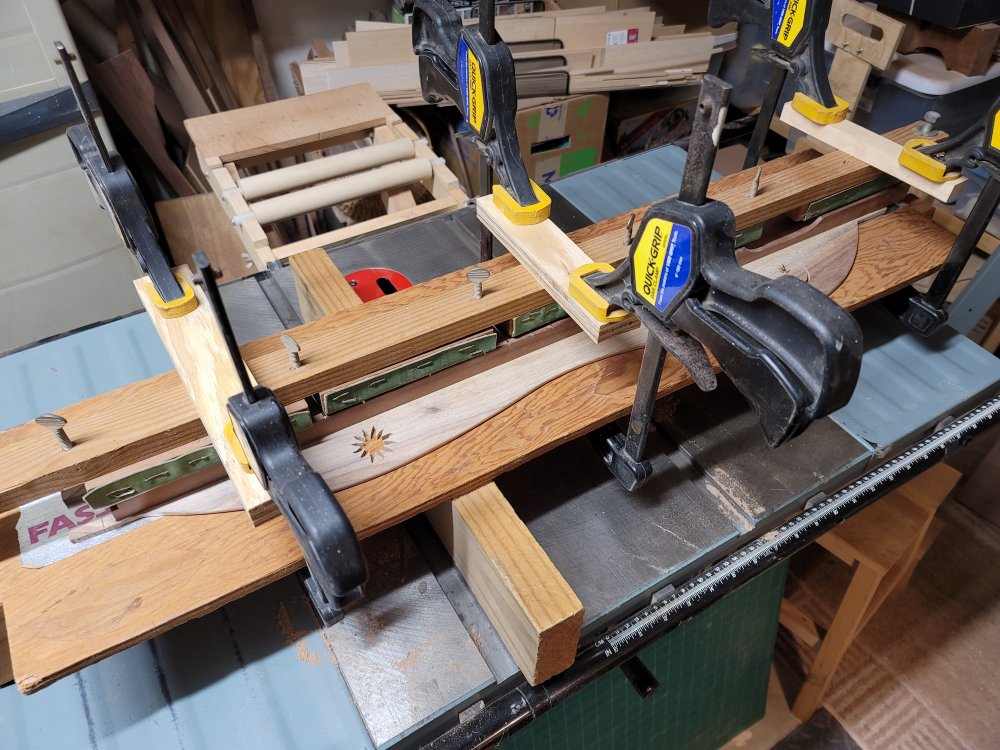

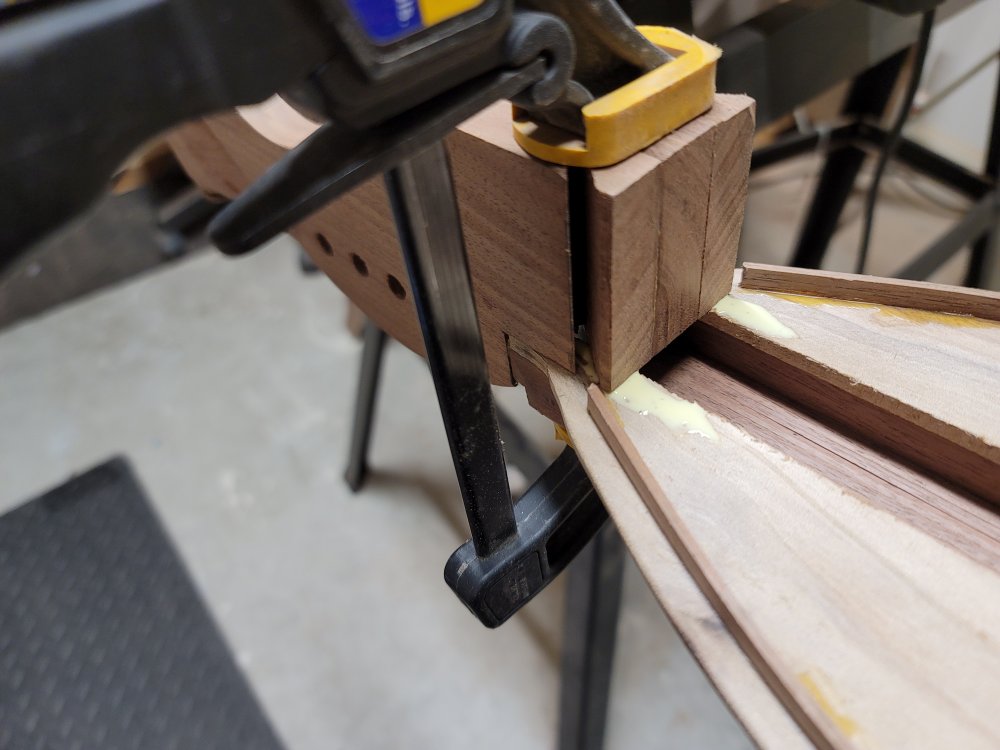
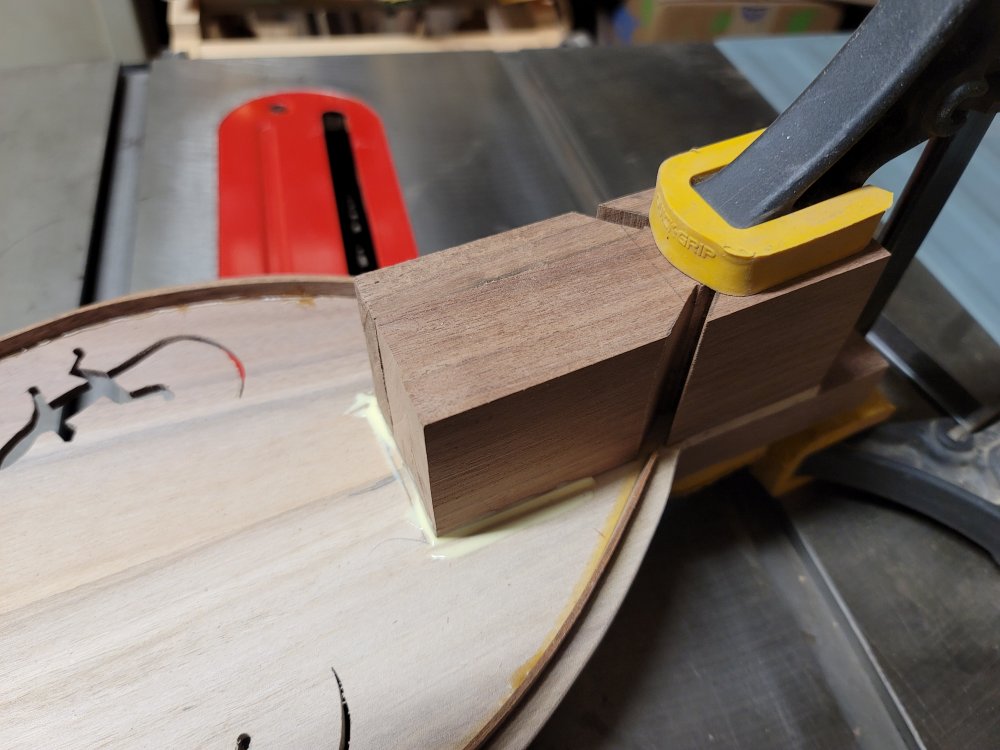
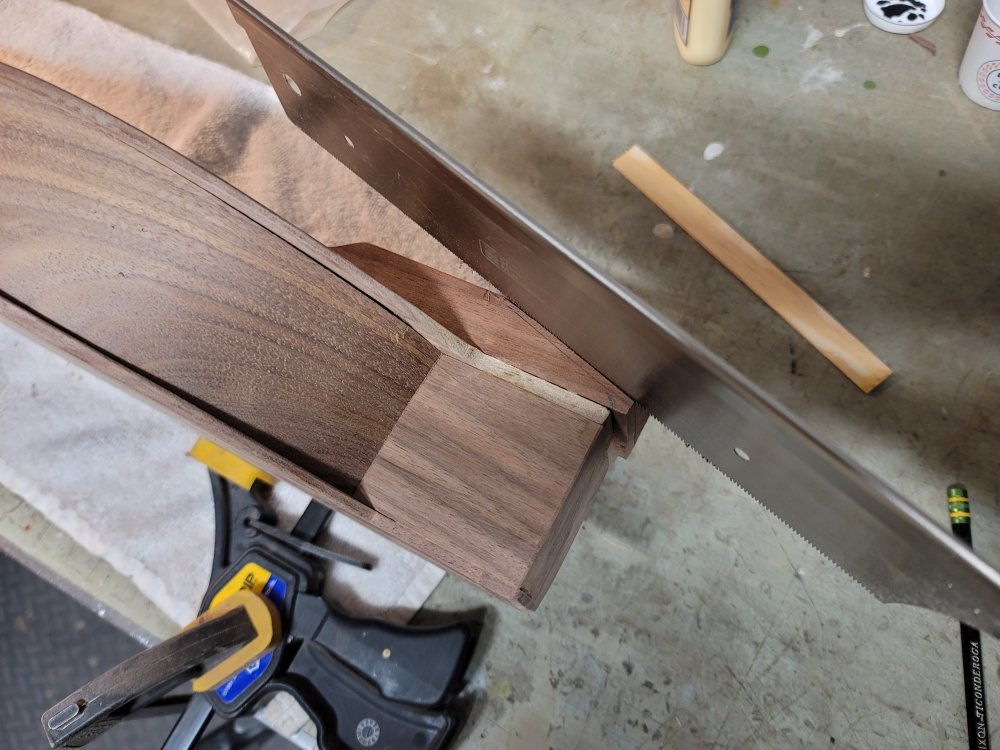
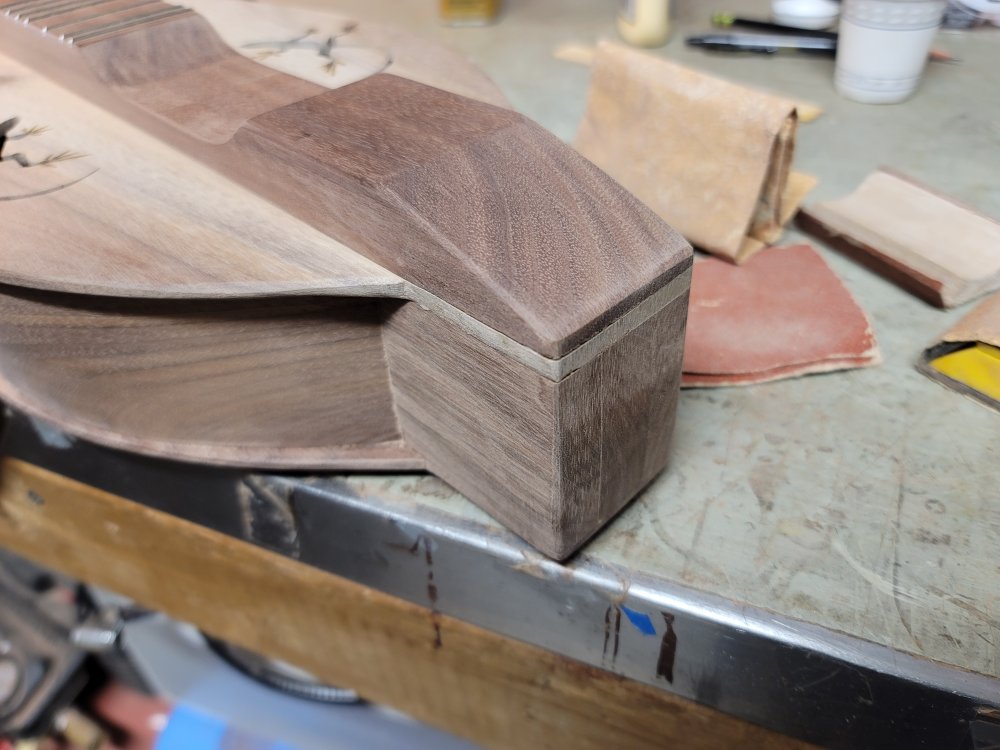
I cut slots in the peghead and tail stock to accept the side pieces, and glued them in place on the top.
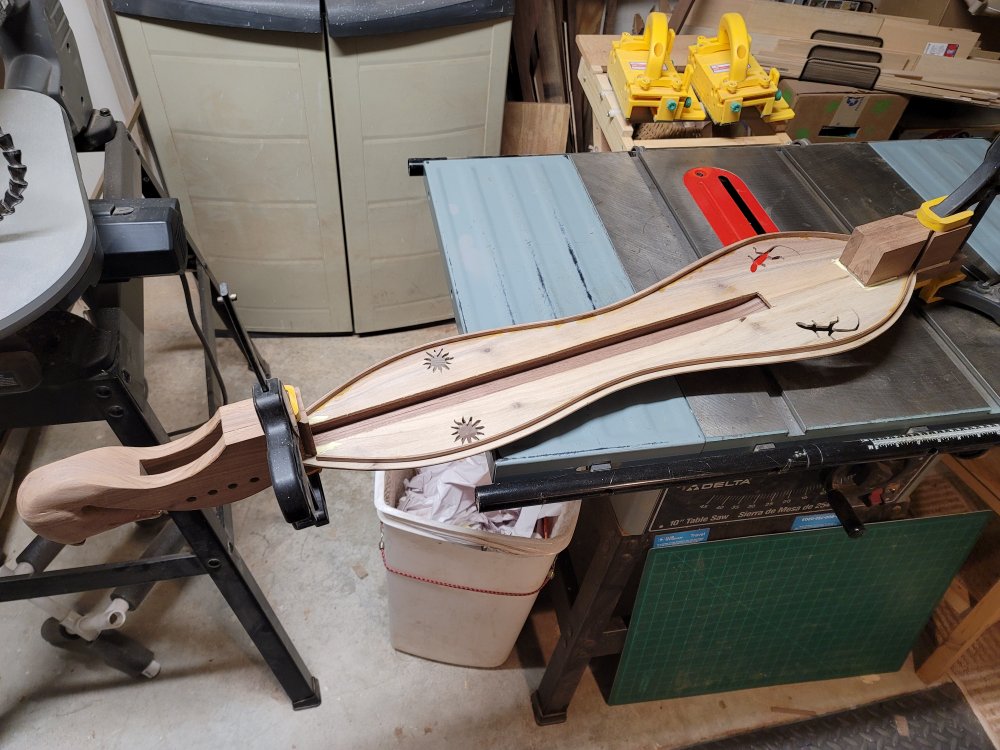
I then matched it up with the back piece.
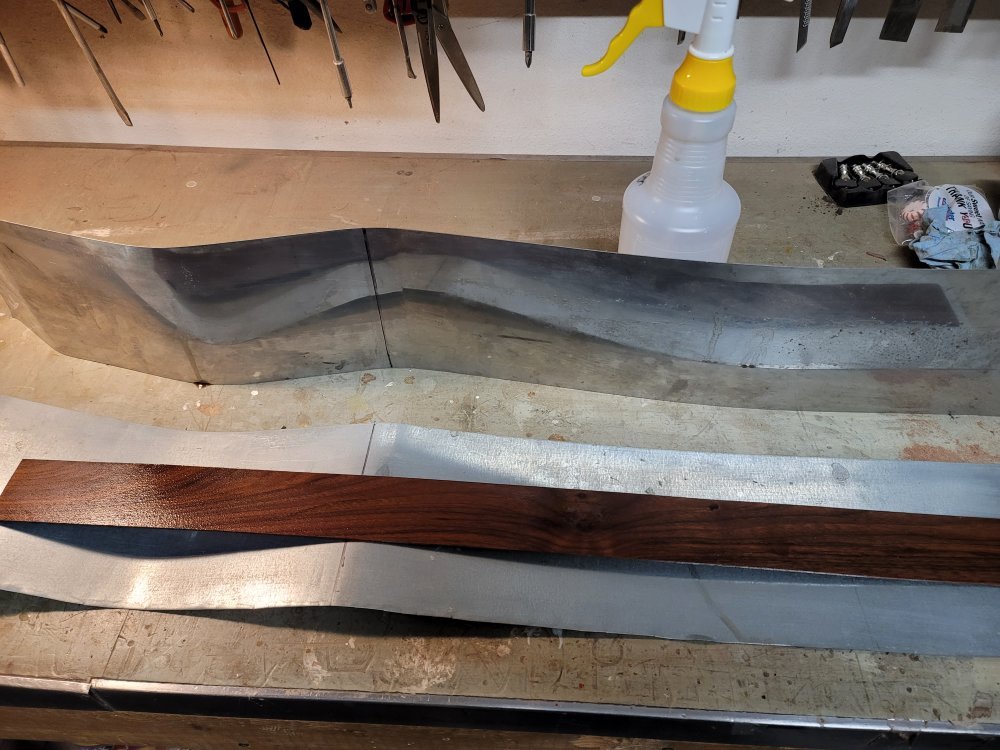
The side pieces had been resawn from the same board, so they are bookmatched just like the top and back. I first needed to thin them down to be able to bend them easily. For this, I employed a belt sander with increasingly finer grade sandpaper. I then used masking tape to trace the path of the sides along the gluing strips from slot to slot. This gave me the exact length of each side and I cut each side accordingly. I worked on the left side first, using my traditional bending method. I boiled water in a kettle and gently but firmly made the needed bends in the resulting steam. While it was still warm and pliable, I added glue to the strips and clamped the side in place using homemade violin clamps.

For the right side, I decided to experiment a little. Several months ago, I acquired several handmade bending jigs for constructing guitars, ukeleles, and mandolins. I decided that some of the bends on the guitar jig was similar to the bends that I could use for the dulcimer side. I just had to figure out how to use it. Some websites and a couple of YouTube videos were helpful. After cleaning up the jig (it apparently hadn’t been used in a while), I dampened both sides of the side piece and sandwiched it between the metal sheets provided. I then clamped it partially into place, not wanting the severe bend needed for a guitar, and plugged it in.
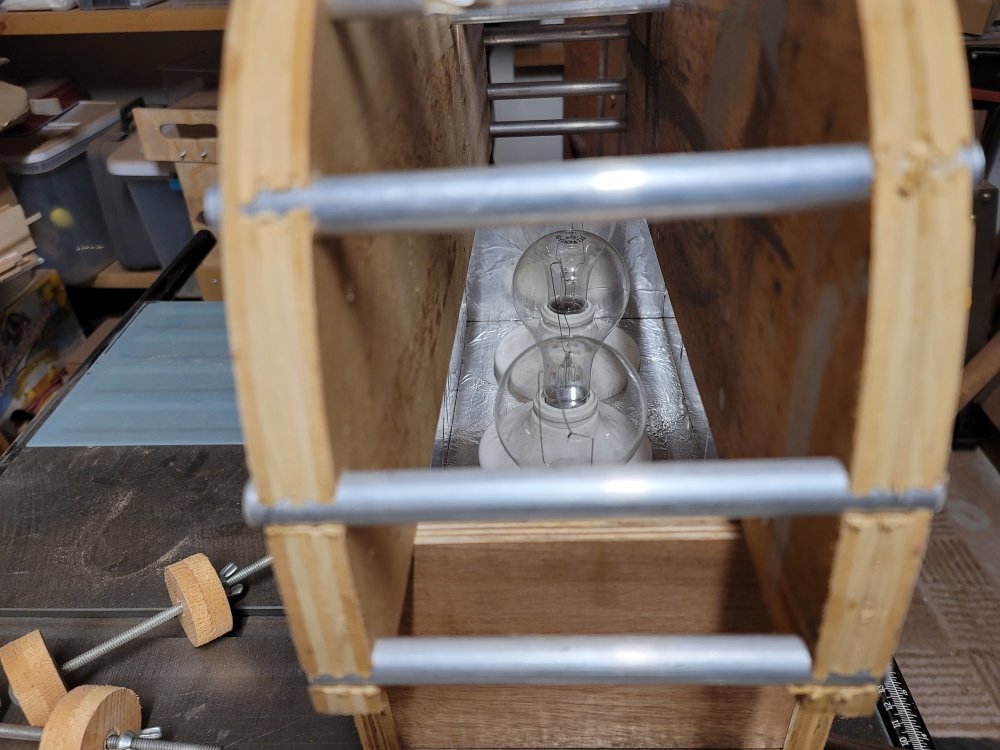
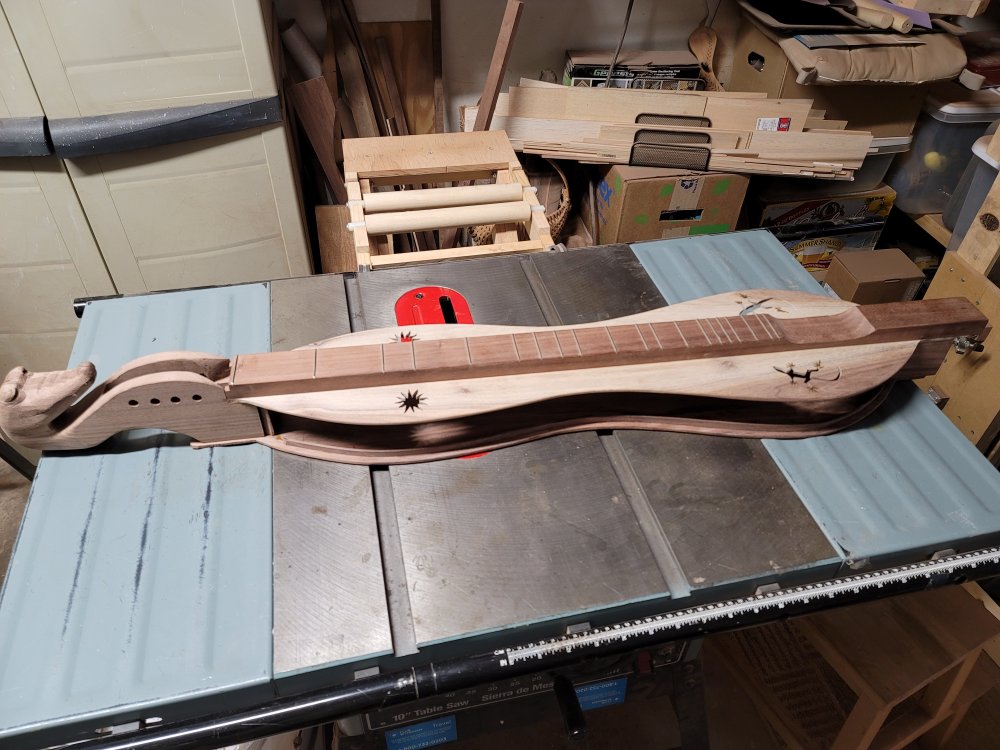
The three 150 Watt bulbs heated the side pretty quickly. It was ready in about 20 minutes. One of the bends was in the wrong place so I had to fire up the kettle anyway to steam it into the proper shape. I have never had a side that retained it’s shape like that. I determined that I could re-create this jig for a dulcimer and get the exact bends I need. I used the clamps to secure the right side. The only thing left was to engineer the tail end of the dulcimer.

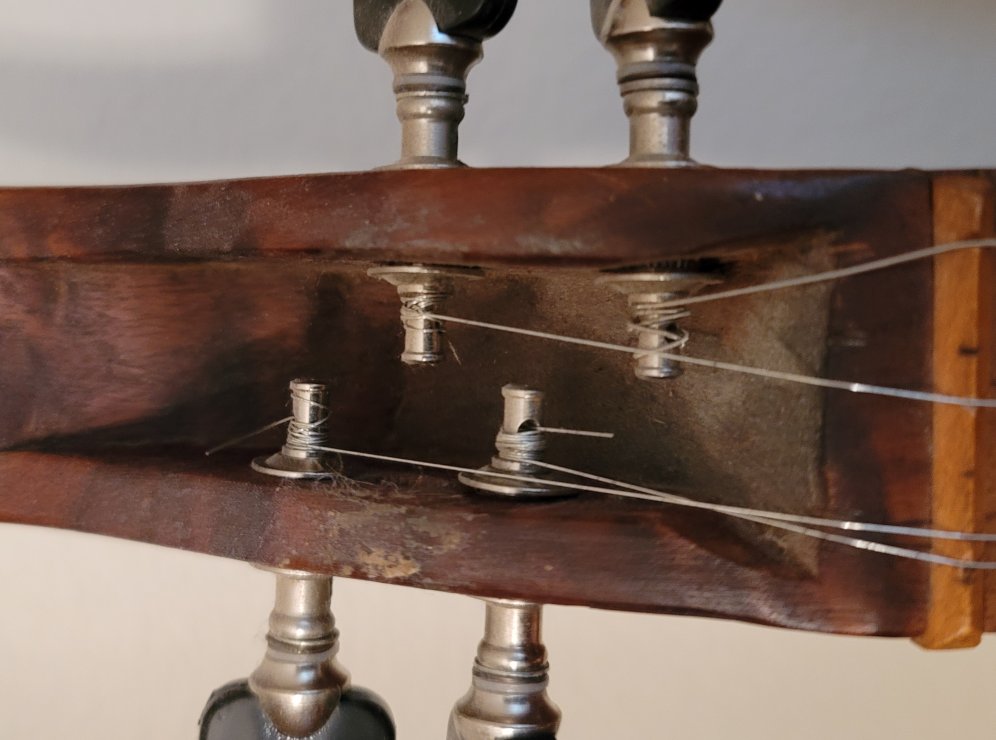
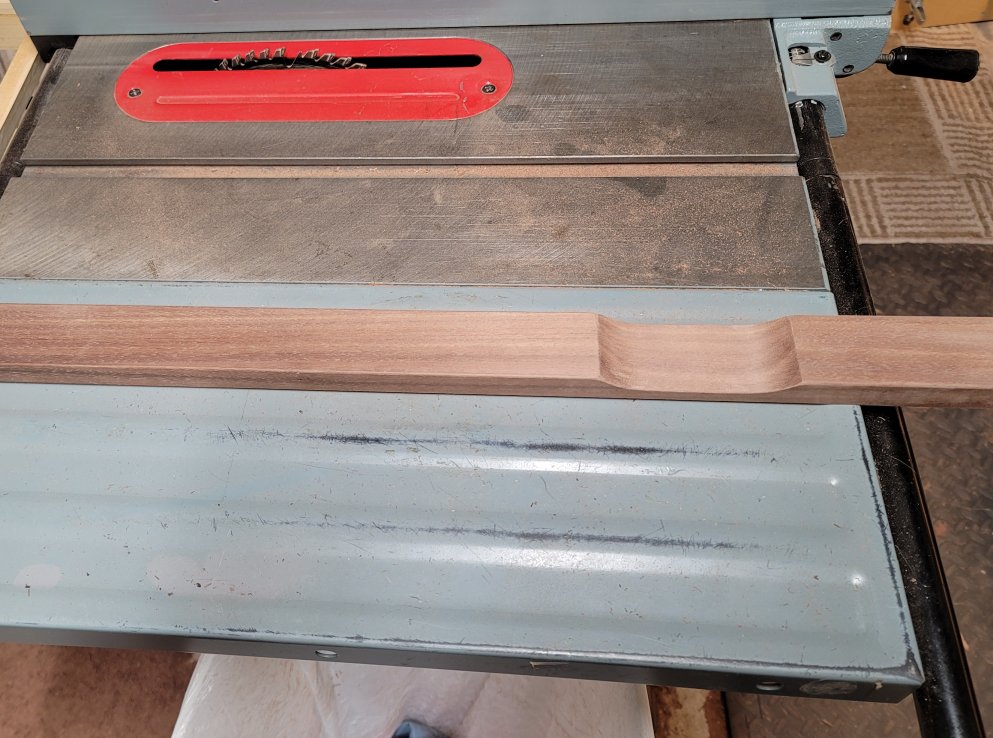
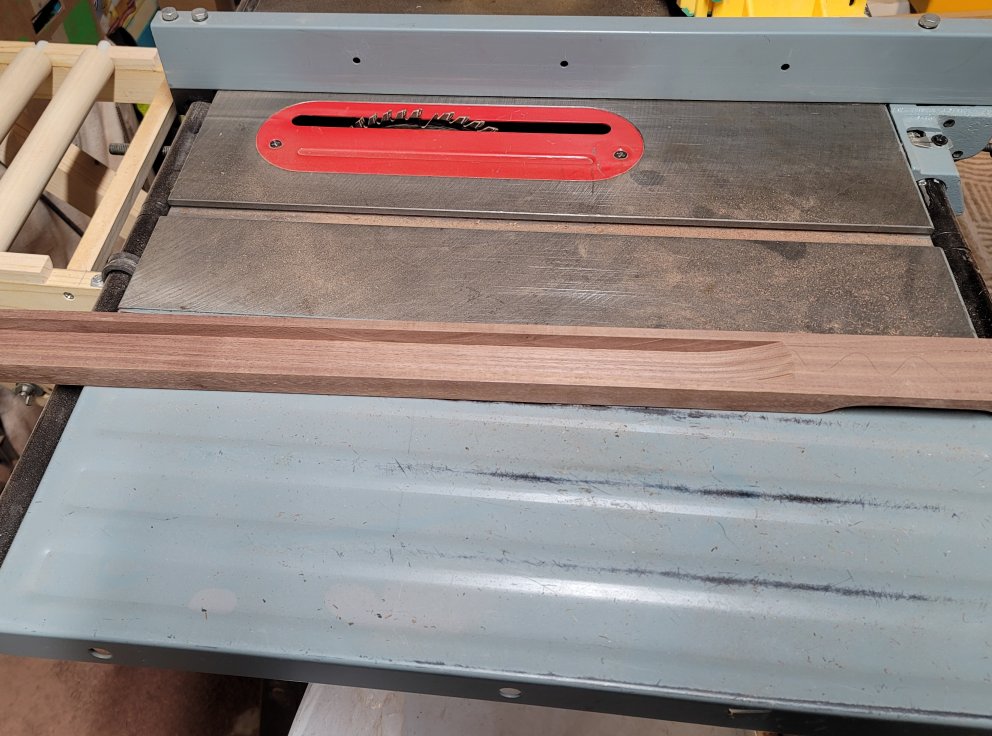
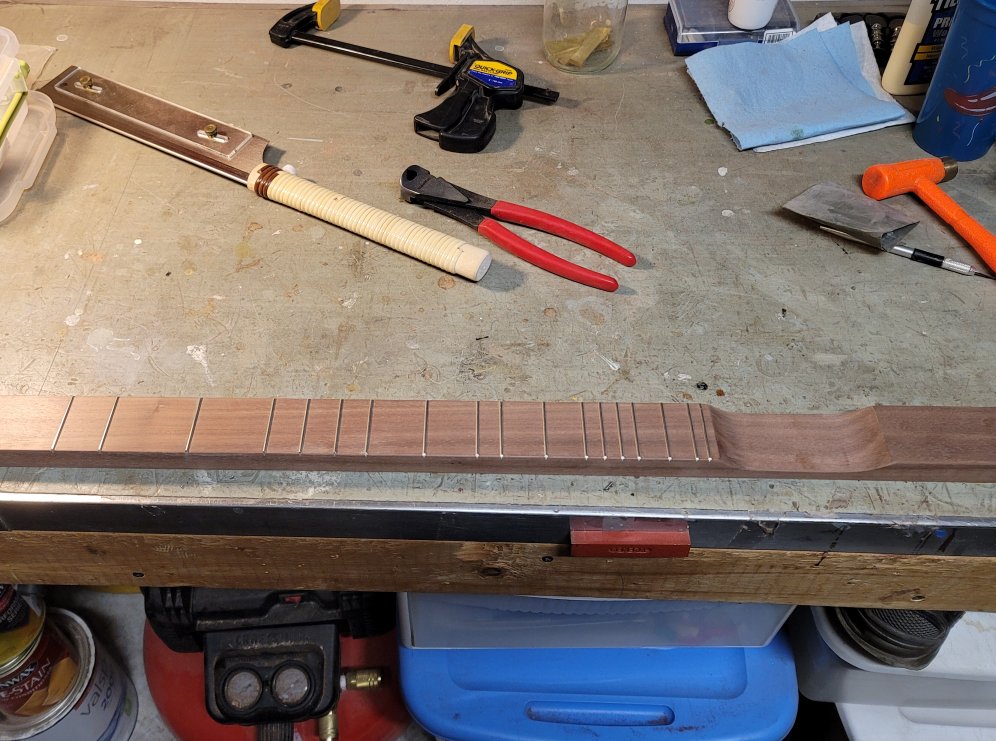
Since I am using friction pegs, I like to employ fine tuners on the other end. Many times when a dulcimer is slightly out of tune, the friction pegs can make it difficult to make small adjustments. (The fine tuners harken back to the days of playing cello — MANY days ago — with wooden pegs that necessitated the fine tuners). After making sure I allowed enough space for the floating bridge, it was a simple matter of adding a slope to the end of the fretboard. I did some touch up sanding to the end and the basic construction of Dulcimer #50 was complete.
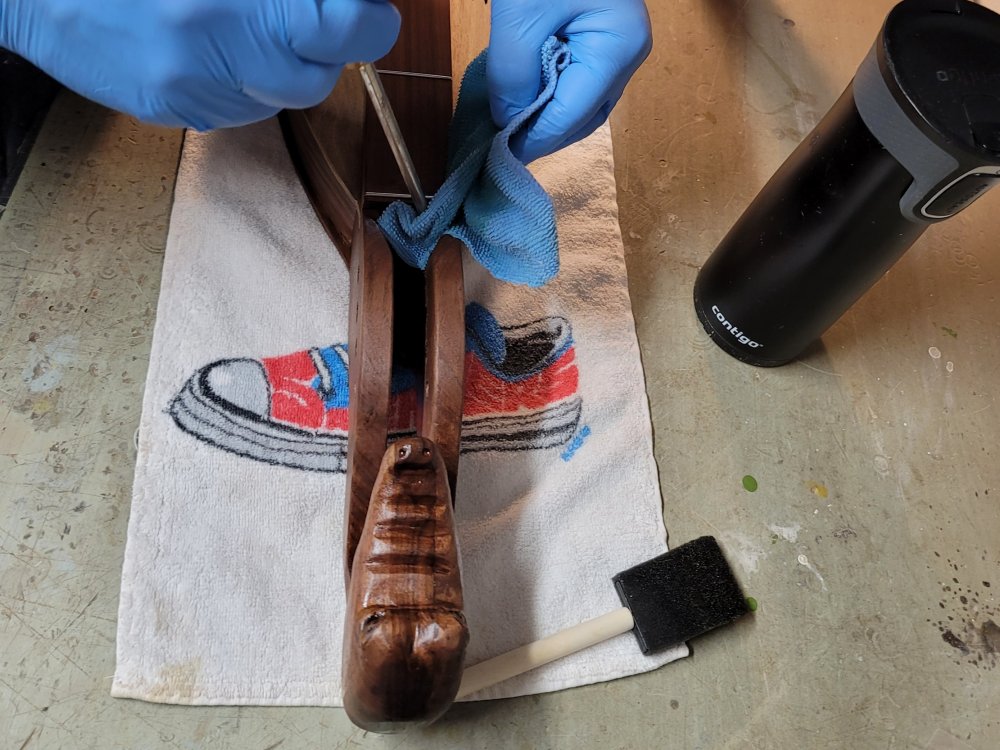
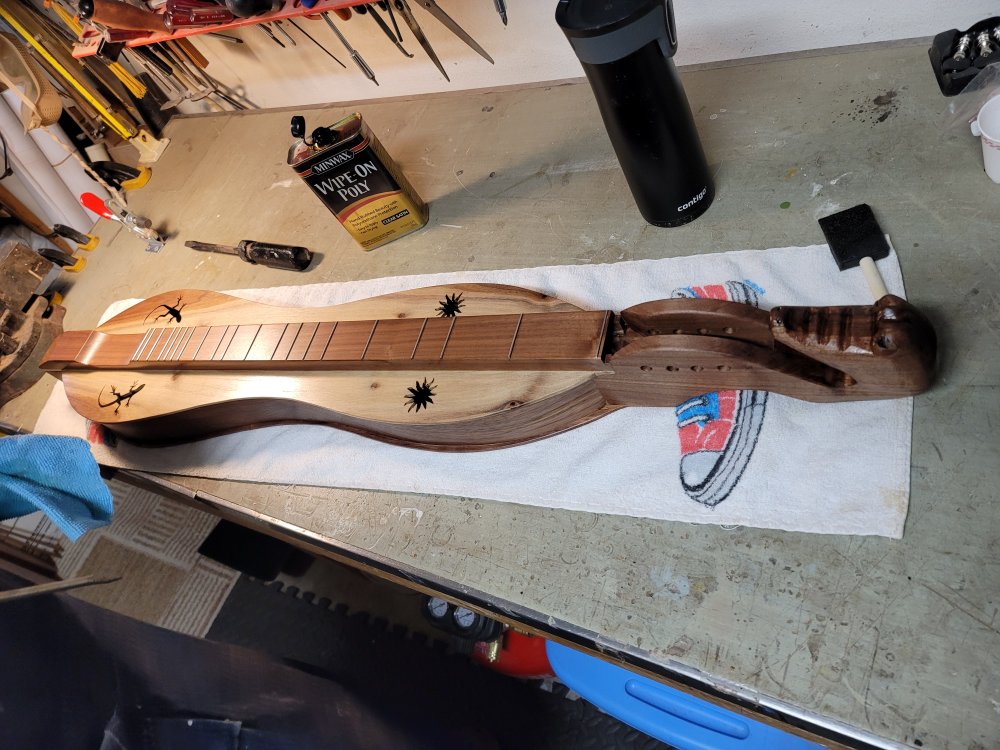
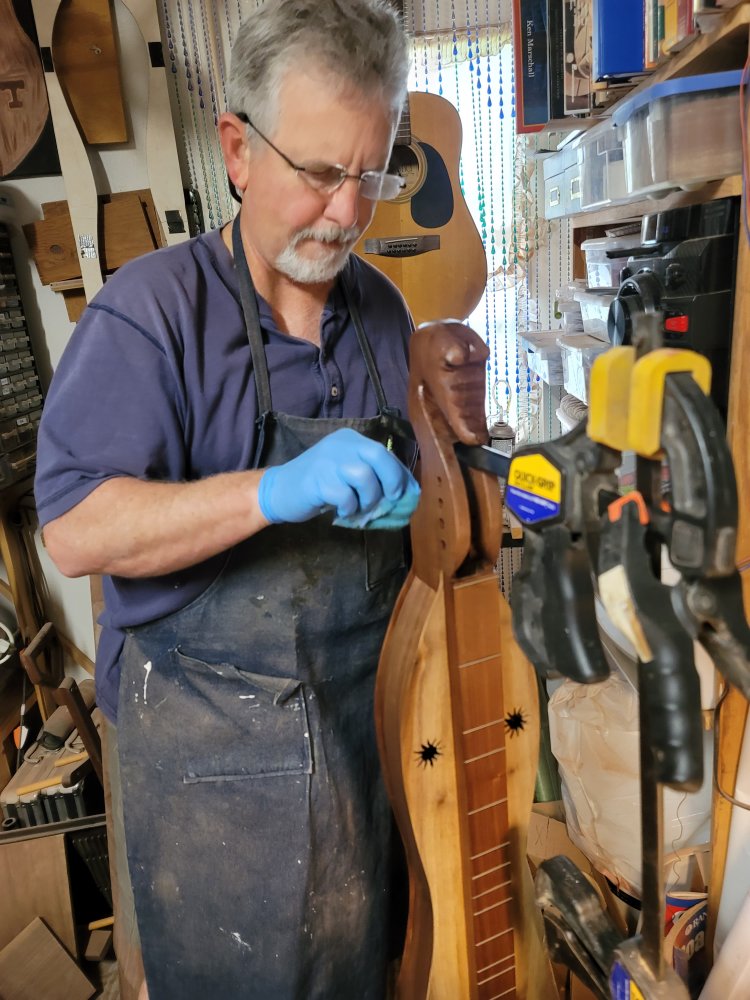
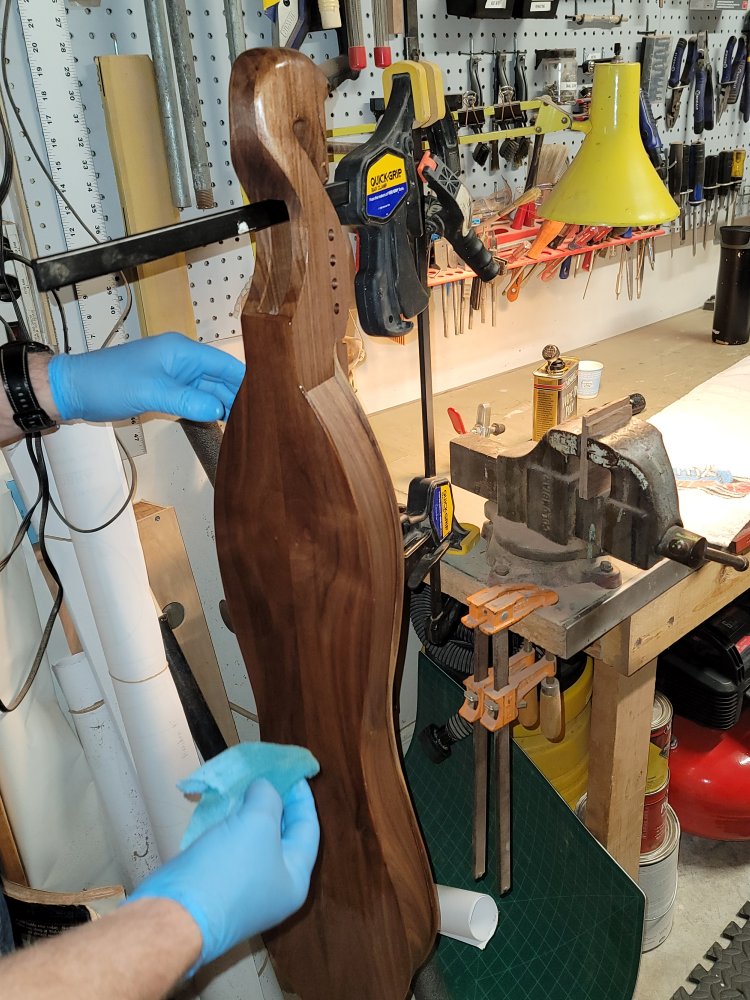
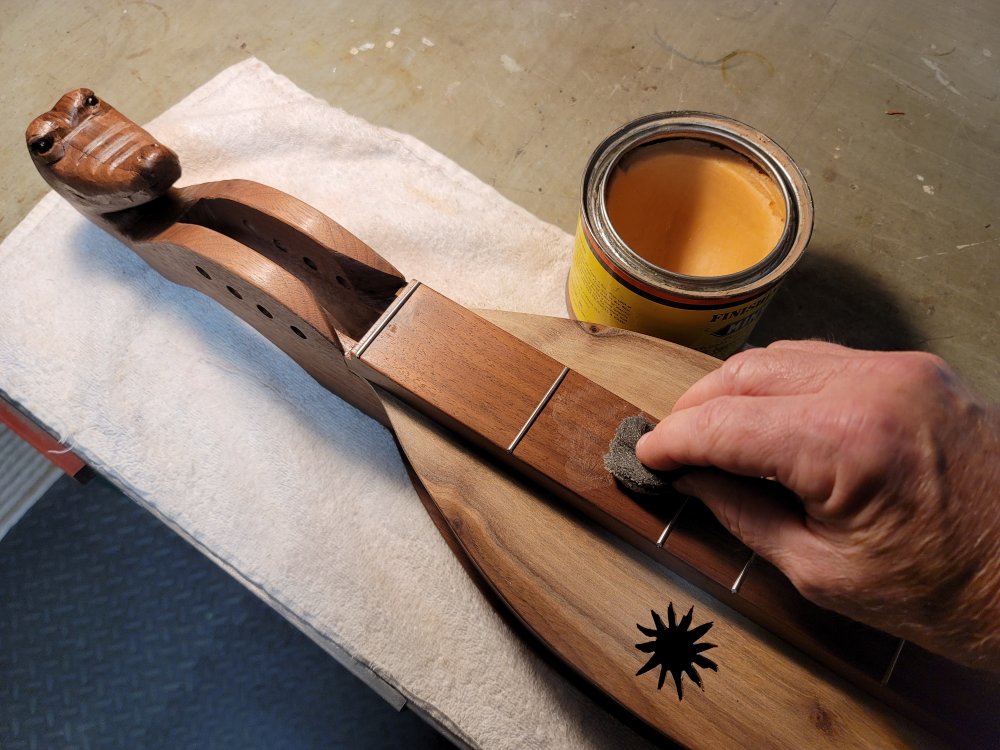
I love this part. The walnut is pretty enough in its raw form, but really pops when the finish is applied. I use Minwax satin finish hand-rubbed polyurethane for all my instruments. This time, I deviated from this by using a foam brush to do the gator head because of all the convolutions in its shape. I give the dulcimer 2 coats of the polyurethane, wiping it down lightly with 0000 steel wool between coats.
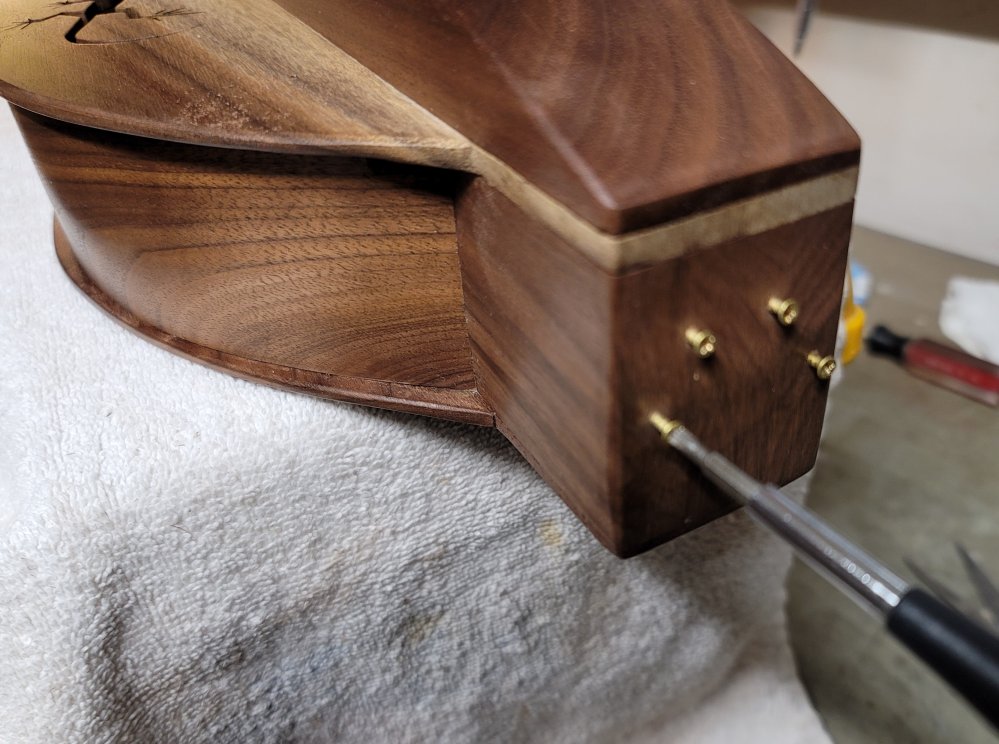
After the second coat has dried thoroughly, I gave the dulcimer a coating of paste wax, applied lightly with 0000 steel wool and wiped off to a smooth and slick finish. I then installed the tiny screws that serve as end pins for the strings.
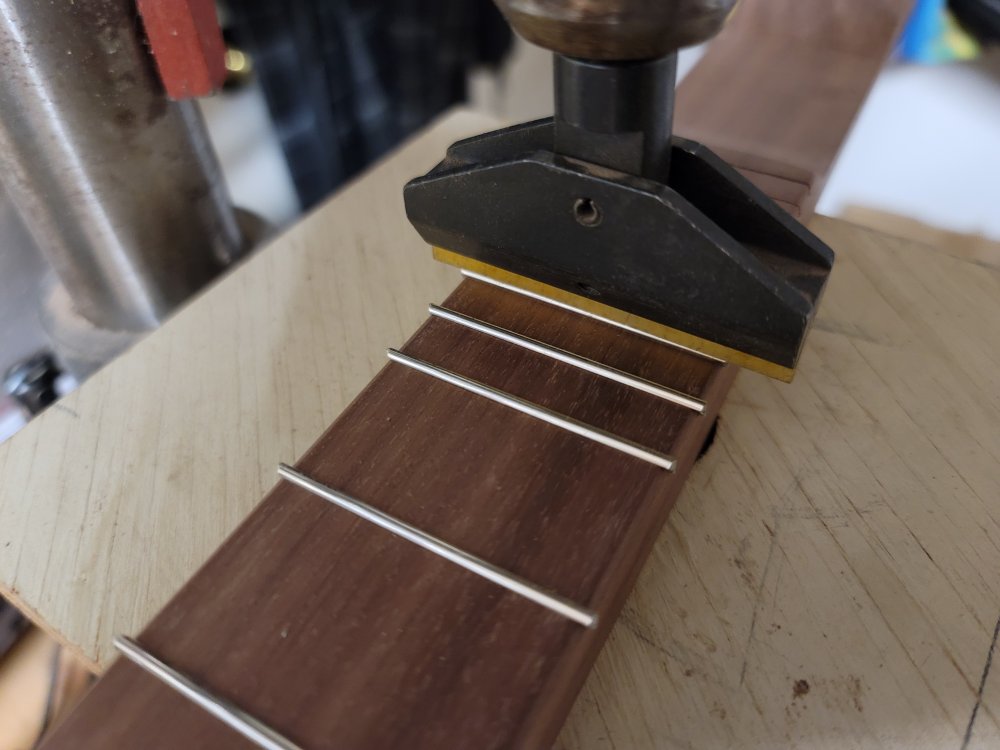
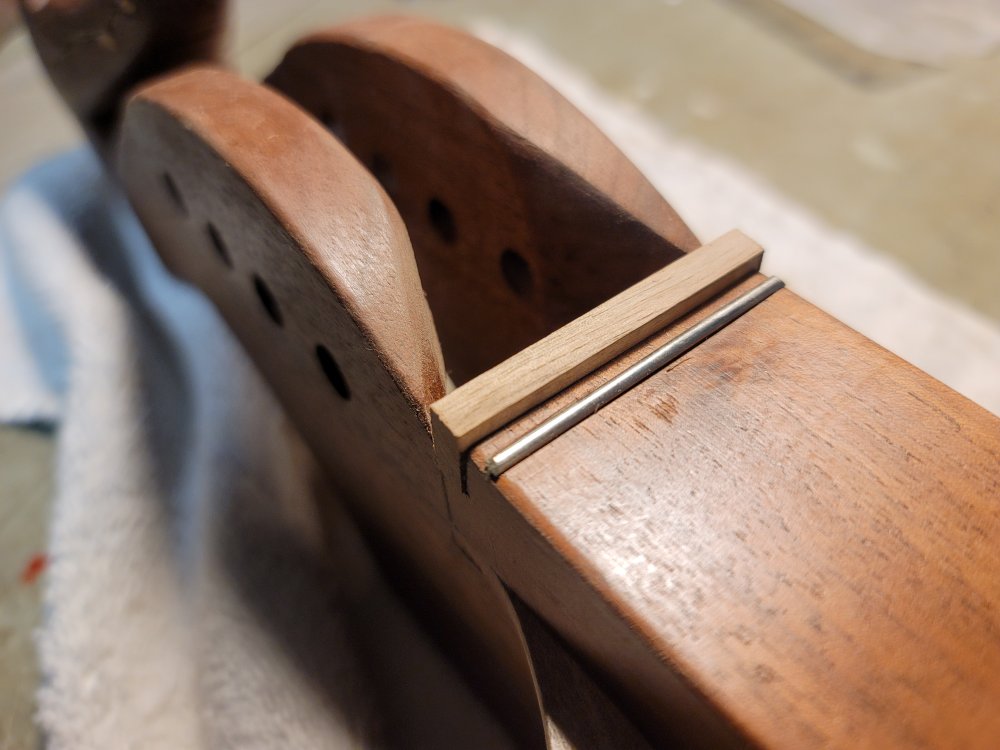
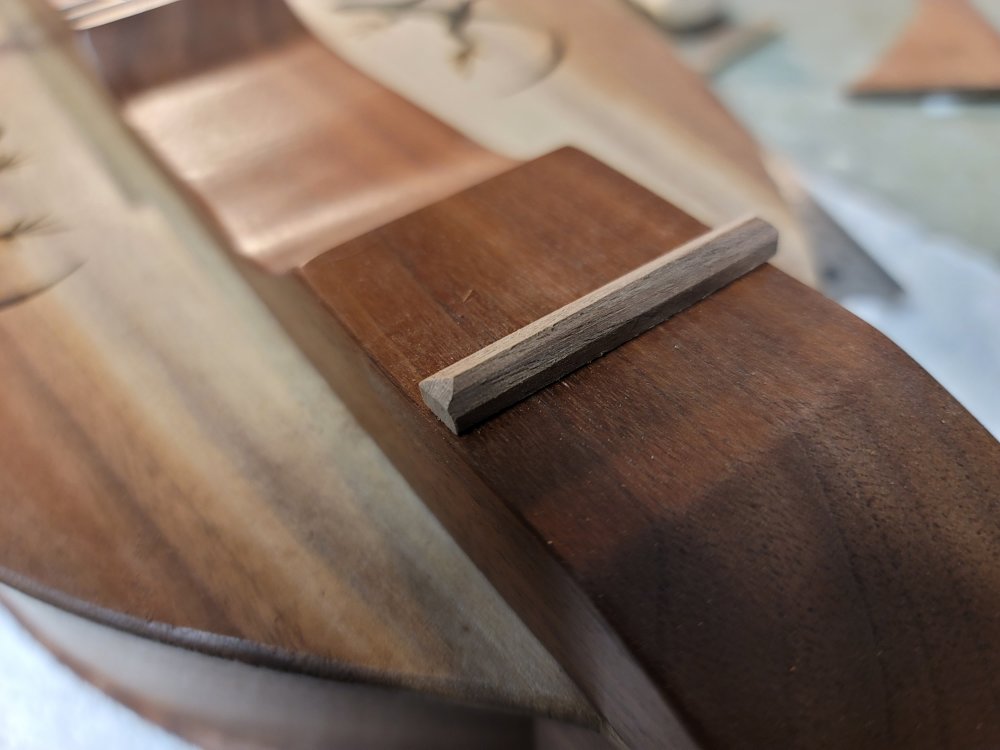
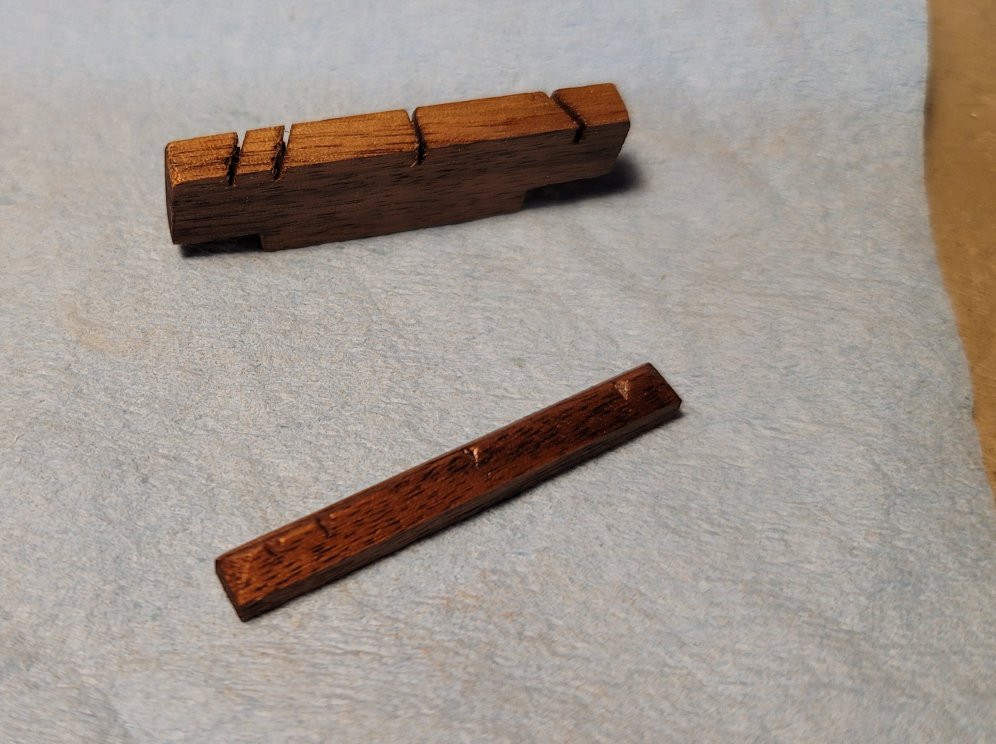
For the past several years, I have been using a “Zero” fret as the nut, basing the scale length measurements of the frets from that point. What I needed was a string guide to hold the strings in place and point them to the correct tuning peg. On the other end, of course, is the bridge. My preference has always been a “floating” bridge which is held in place by the tightened strings. Mathematically, a 28″ scale length does not measure exactly 28″ from the nut to the bridge. For perfect placement, the bridge will be just a little past the 28″ mark. You know it’s in the right place when your tuner shows exact notes (exact pitches) as you move up the fretboard. I feel that the ability to adjust for this is important — hence, the floating bridge.
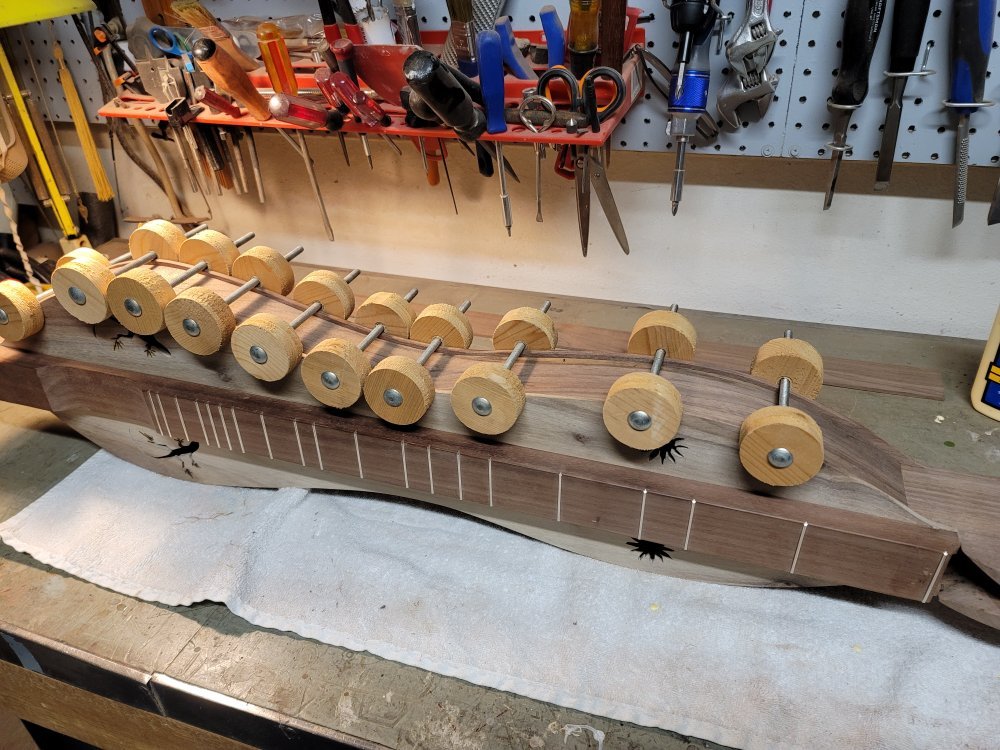
It was time to install the friction pegs which was quick and painless because I had prepped for them when I put together the peghead.
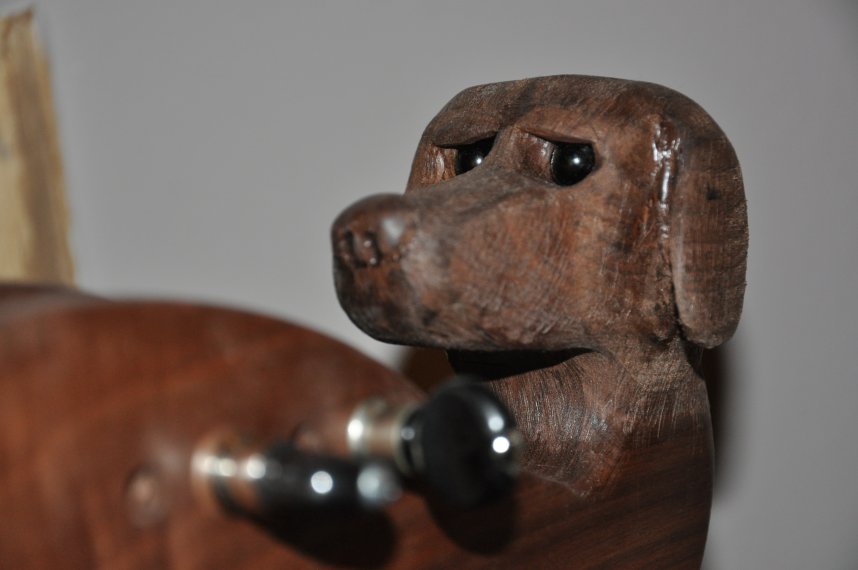
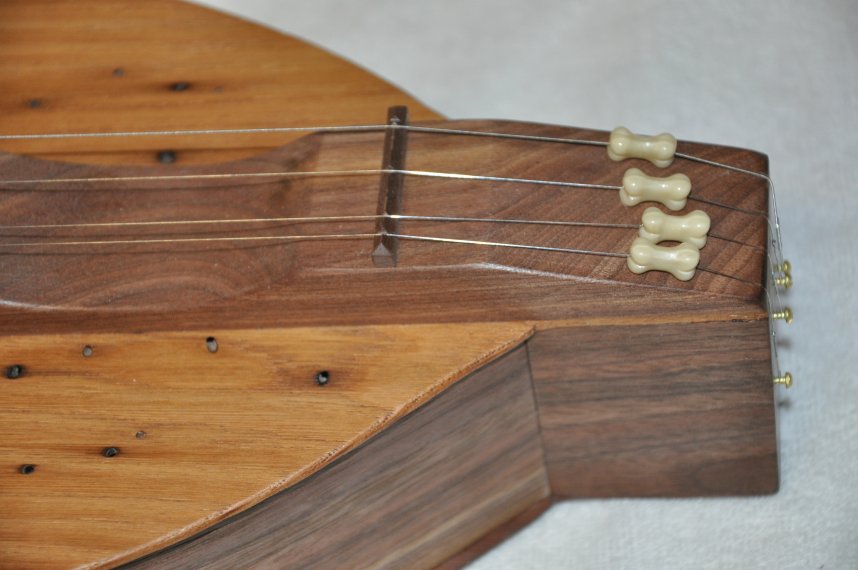
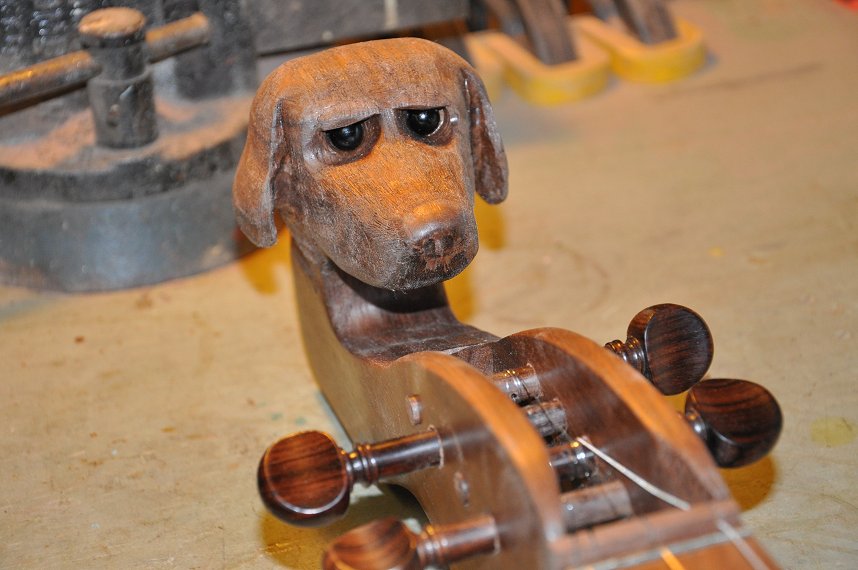
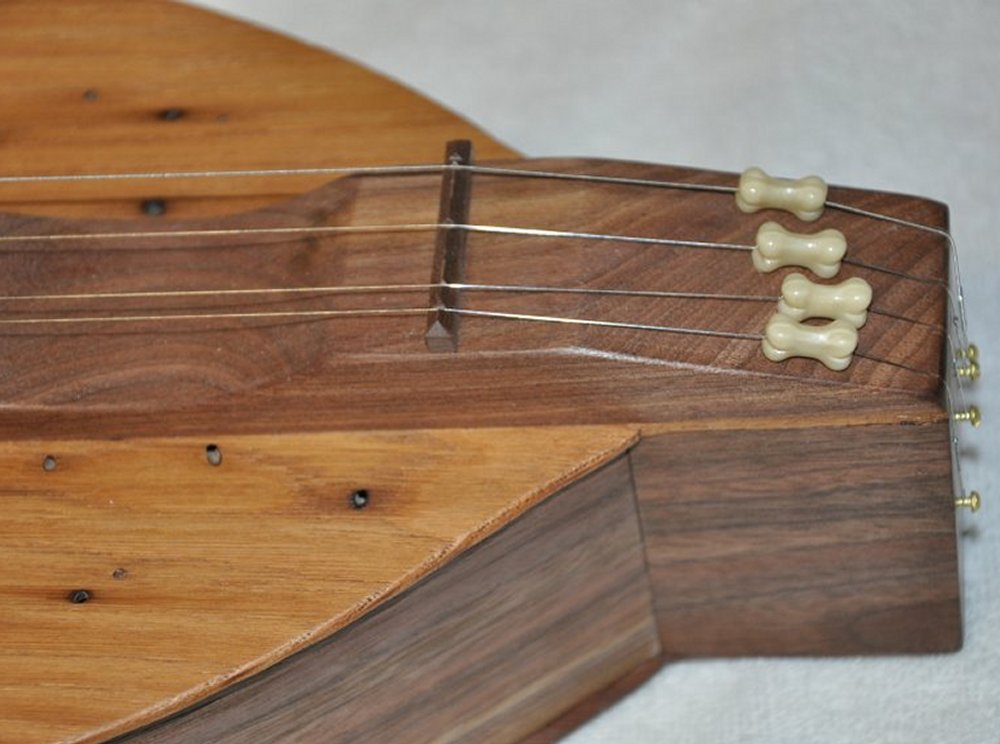
The fine tuners were next. The only other time I added fine tuners at the other end was for the Dog Head dulcimer I made for myself. For that one, I found plastic beads in the shape of dog bones. I have seen pictures of dulcimers that used plain beads and I knew that would work. My preference, however, was to have the fine tuners reflect the theme of the instrument, if at all possible. I hit on the idea of using actual alligator teeth to accomplish this. I purchased 15 teeth from a really funky website.

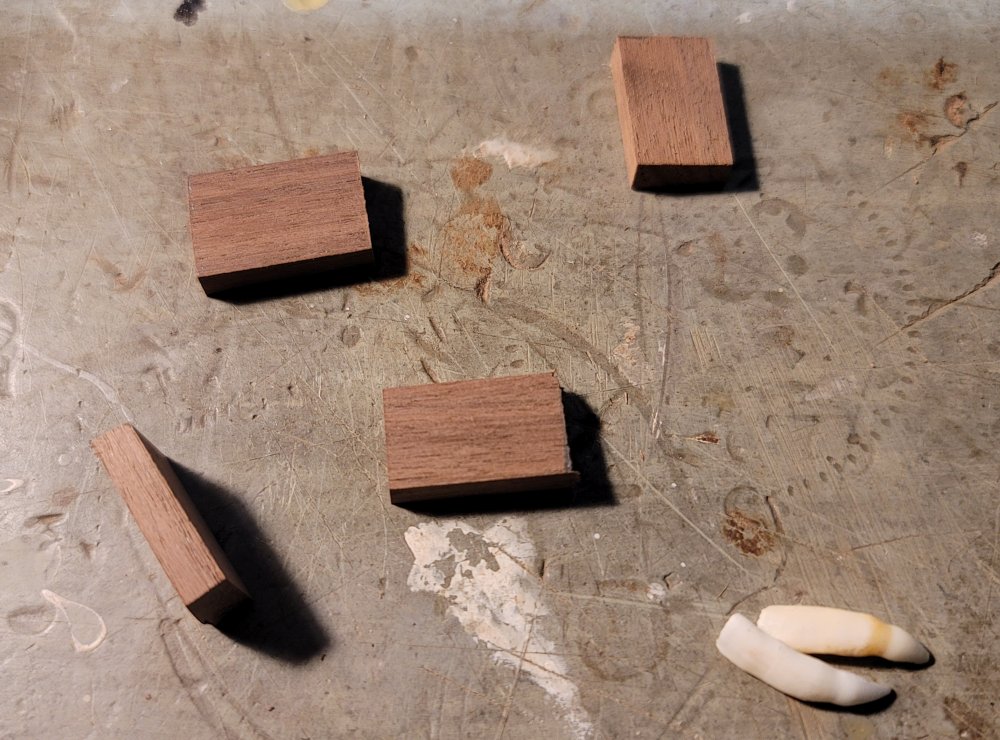
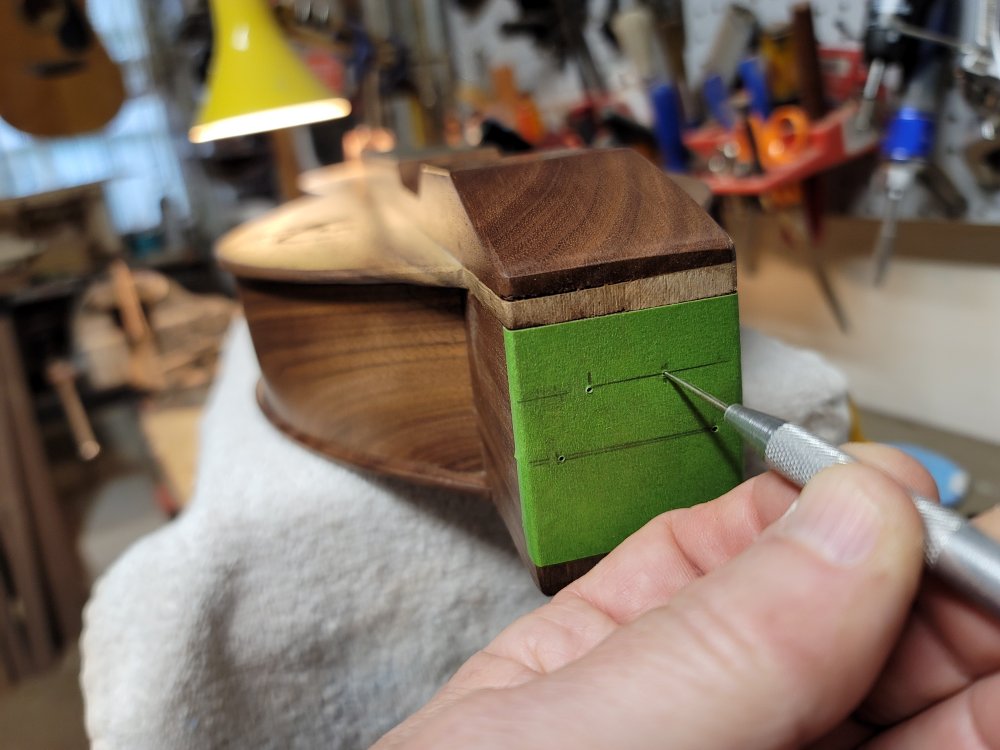
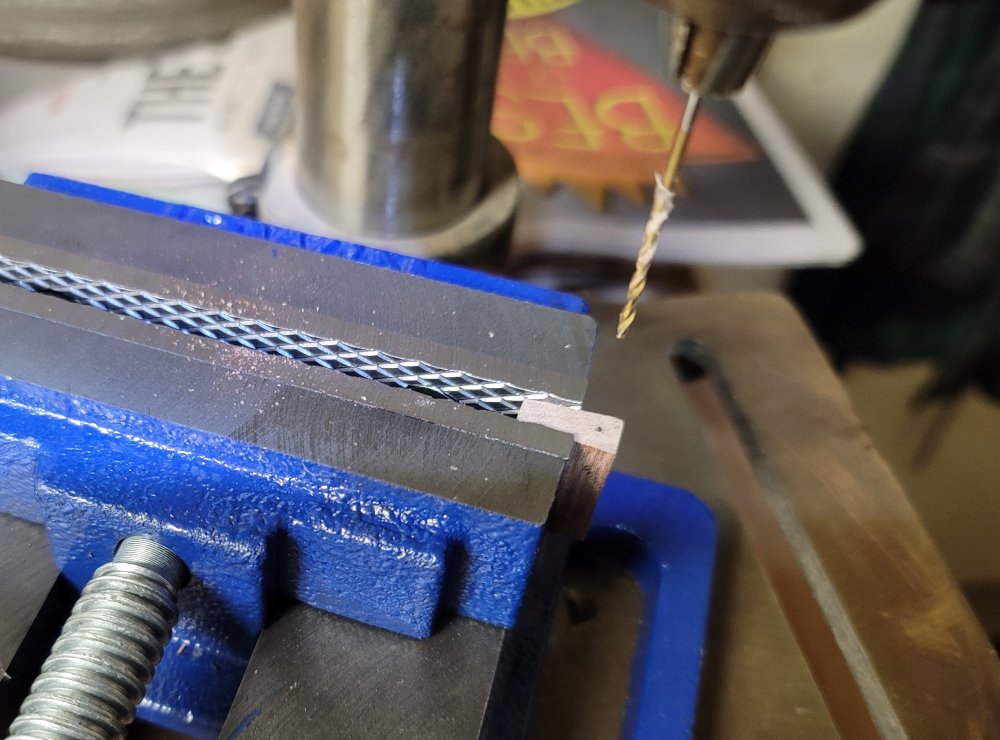
Unfortunately, there were several problems, even though the teeth were the perfect size. Two-thirds of each tooth was hollow and I felt that the tension of the string might break through. Also, there was a little curve to the teeth which made it difficult to work in a 1/16″ drill bit. Finally, when I tried to drill anyway, the teeth were way too hard to make a hole. Rather than try to track down a dentist for assistance, I decided to mount the teeth onto small blocks through which each string would pass.
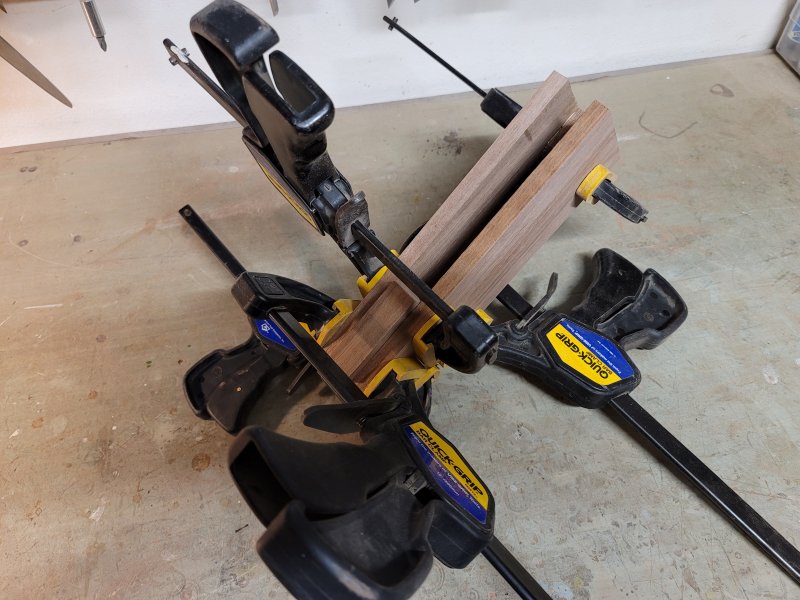
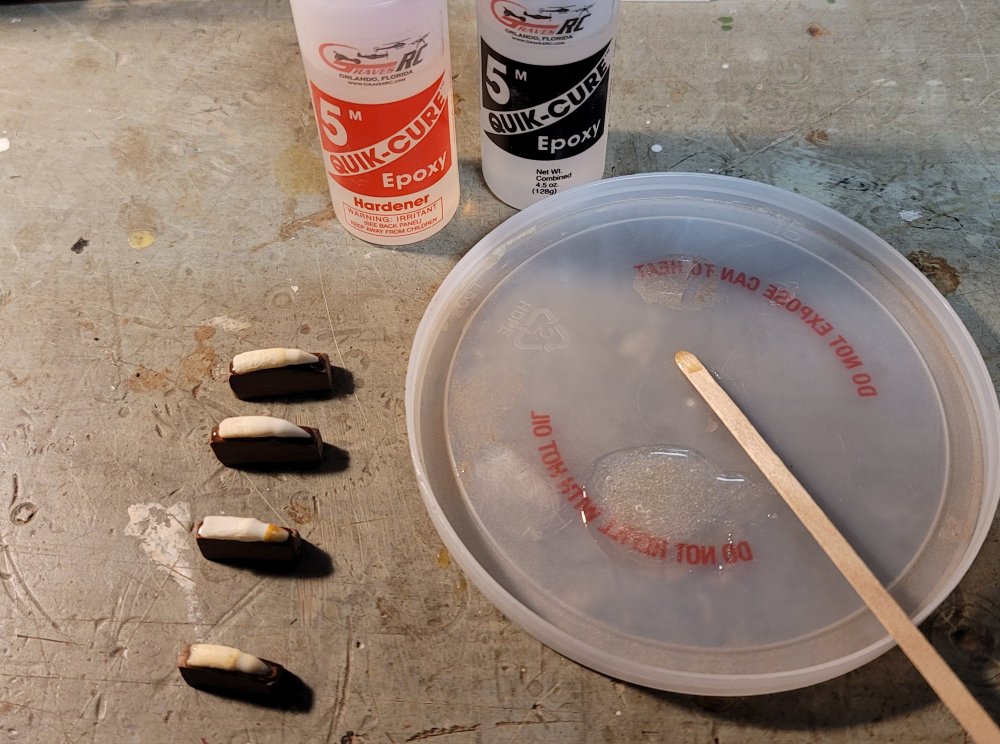
Since I really needed to drill a hole perfectly straight through each block, I purchased a drill press clamp that helped me hold it in place. I then meticulously shaped each block to fit the curve of each tooth and epoxied a tooth on each block, ensuring that the teeth did not extend over the edge of the blocks to bite the dulcimer player.
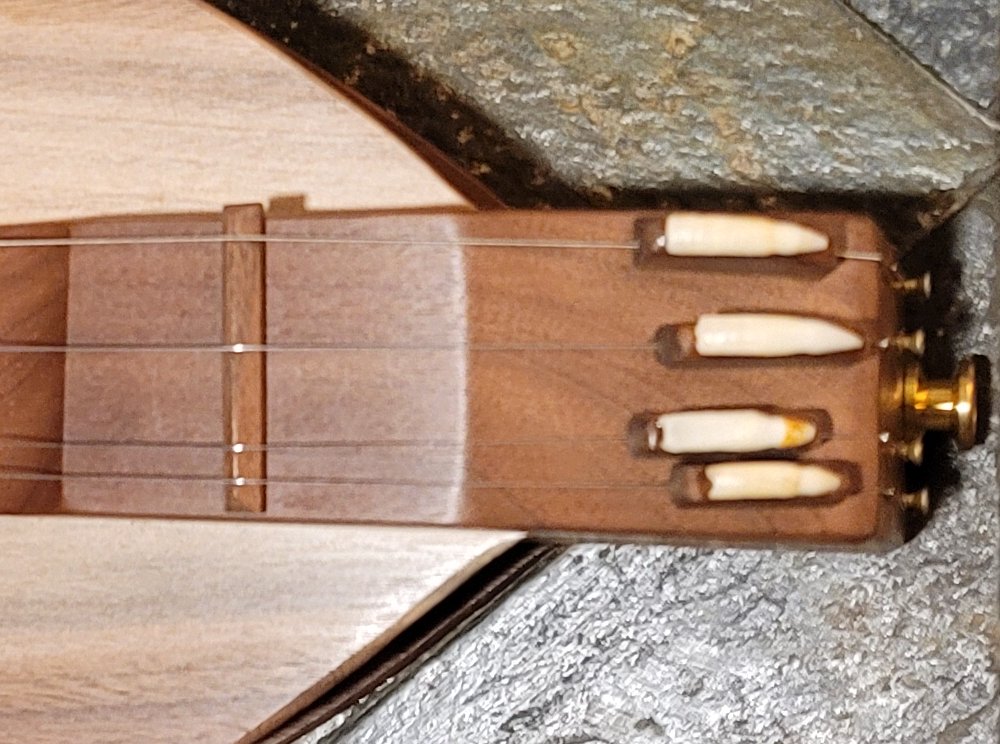
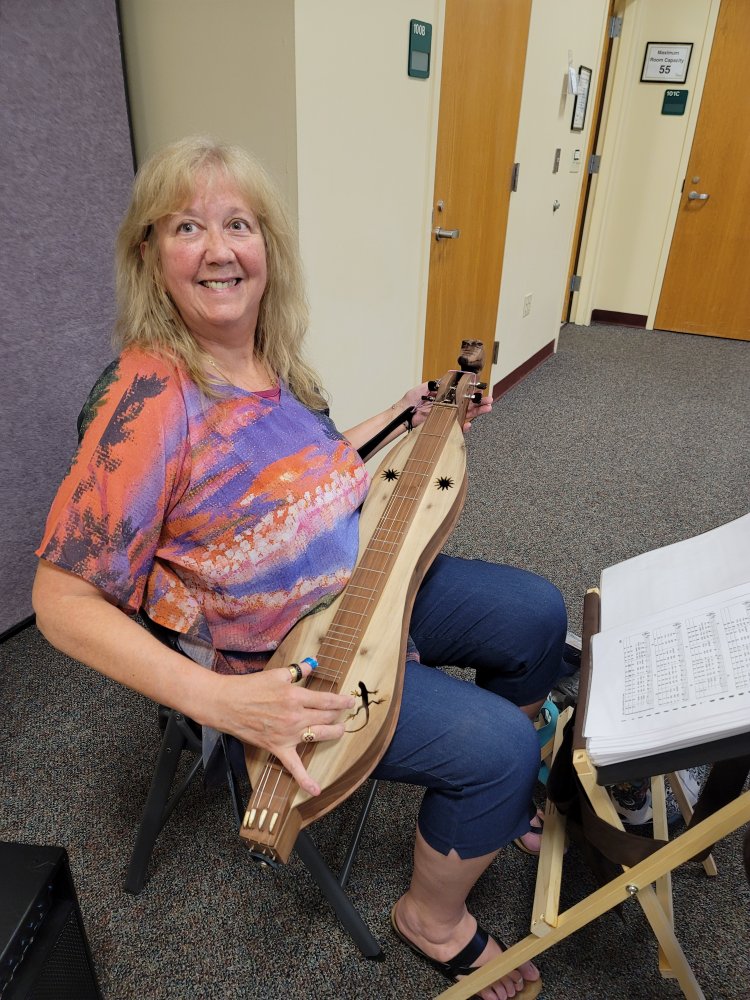
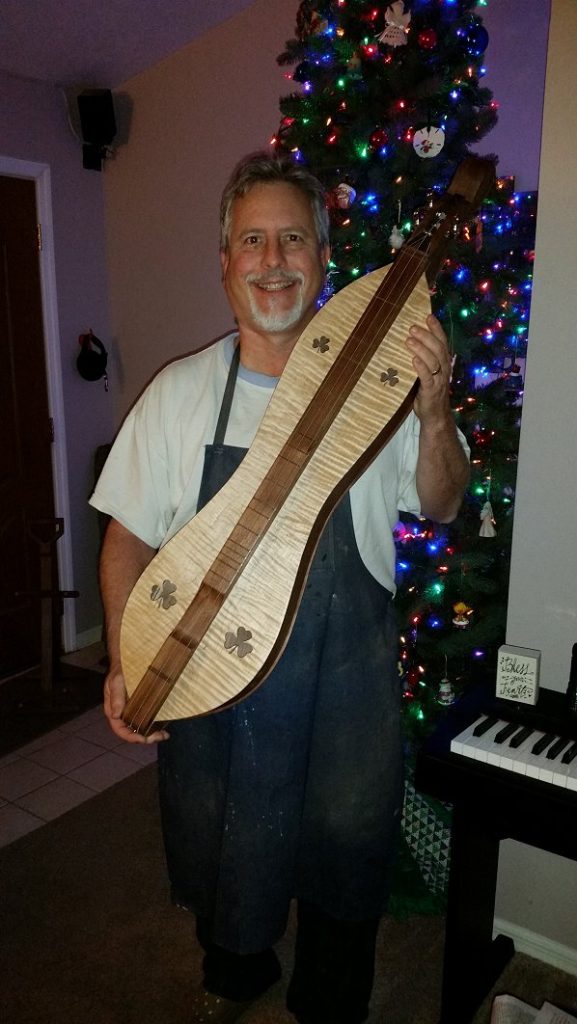
After adding strings, tuning, and setting up the instrument, Dulcimer #50 was finally complete!
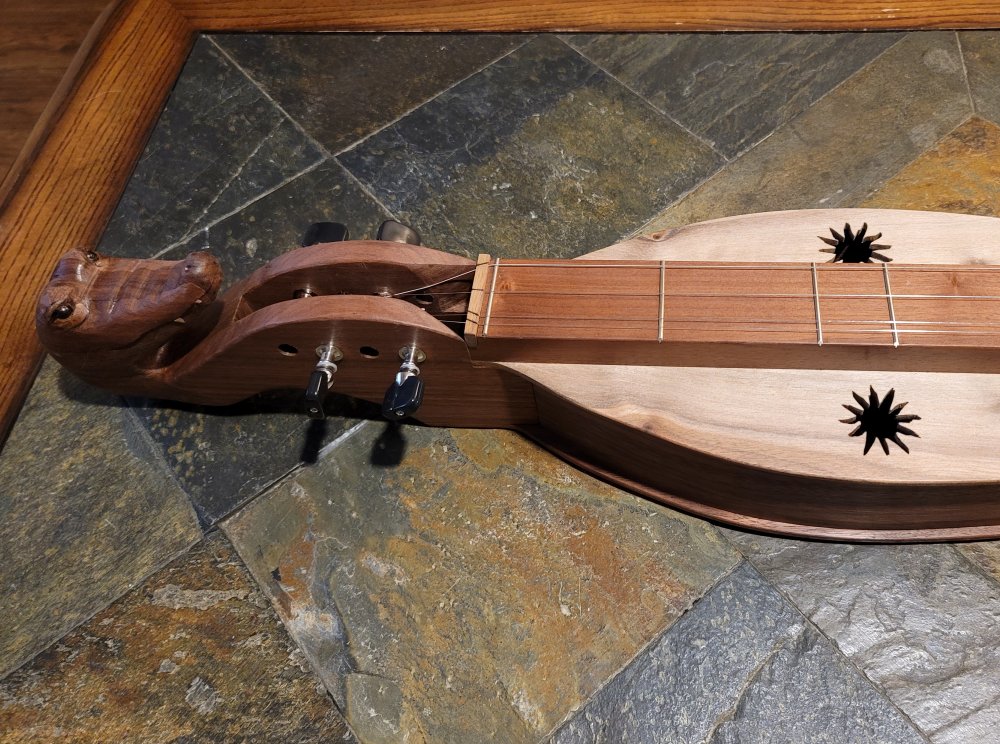
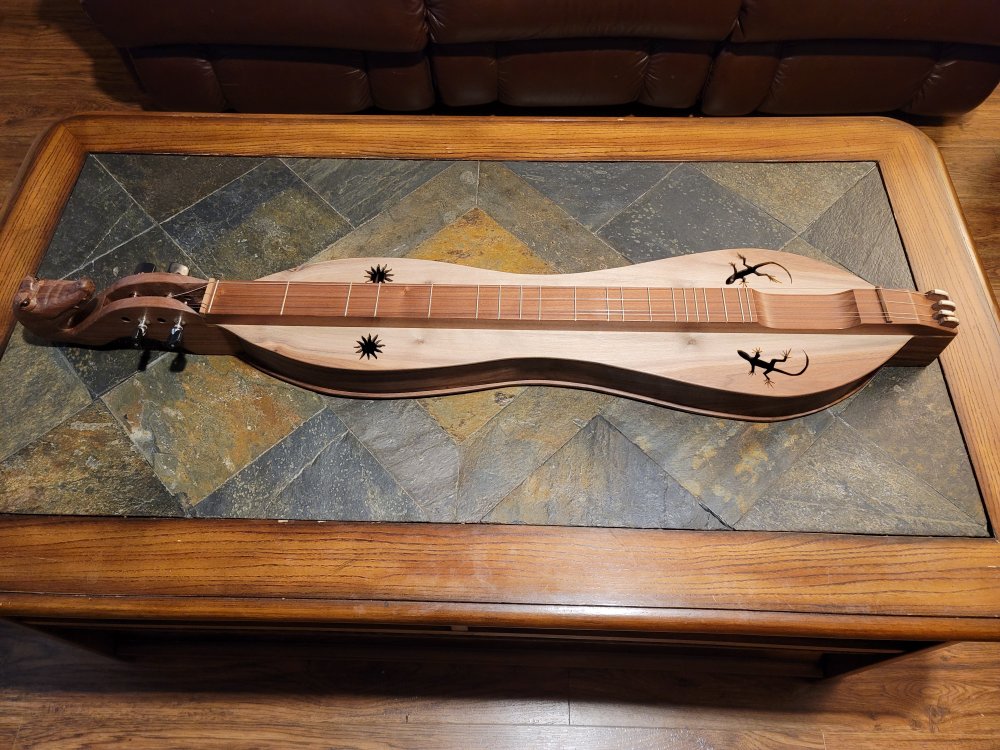
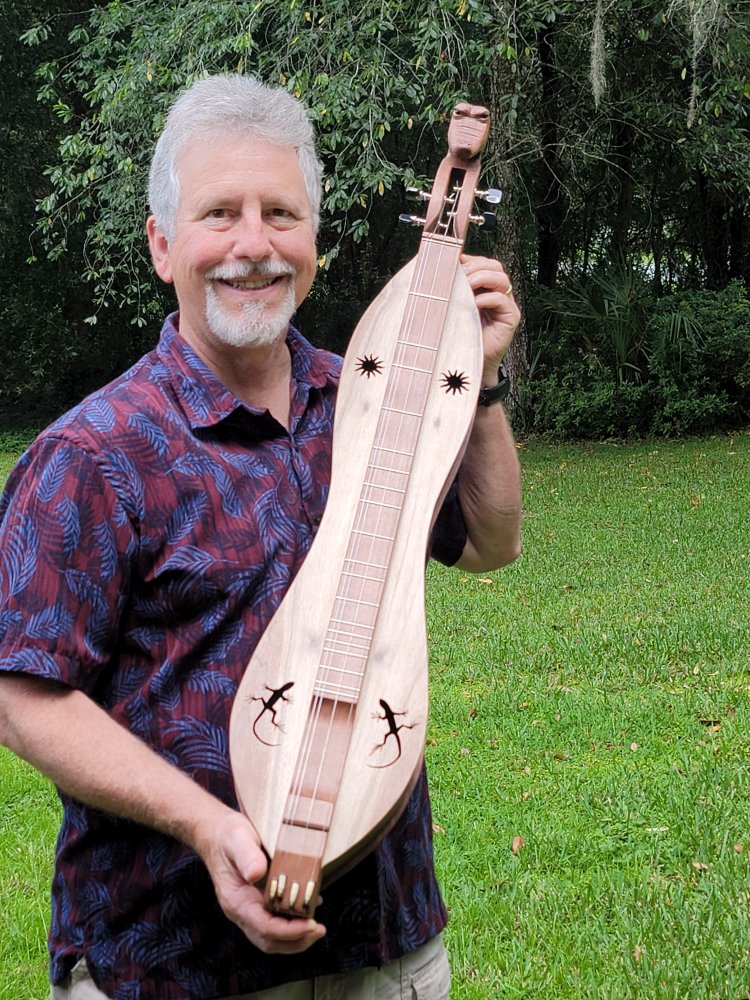
I am very pleased to present my 50th dulcimer, constructed 45 years since I built my first one — to Ms. Becky. Thank you for the opportunity to build this for you. Enjoy!